> ## Documentation Index
> Fetch the complete documentation index at: https://docs.zeotap.com/llms.txt
> Use this file to discover all available pages before exploring further.
# Create a HubSpot Source
**Note:**
Refer to [HubSpot source](/articles/integrate-customer/hubspot-source) to know about this source.
## Prerequisites
Ensure that you take care of the following prerequisites before creating a HubSpot source:
* **HubSpot Account**– Ensure that you have an active account on HubSpot. For more information about how to create a HubSport account, refer [here](https://knowledge.hubspot.com/get-started/set-up-your-account).
* **Bearer Token (Access Token)** – A bearer token in HubSpot is a unique string of characters that authenticates a user or application to access a resource. It grants limited access to a user or application for a specific period, allowing them to perform actions on behalf of the user who generated the token.
**Steps to Obtain the Bearer Token**
In your HubSpot account, click the **settings icon** in the main navigation bar.
In the left sidebar menu, navigate to **Integrations > Private Apps**.
Click **Create private app**.
On the **Basic Info** tab, configure your app details:
* Enter your app's **name**.
* Hover over the placeholder logo, then click the **upload icon** to upload a square image to serve as the app logo.
* Enter a **description** for your app.
 In the **Scopes** tab, at the top of the page, click + **Add new scope** and add the following scopes:
**Contacts**
* crm.objects.contacts.read
* crm.objects.contacts.write
**Companies**
* crm.objects.companies.read
* crm.objects.companies.write
Click **Update** after adding the required scopes.
In the top-right corner, click **Create app > Continue Creating**.
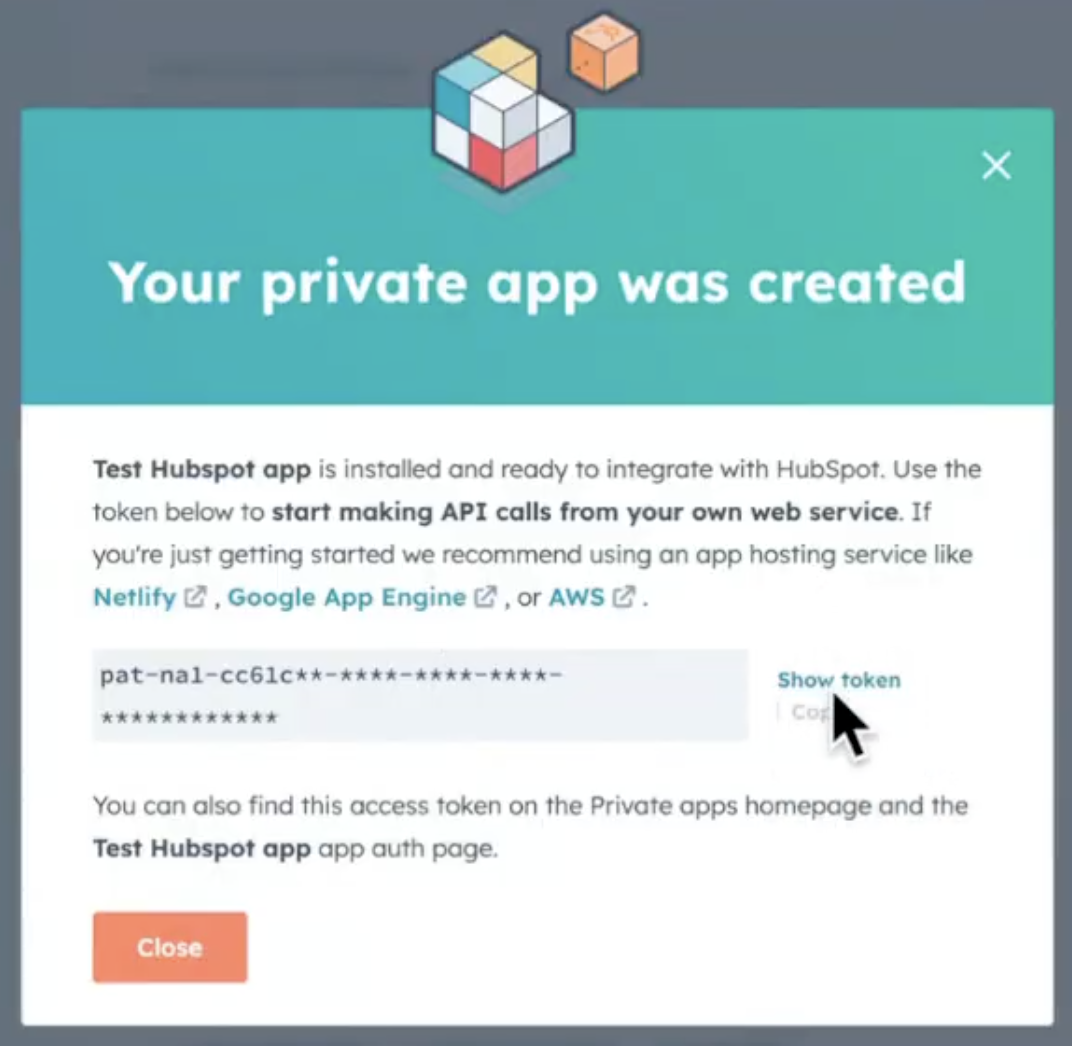
In the new window, click **Show Token** to view and copy the Bearer Token.
In the **Scopes** tab, at the top of the page, click + **Add new scope** and add the following scopes:
**Contacts**
* crm.objects.contacts.read
* crm.objects.contacts.write
**Companies**
* crm.objects.companies.read
* crm.objects.companies.write
Click **Update** after adding the required scopes.
In the top-right corner, click **Create app > Continue Creating**.
In the new window, click **Show Token** to view and copy the Bearer Token.
 * **Sync Frequency**– The first data sync takes place once you create the source. However, the subsequent syncs take place based on the sync frequency that you select. Currently, we support the following sync frequencies:
* Daily
* Weekly
* Monthly
* Fetch Mode – Select either Full or Delta based on the requirement.
* **Full** – Retrieves the complete dataset during the initial fetch and transfers the entire dataset during each subsequent synchronisation, regardless of any changes made. This process ensures the full dataset is updated at each sync frequency.
* **Delta** – Receives all available data during the initial fetch and thereafter exclusively gathers incremental updates (deltas) as per the sync frequency configured.
* Note that we currently support only one user ID per source and one campaign per source.
## Create a HubSpot Source
Once you have all the necessary information mentioned above, perform the following steps to create a HubSpot source:
Navigate to the **Sources** application under **Integrate**, in the Zeotap CDP App.
Click **CREATE SOURCE**.
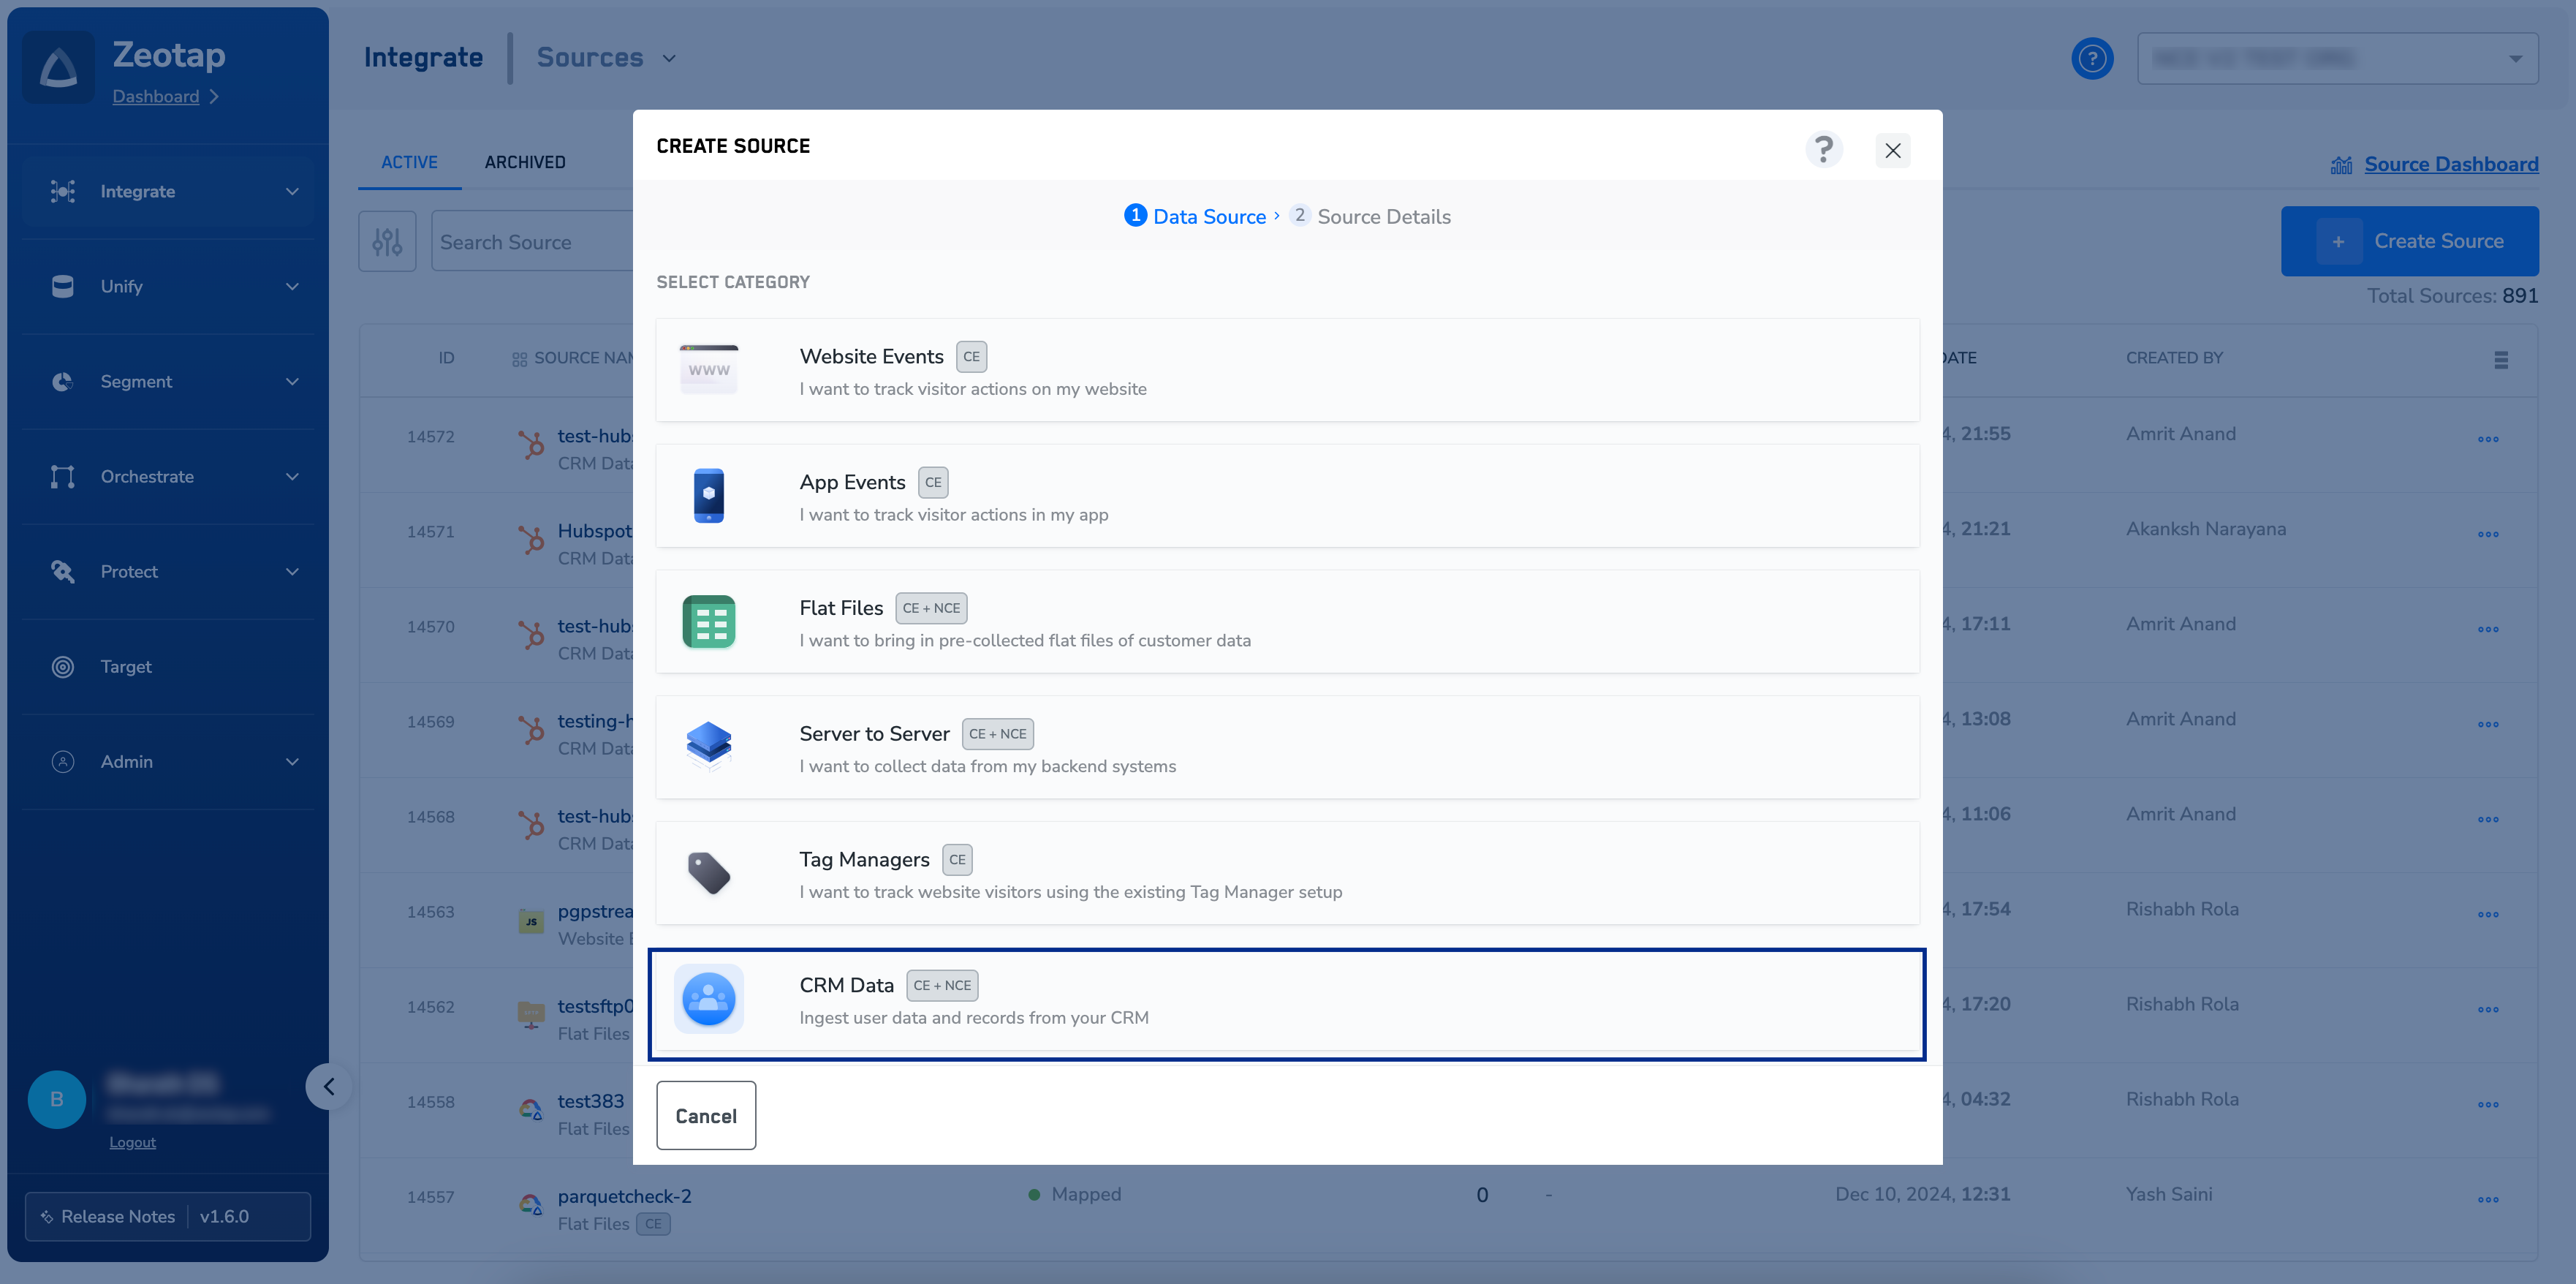
Choose **CRM Data** as the Category.
* **Sync Frequency**– The first data sync takes place once you create the source. However, the subsequent syncs take place based on the sync frequency that you select. Currently, we support the following sync frequencies:
* Daily
* Weekly
* Monthly
* Fetch Mode – Select either Full or Delta based on the requirement.
* **Full** – Retrieves the complete dataset during the initial fetch and transfers the entire dataset during each subsequent synchronisation, regardless of any changes made. This process ensures the full dataset is updated at each sync frequency.
* **Delta** – Receives all available data during the initial fetch and thereafter exclusively gathers incremental updates (deltas) as per the sync frequency configured.
* Note that we currently support only one user ID per source and one campaign per source.
## Create a HubSpot Source
Once you have all the necessary information mentioned above, perform the following steps to create a HubSpot source:
Navigate to the **Sources** application under **Integrate**, in the Zeotap CDP App.
Click **CREATE SOURCE**.
Choose **CRM Data** as the Category.
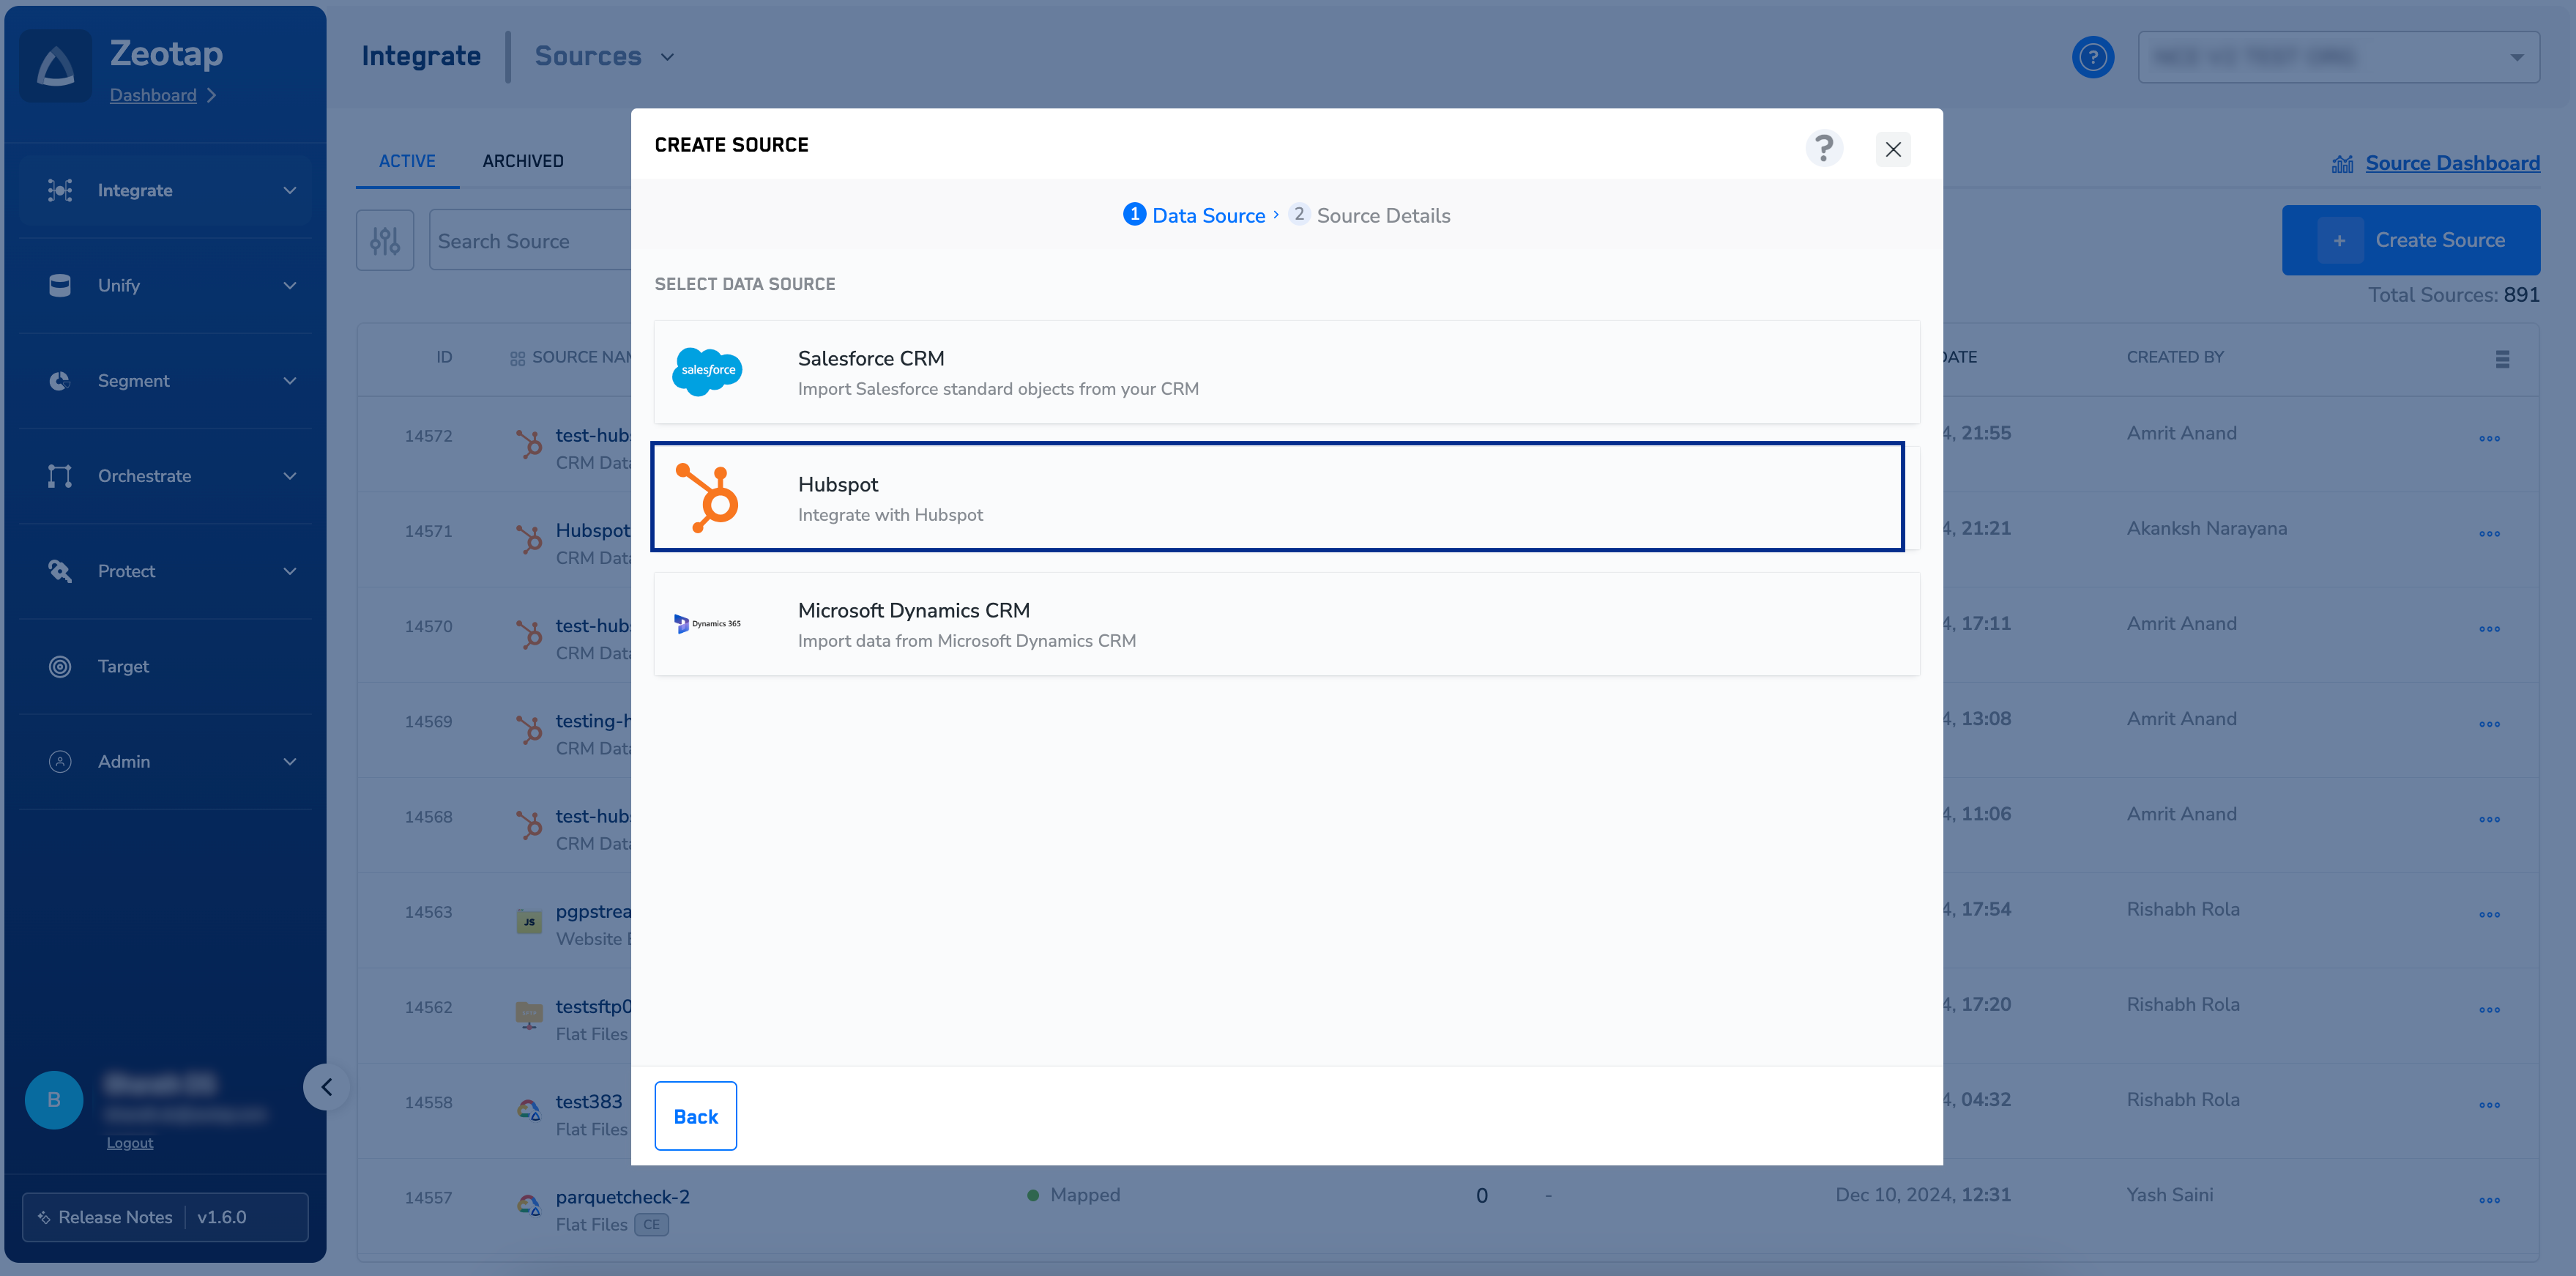
 Click **HubSpot** at the Data Source.
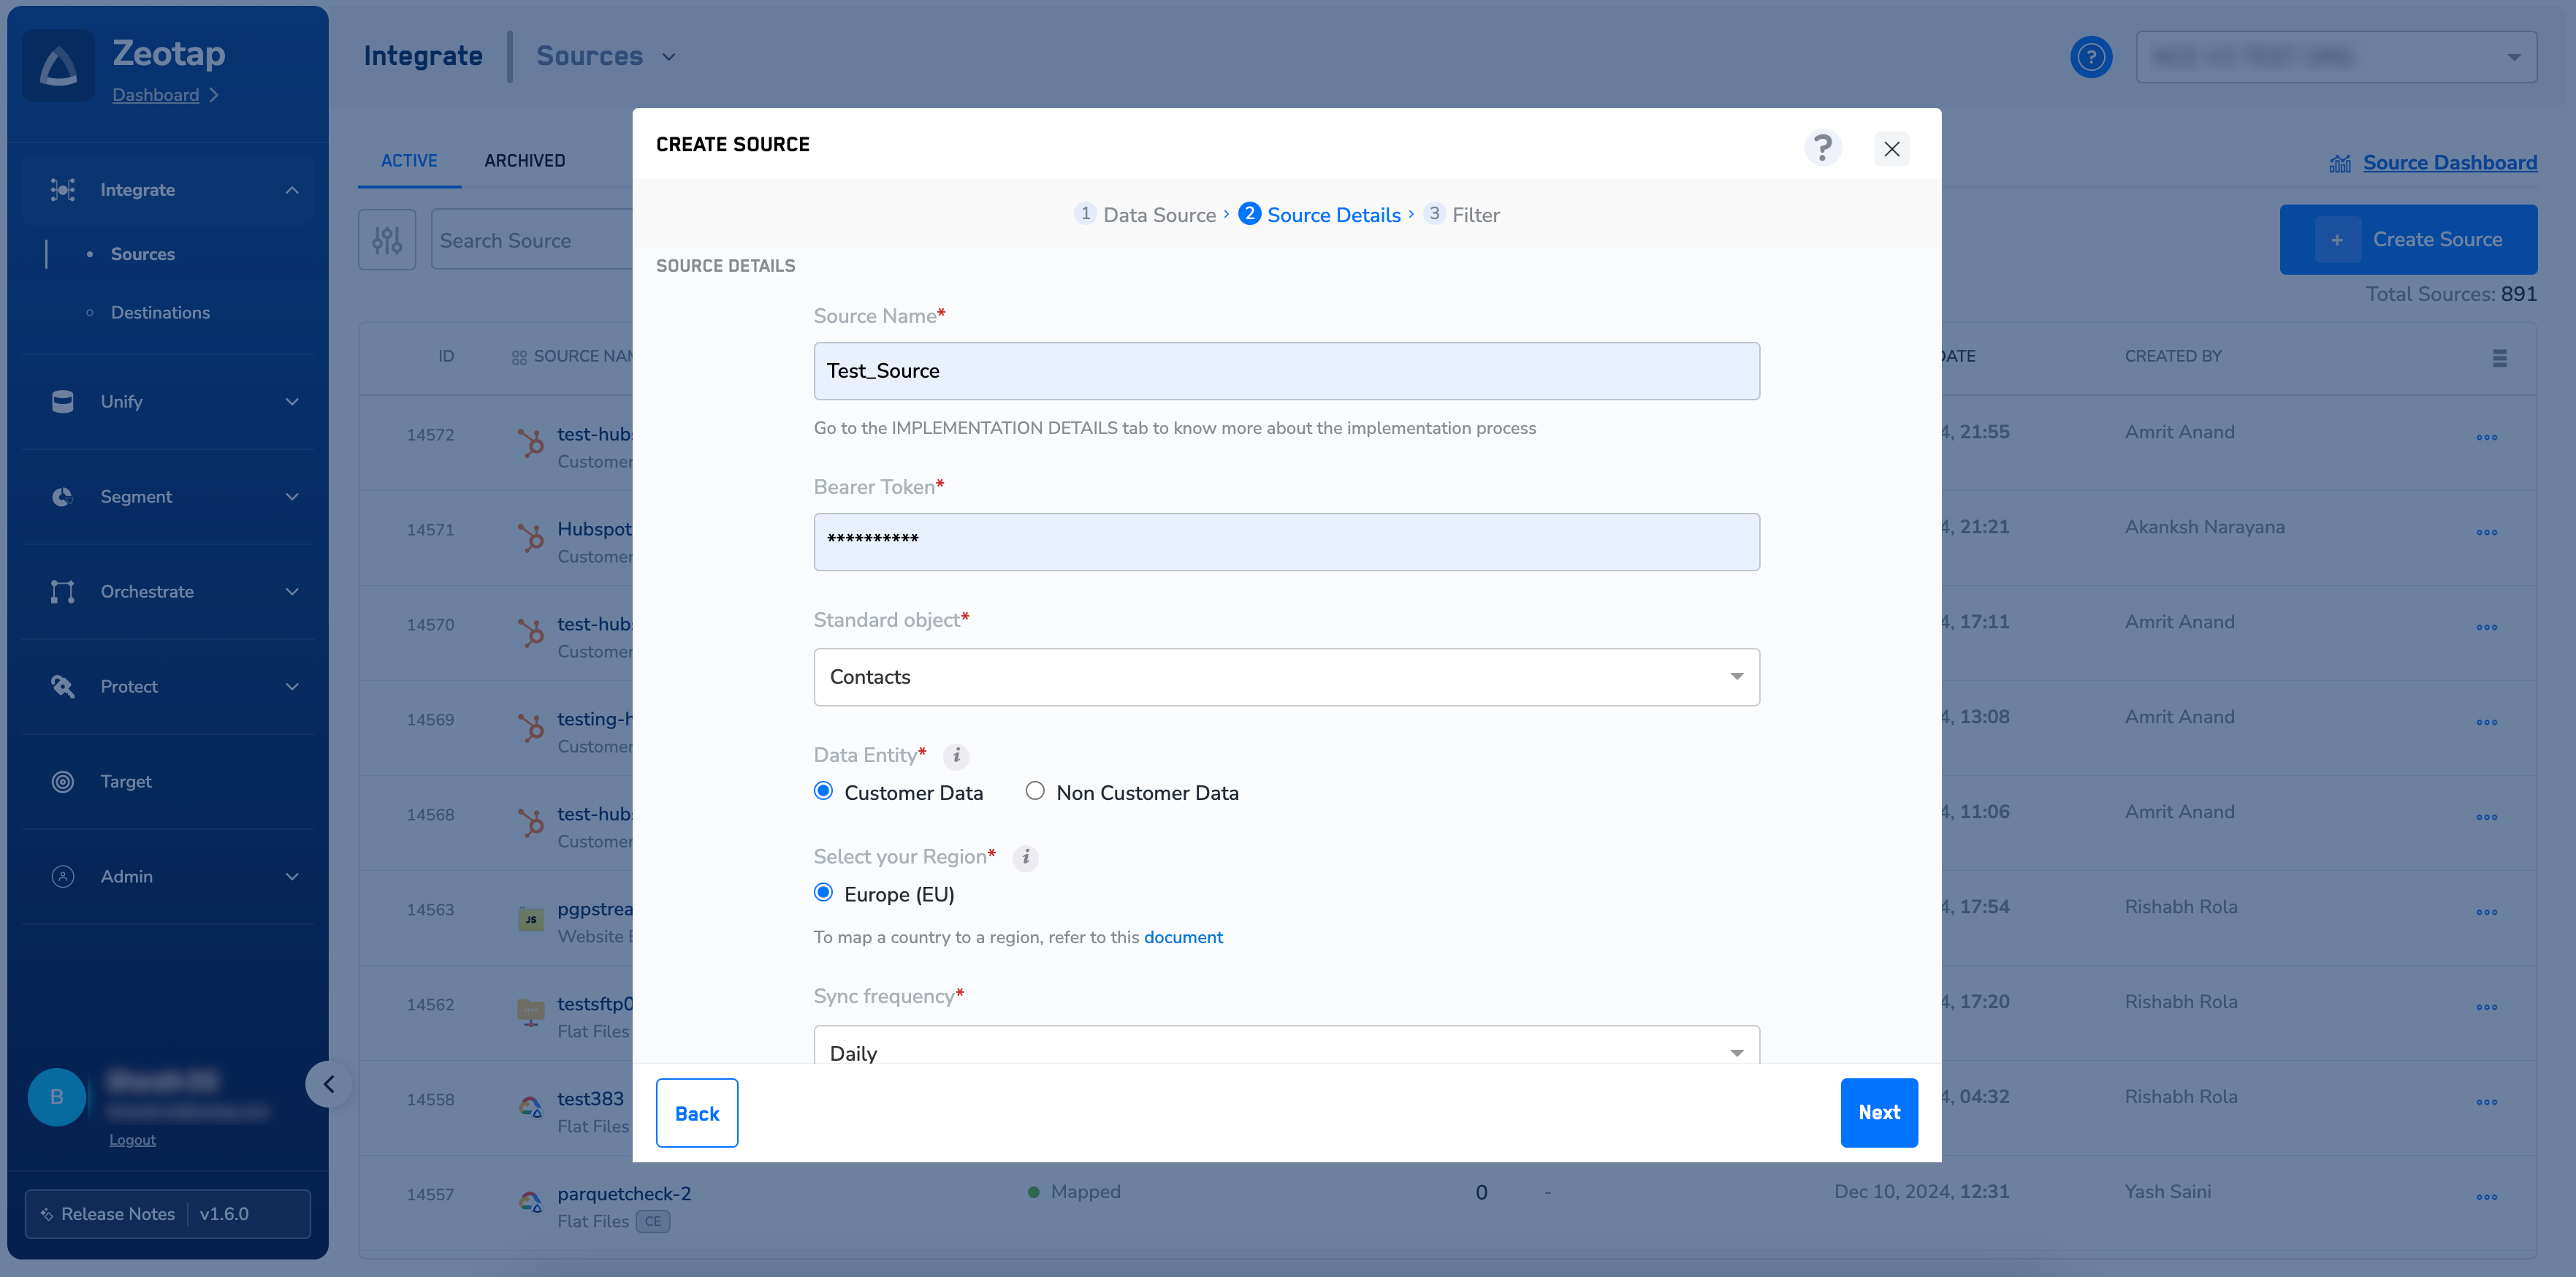
 Enter a short and descriptive name for the Source.
Enter the **Bearer Token**. For more information about how to obtain your Bearer Token in HubSpot, refer [here](https://developers.hubspot.com/docs/api/private-apps#make-api-calls-with-your-app-s-access-token).
Choose either **Contacts** or **Companies** as the **Standard Object.**
Under **Data Entity**, depending on the type of data that you want to ingest, choose either **Customer Data** or **Non Customer Data** and proceed with the source creation. To know more about Customer Data and Non Customer Data, refer [here](https://docs.zeotap.com/smart/project-unify/supported-data-entities).
Select the **Region** of upload and the **Sync Frequency.**
Under Fetch Mode, select either Full or Delta based on the requirement.
a. Full – Receives all available data during the initial fetch and thereafter consistently fetches data as per the sync frequency configured.
b. Delta – Receives all available data during the initial fetch and thereafter exclusively gathers incremental updates (deltas) as per the sync frequency configured.
Click **Next** to proceed to fields selection.
Enter a short and descriptive name for the Source.
Enter the **Bearer Token**. For more information about how to obtain your Bearer Token in HubSpot, refer [here](https://developers.hubspot.com/docs/api/private-apps#make-api-calls-with-your-app-s-access-token).
Choose either **Contacts** or **Companies** as the **Standard Object.**
Under **Data Entity**, depending on the type of data that you want to ingest, choose either **Customer Data** or **Non Customer Data** and proceed with the source creation. To know more about Customer Data and Non Customer Data, refer [here](https://docs.zeotap.com/smart/project-unify/supported-data-entities).
Select the **Region** of upload and the **Sync Frequency.**
Under Fetch Mode, select either Full or Delta based on the requirement.
a. Full – Receives all available data during the initial fetch and thereafter consistently fetches data as per the sync frequency configured.
b. Delta – Receives all available data during the initial fetch and thereafter exclusively gathers incremental updates (deltas) as per the sync frequency configured.
Click **Next** to proceed to fields selection.
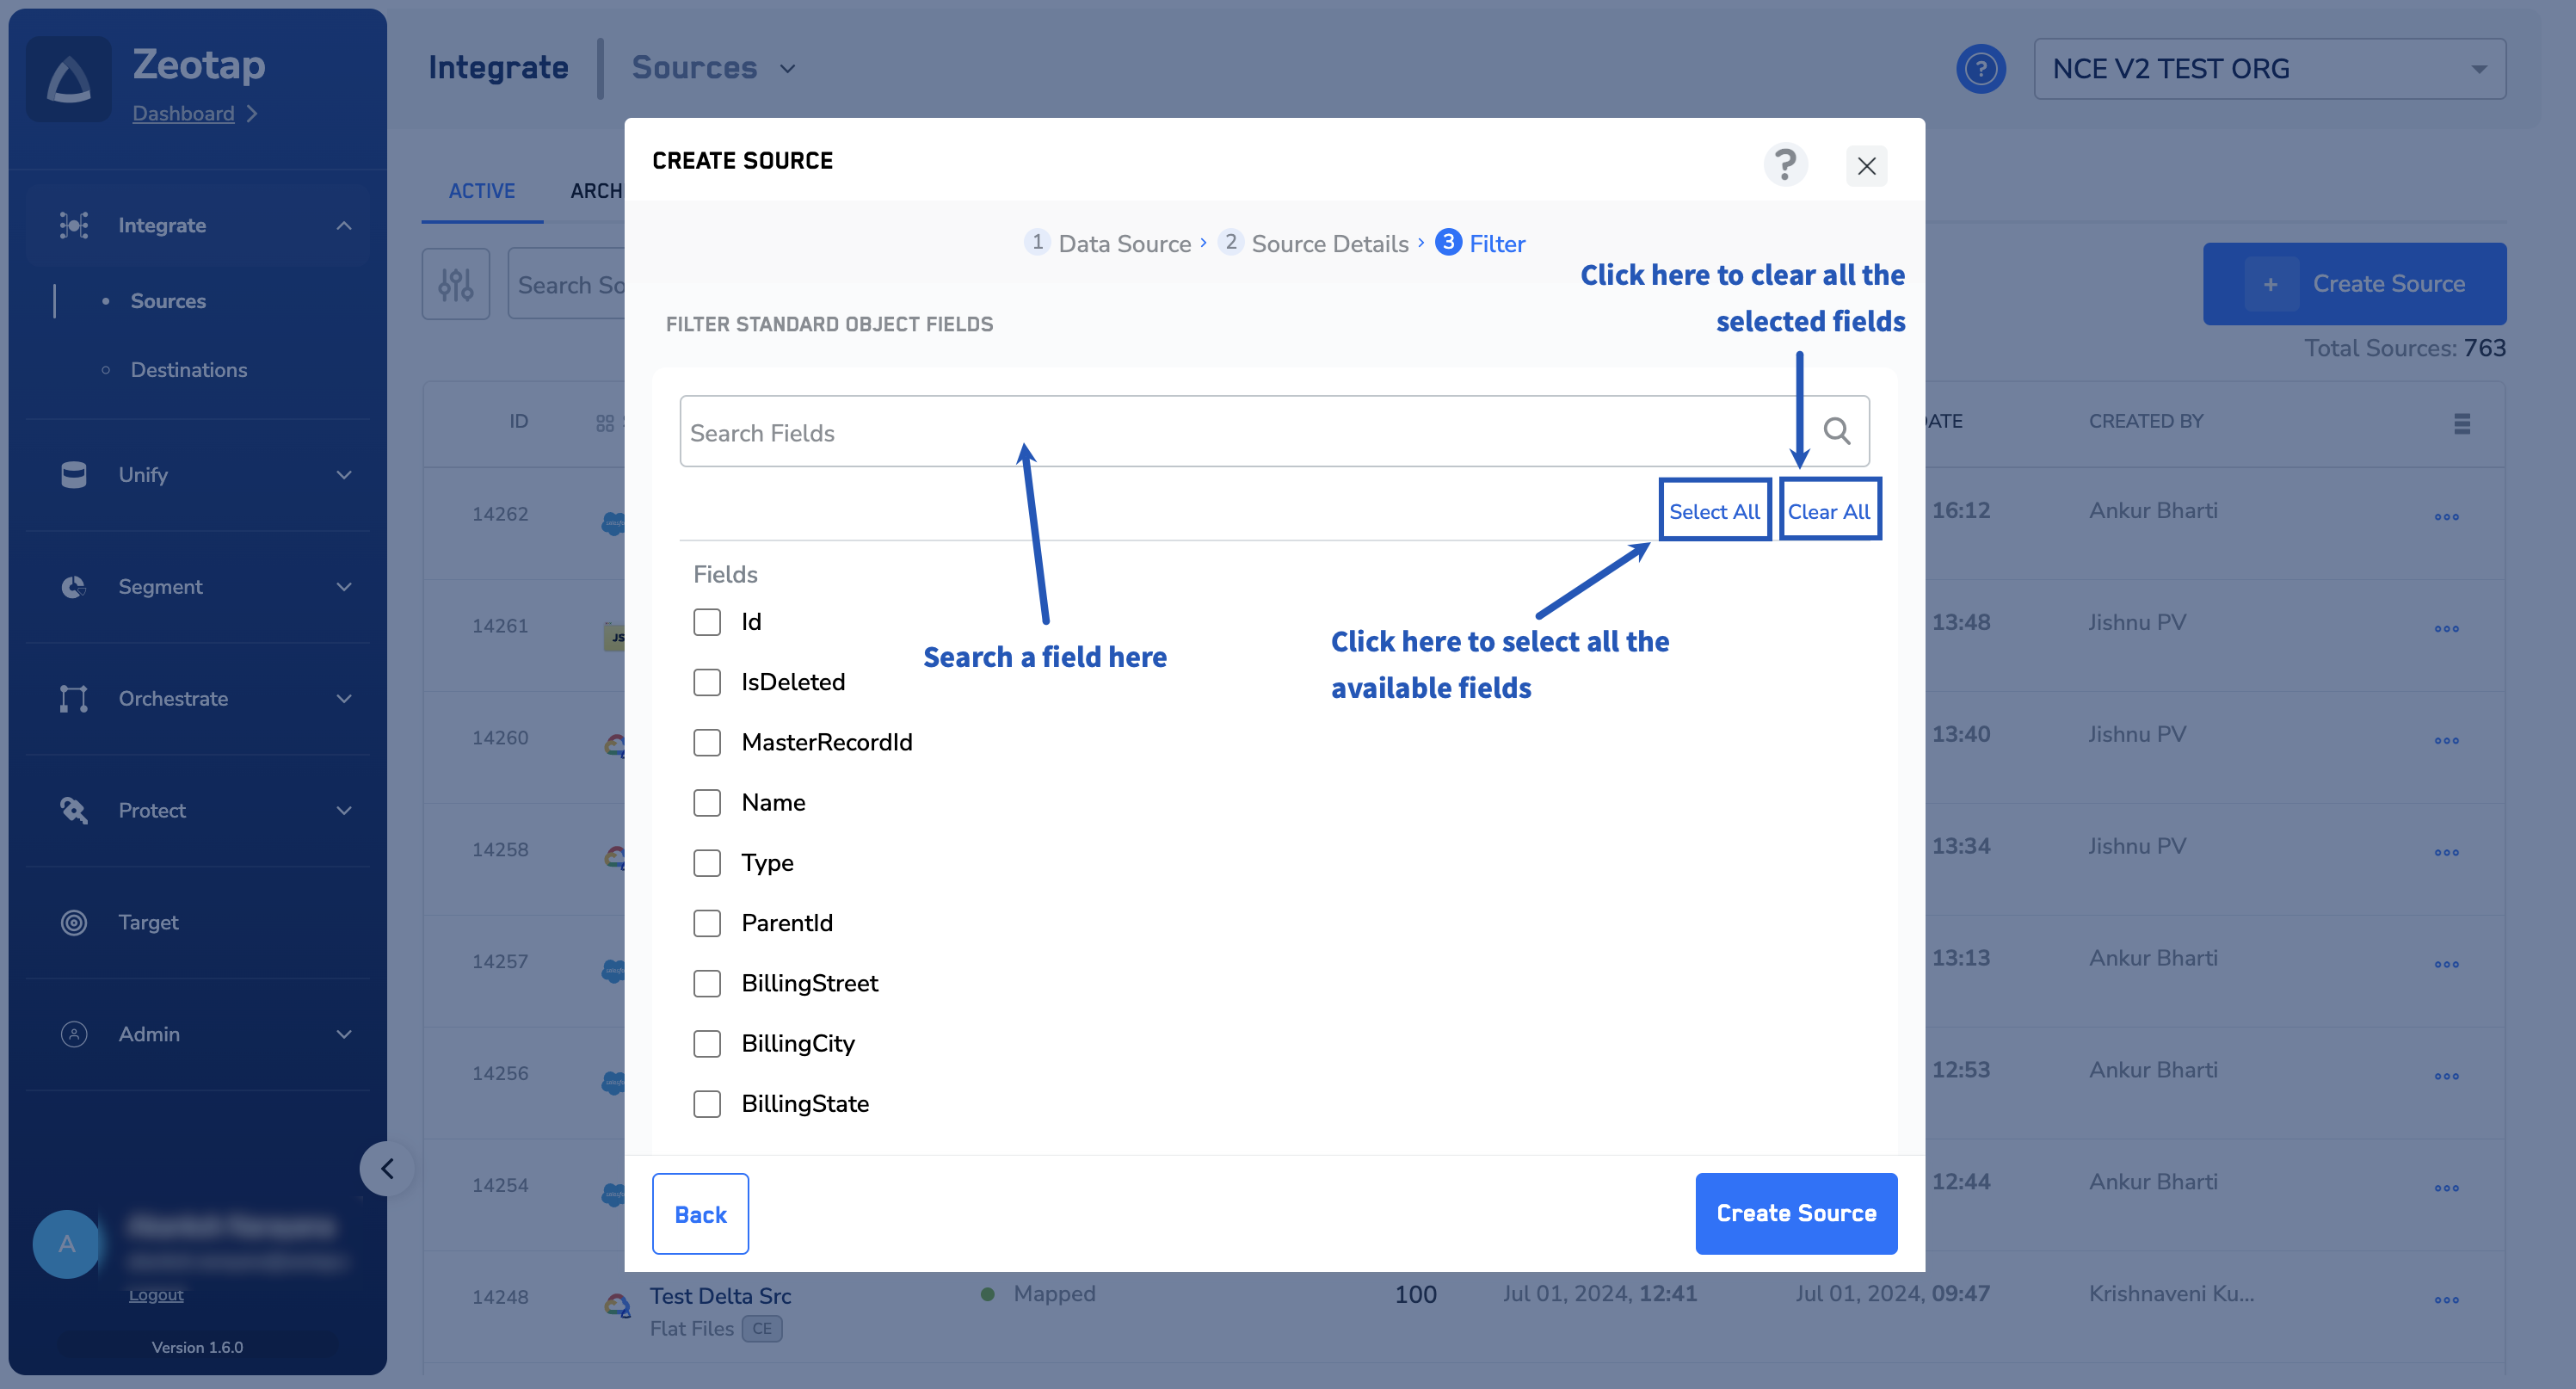
 In the window that appears, based on the Object (Contacts or Companies) selected in the previous step, a list of fields are displayed. You can select the desired fields using the check boxes. Use **Select All** to select all the fields available for that Object in your HubSpot account. If you know the field names, you can select them after searching in the search box.
 **Note:**
Currently, editing the field selection after source creation is not allowed. If you wish to do so, then you need to create a new source in Zeotap CDP.
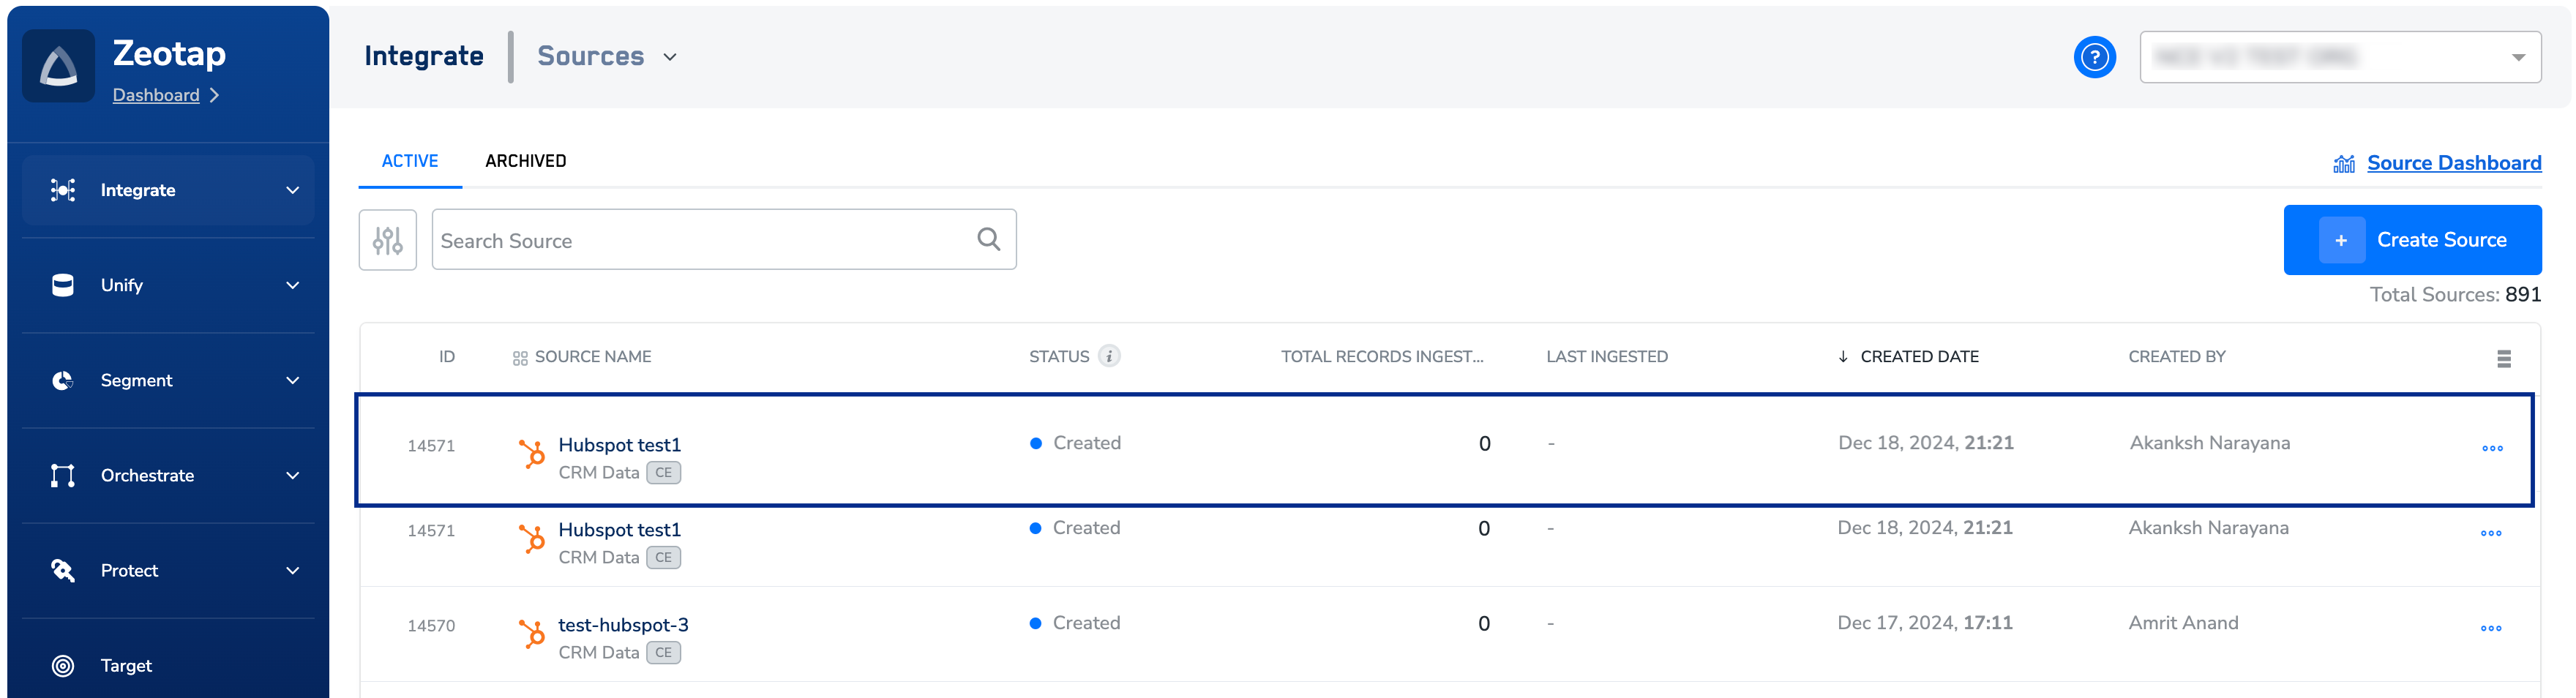
Review the selected fields and click **CREATE SOURCE**. The created HubSpot source is listed on the source listing page as shown below.
**Note:**
Currently, editing the field selection after source creation is not allowed. If you wish to do so, then you need to create a new source in Zeotap CDP.
Review the selected fields and click **CREATE SOURCE**. The created HubSpot source is listed on the source listing page as shown below.
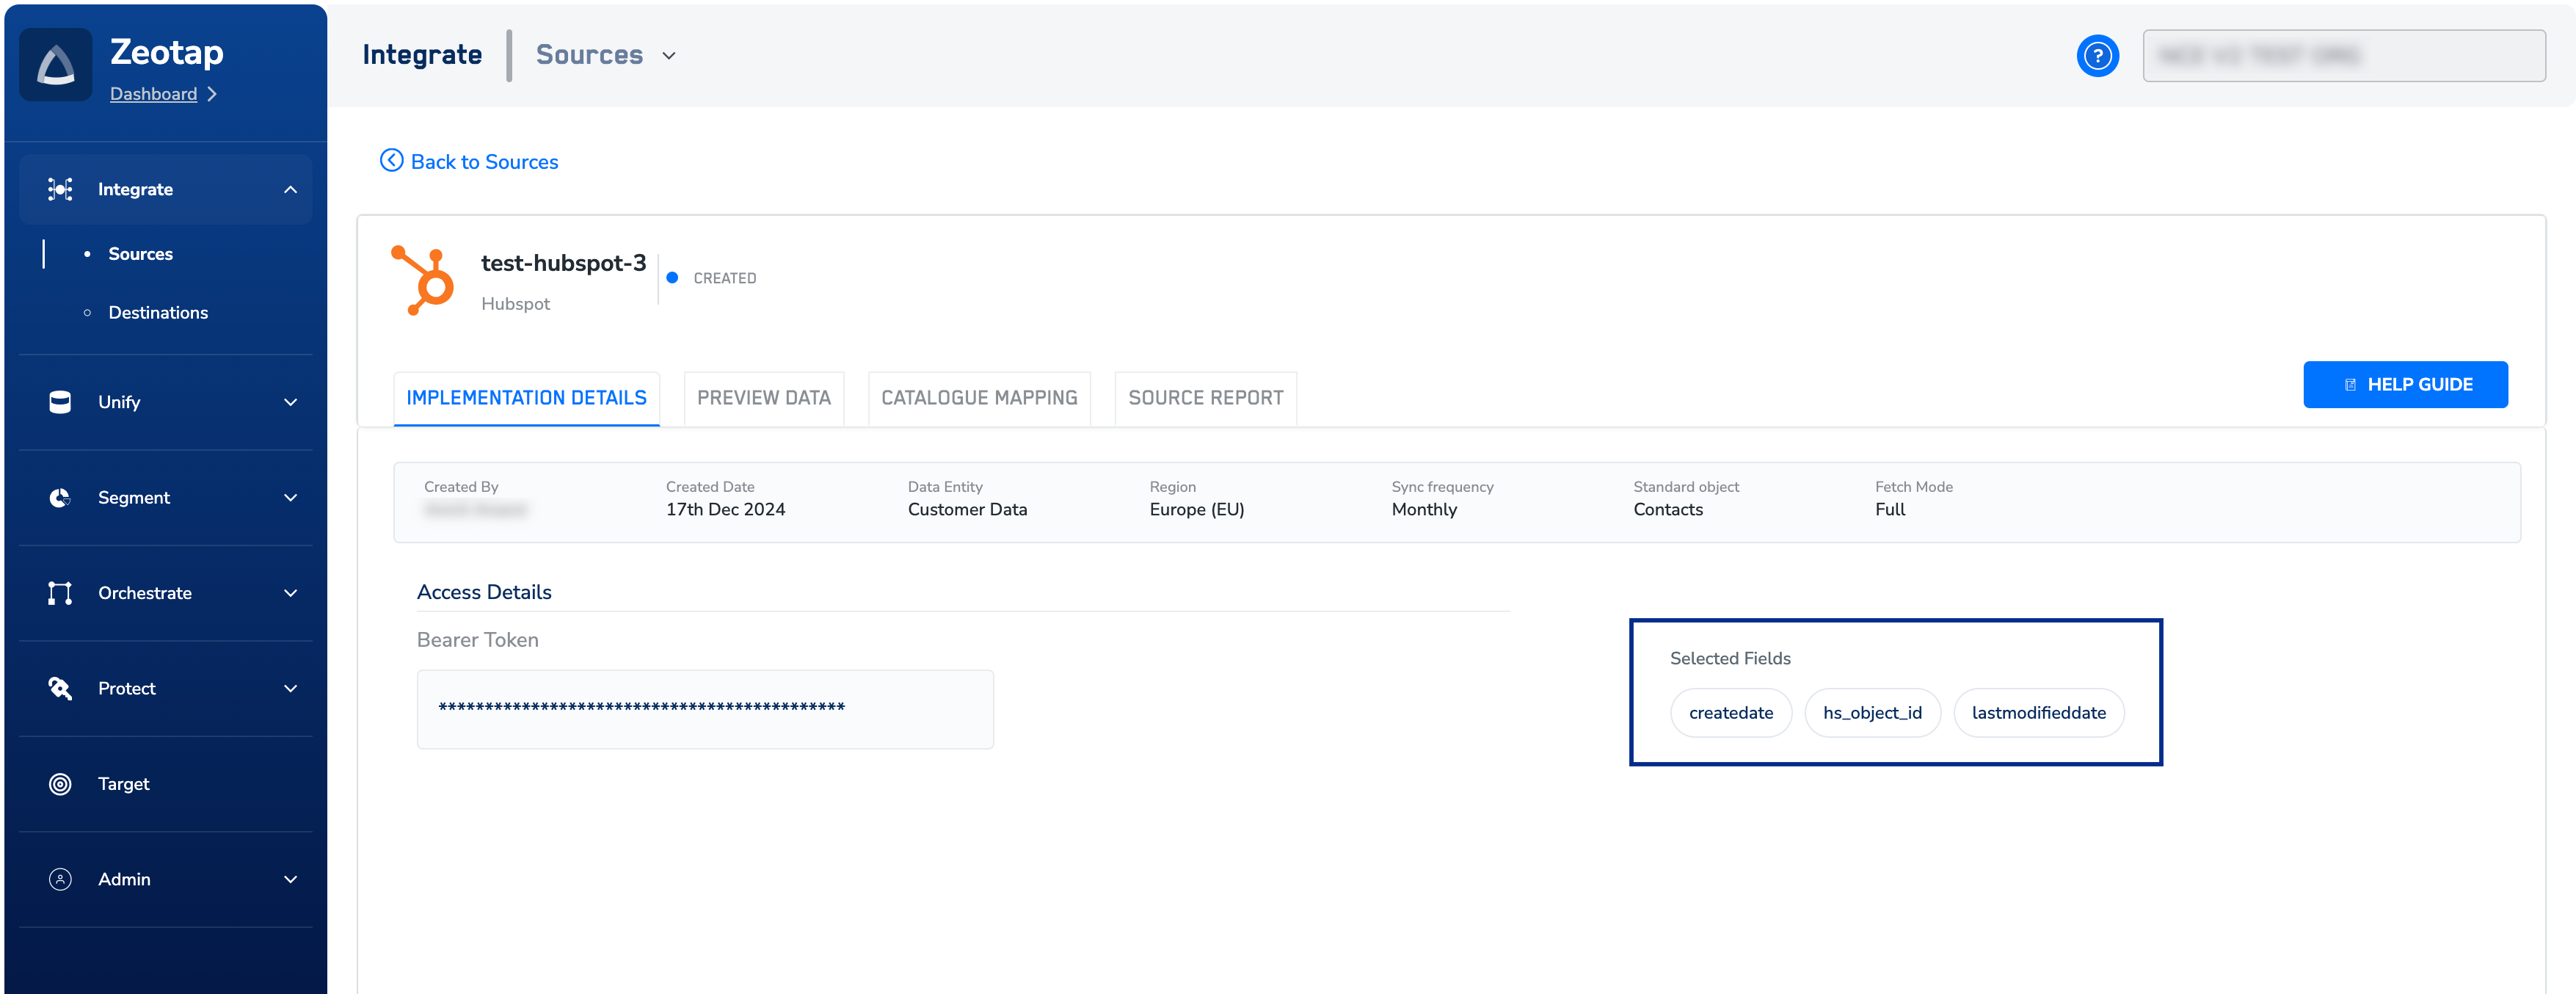
 Upon successfully creating the source, it appears on the **SOURCES** listing page. You can open the created source and find essential details about the created source such as Bearer token, Created by, Created on information and more under the **IMPLEMENTATION DETAILS** tab. You can also find details about the source and the selected fields for the Object.
 **Note:**
Once the connection between Zeotap and HubSpot is successfully established, you can view the data flowing into the system under the **[PREVIEW DATA](/articles/integrate-customer/knowing-the-fields-on-the-preview-data-tab)** tab.
## What Next?
You cannot edit the field selection after creating the source. In such cases, you need to create a new source in Zeotap CDP. For further assistance or queries related to HubSpot source creation, reach out to your Zeotap POC.
**Note:**
Once the connection between Zeotap and HubSpot is successfully established, you can view the data flowing into the system under the **[PREVIEW DATA](/articles/integrate-customer/knowing-the-fields-on-the-preview-data-tab)** tab.
## What Next?
You cannot edit the field selection after creating the source. In such cases, you need to create a new source in Zeotap CDP. For further assistance or queries related to HubSpot source creation, reach out to your Zeotap POC.