> ## Documentation Index
> Fetch the complete documentation index at: https://docs.zeotap.com/llms.txt
> Use this file to discover all available pages before exploring further.
# Brevo
## Overview
This integration allows you to automatically send user data from Zeotap to Brevo in real-time, ensuring your email marketing lists are always up-to-date with the latest customer information. When users interact with your campaigns or meet specific criteria in Zeotap, they'll be instantly added to your designated Brevo contact lists, enabling you to deliver timely, personalized email campaigns without manual data transfers.
## How It Works
When a user event occurs in Zeotap (such as a form submission, purchase, or behavioral trigger), the integration automatically sends that user's information to Brevo, where they are added to your specified contact list. This real-time synchronization ensures your email campaigns always reach the right audience with the most current data.
## Before You Begin (Prerequisites)
In Zeotap:
* Active Zeotap account with appropriate permissions
* Access to the Integrations or Destinations section
* User data or events ready to sync
In Brevo:
* Active Brevo account with API access
* Admin or appropriate permissions to generate API keys
* At least one contact list created where users will be added
* Knowledge of your Brevo account's contact list structure
## Step-by-Step Configuration Guide
### Part 1: Get Your Credentials from Brevo
Log into your Brevo account
* Navigate to[https://app.brevo.com](https://app.brevo.com/)
* Sign in with your credentials
Access API Settings
* Click on your profile icon in the top-right corner
* Select "Account Settings" from the dropdown menu
* Navigate to the "API Keys" section in the left sidebar
Generate a New API Key
* Click "Generate a new API key"
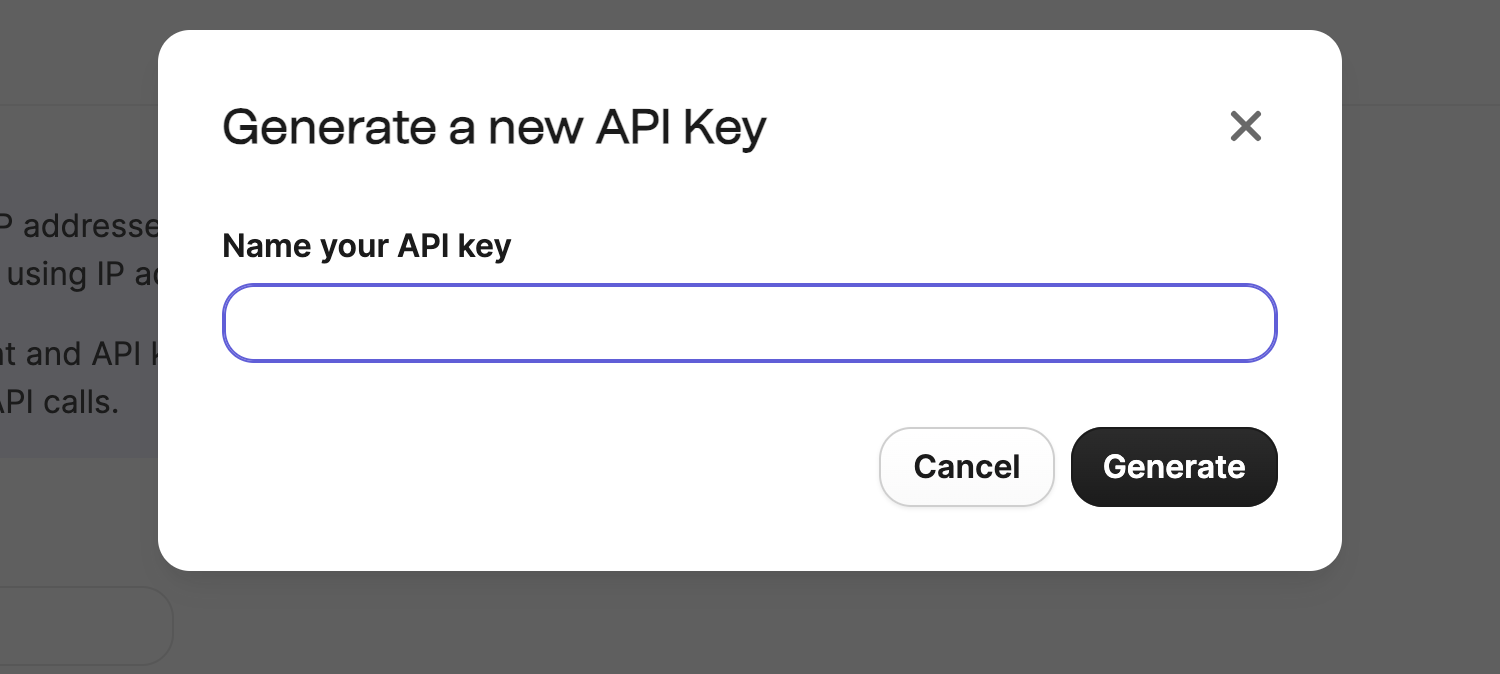 * Give your API key a descriptive name (e.g., "Zeotap Integration")
* Copy the generated API key immediately and store it securely
* Give your API key a descriptive name (e.g., "Zeotap Integration")
* Copy the generated API key immediately and store it securely
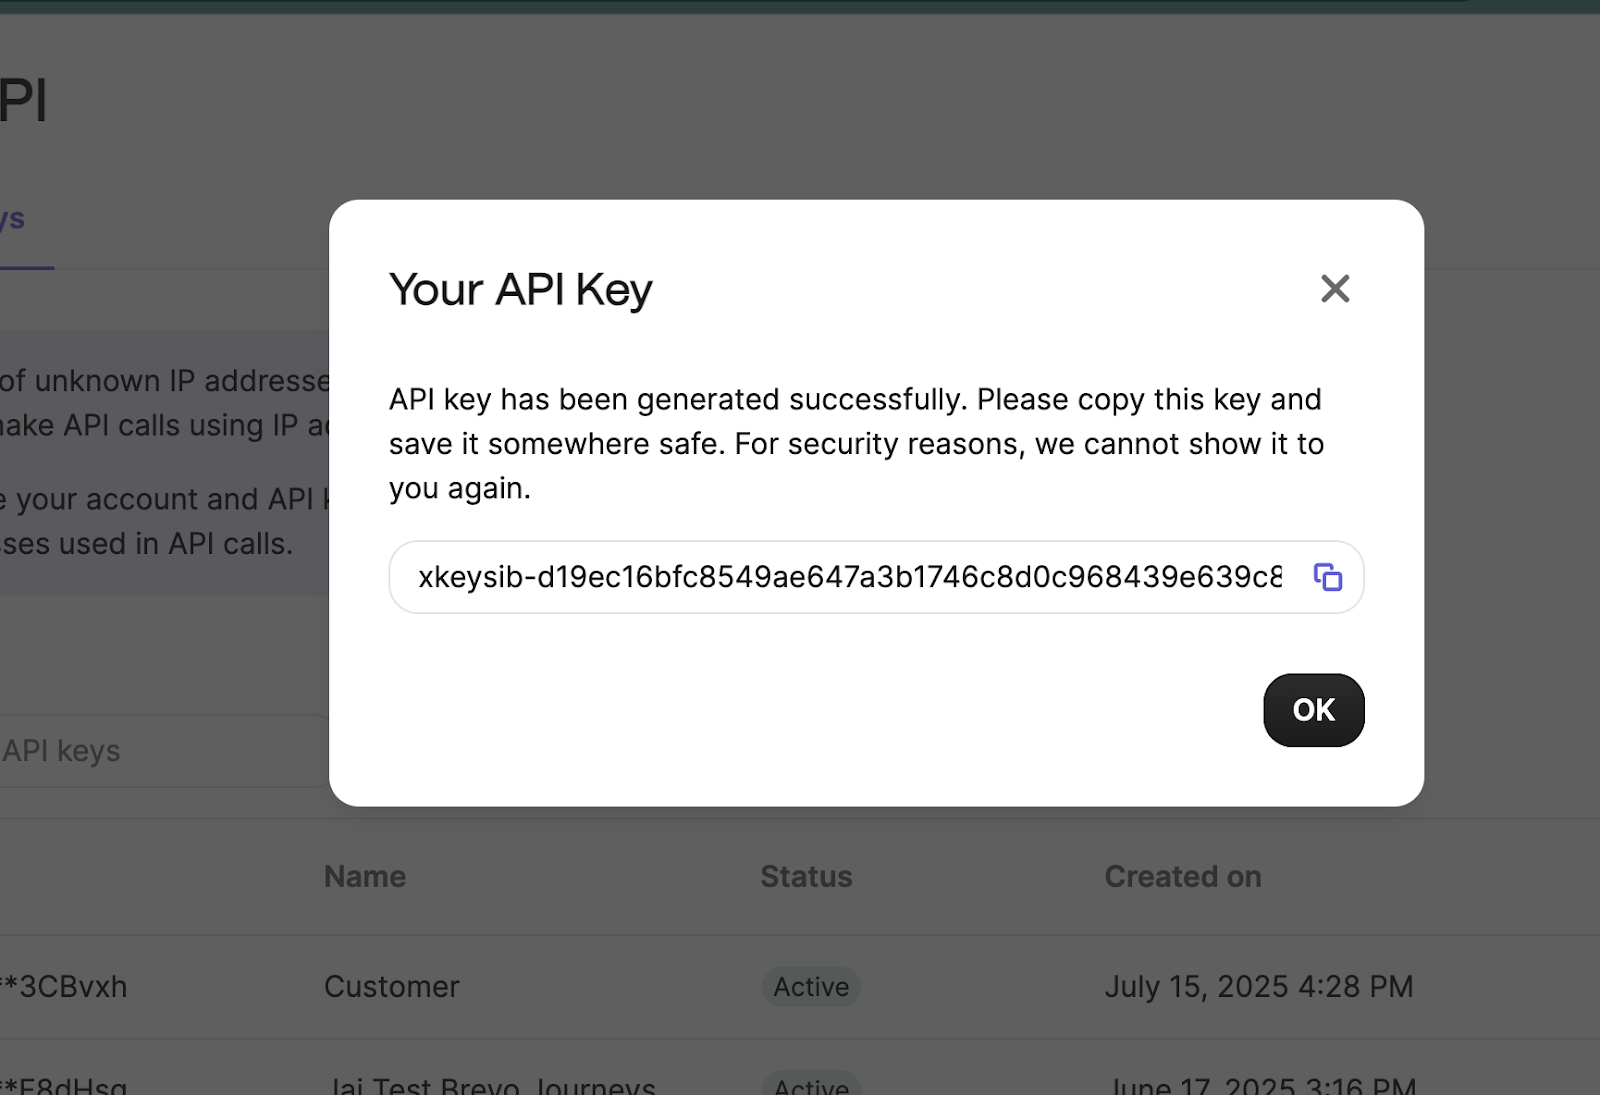 **Important:**
You won't be able to view this key again, so save it now
Get Your Contact List Information
* Go to "Contacts" in the main navigation
* Select "Lists" from the submenu
* Find the list where you want to add users
**Important:**
You won't be able to view this key again, so save it now
Get Your Contact List Information
* Go to "Contacts" in the main navigation
* Select "Lists" from the submenu
* Find the list where you want to add users
 * Note the List ID
### Part 2: Set Up the Connection in Zeotap
Navigate to Integrations
* Log into your Zeotap account
* Go to the "Destinations" in the "Integrations" section
* Note the List ID
### Part 2: Set Up the Connection in Zeotap
Navigate to Integrations
* Log into your Zeotap account
* Go to the "Destinations" in the "Integrations" section
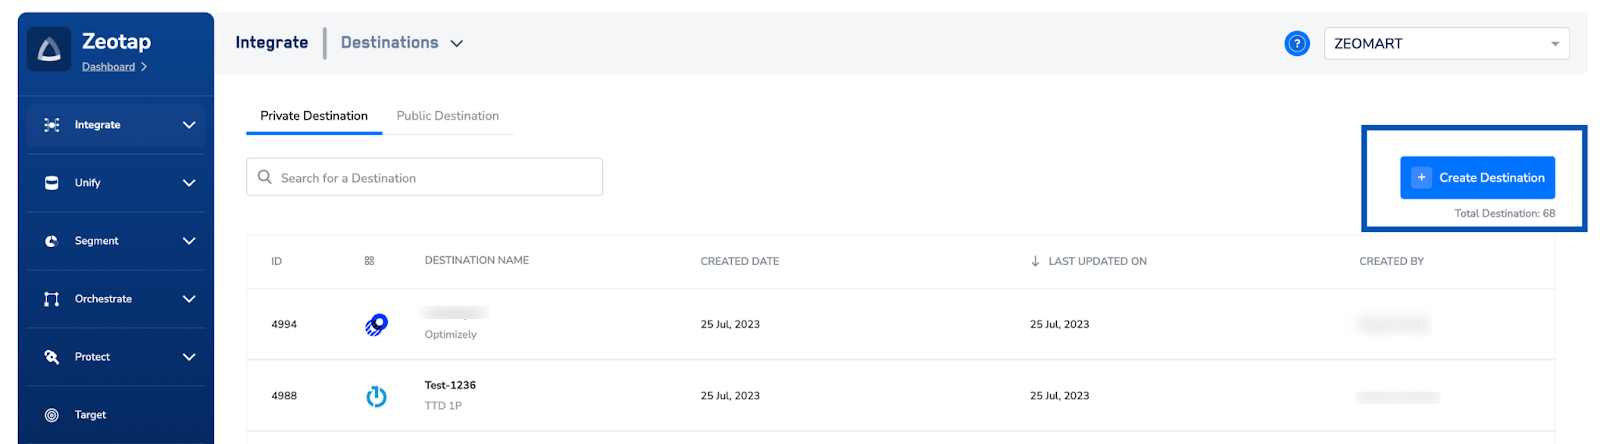 * Look for "Brevo" in the available destinations
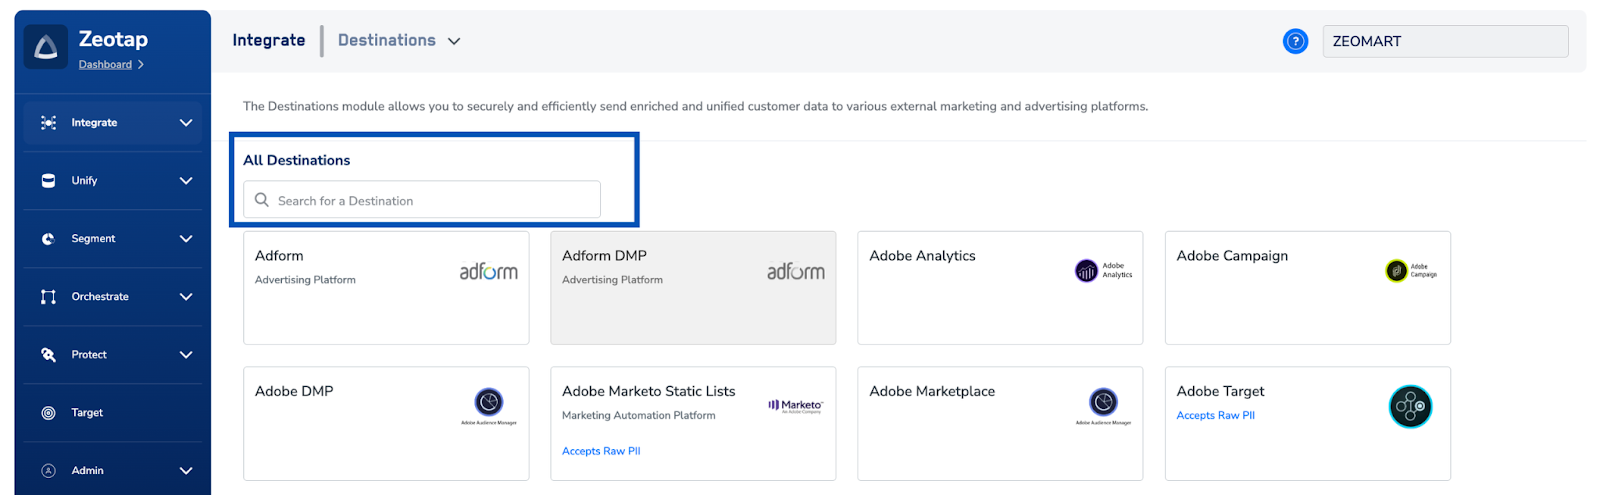 Add Brevo as a Destination
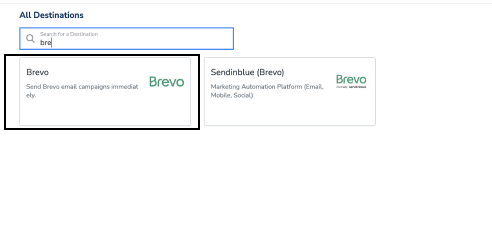
* Search "Brevo" from the list of available integrations
* Click “Brevo”
Add Brevo as a Destination
* Search "Brevo" from the list of available integrations
* Click “Brevo”
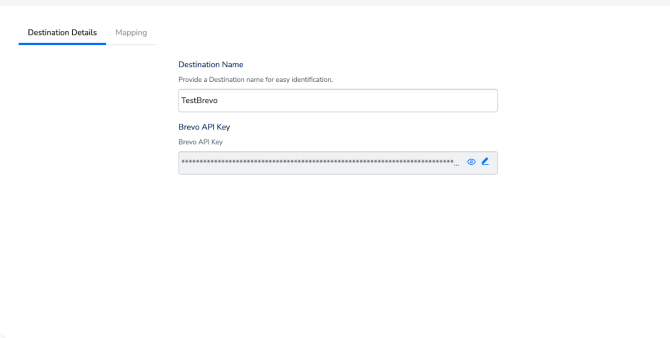
 Configure Connection Settings
* API Key: Enter your Brevo API key from Part 1, Step 3
* List ID(Journeys level input): Enter the Brevo contact list ID from Part 1, Step 4
* Connection Name: Give this integration a memorable name
Configure Connection Settings
* API Key: Enter your Brevo API key from Part 1, Step 3
* List ID(Journeys level input): Enter the Brevo contact list ID from Part 1, Step 4
* Connection Name: Give this integration a memorable name
 Configure Data Mapping
* Map the required fields (see Field Mapping section below)
Configure Data Mapping
* Map the required fields (see Field Mapping section below)
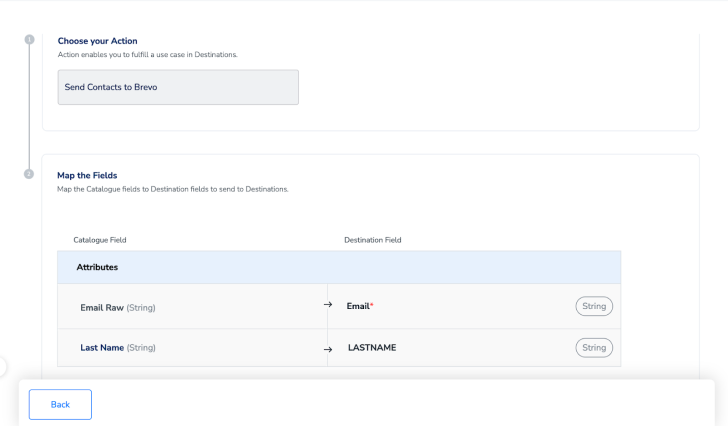 * Set up any additional custom field mappings as needed
Save Configuration
* Review all settings for accuracy
* Click "Save" or "Create Destination"
## Field Mapping
The following fields are essential for the integration to work properly:
Required Fields:
* Email Address: Map your Zeotap email field to Brevo's email field (this is the primary identifier)
Optional but Recommended Fields:
* Phone Number: For SMS campaigns if available
* First Name: Map to Brevo's first name field for personalization
* Last Name: Map to Brevo's last name field for personalization
* Custom Attributes: Any additional data points you want to use for segmentation
Field Mapping Example:
```markdown Markdown theme={null}
Zeotap Field → Brevo Field
email → email (required)
first_name → FNAME
last_name → LNAME
phone → SMS
custom_field_1 → CUSTOM_ATTRIBUTE_1
```
## Activate the Destination on Journeys
After creating a destination, next, you need to link it in the Send to Destination node within the workflow, as explained below.
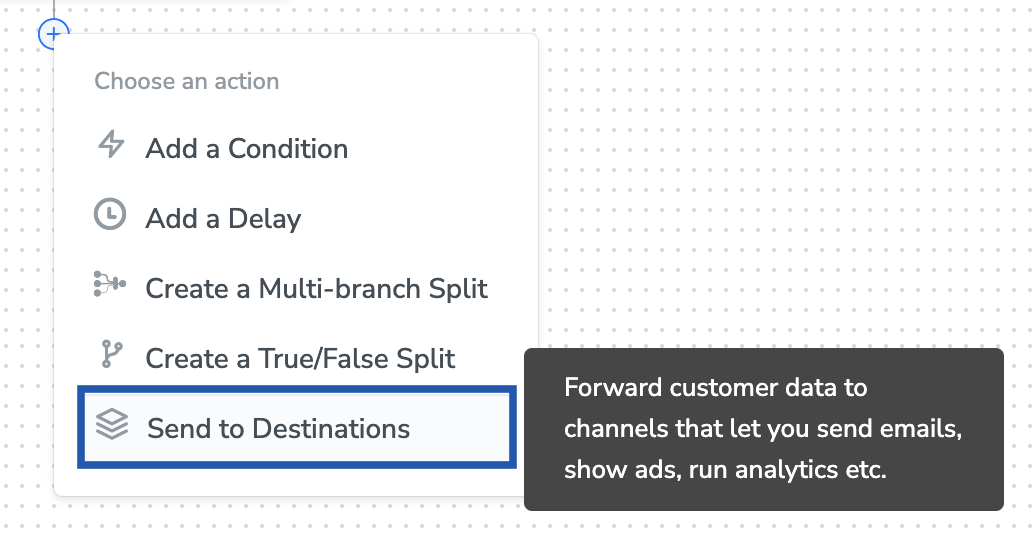
In the workflow, click + and choose Send to Destinations.
* Set up any additional custom field mappings as needed
Save Configuration
* Review all settings for accuracy
* Click "Save" or "Create Destination"
## Field Mapping
The following fields are essential for the integration to work properly:
Required Fields:
* Email Address: Map your Zeotap email field to Brevo's email field (this is the primary identifier)
Optional but Recommended Fields:
* Phone Number: For SMS campaigns if available
* First Name: Map to Brevo's first name field for personalization
* Last Name: Map to Brevo's last name field for personalization
* Custom Attributes: Any additional data points you want to use for segmentation
Field Mapping Example:
```markdown Markdown theme={null}
Zeotap Field → Brevo Field
email → email (required)
first_name → FNAME
last_name → LNAME
phone → SMS
custom_field_1 → CUSTOM_ATTRIBUTE_1
```
## Activate the Destination on Journeys
After creating a destination, next, you need to link it in the Send to Destination node within the workflow, as explained below.
In the workflow, click + and choose Send to Destinations.
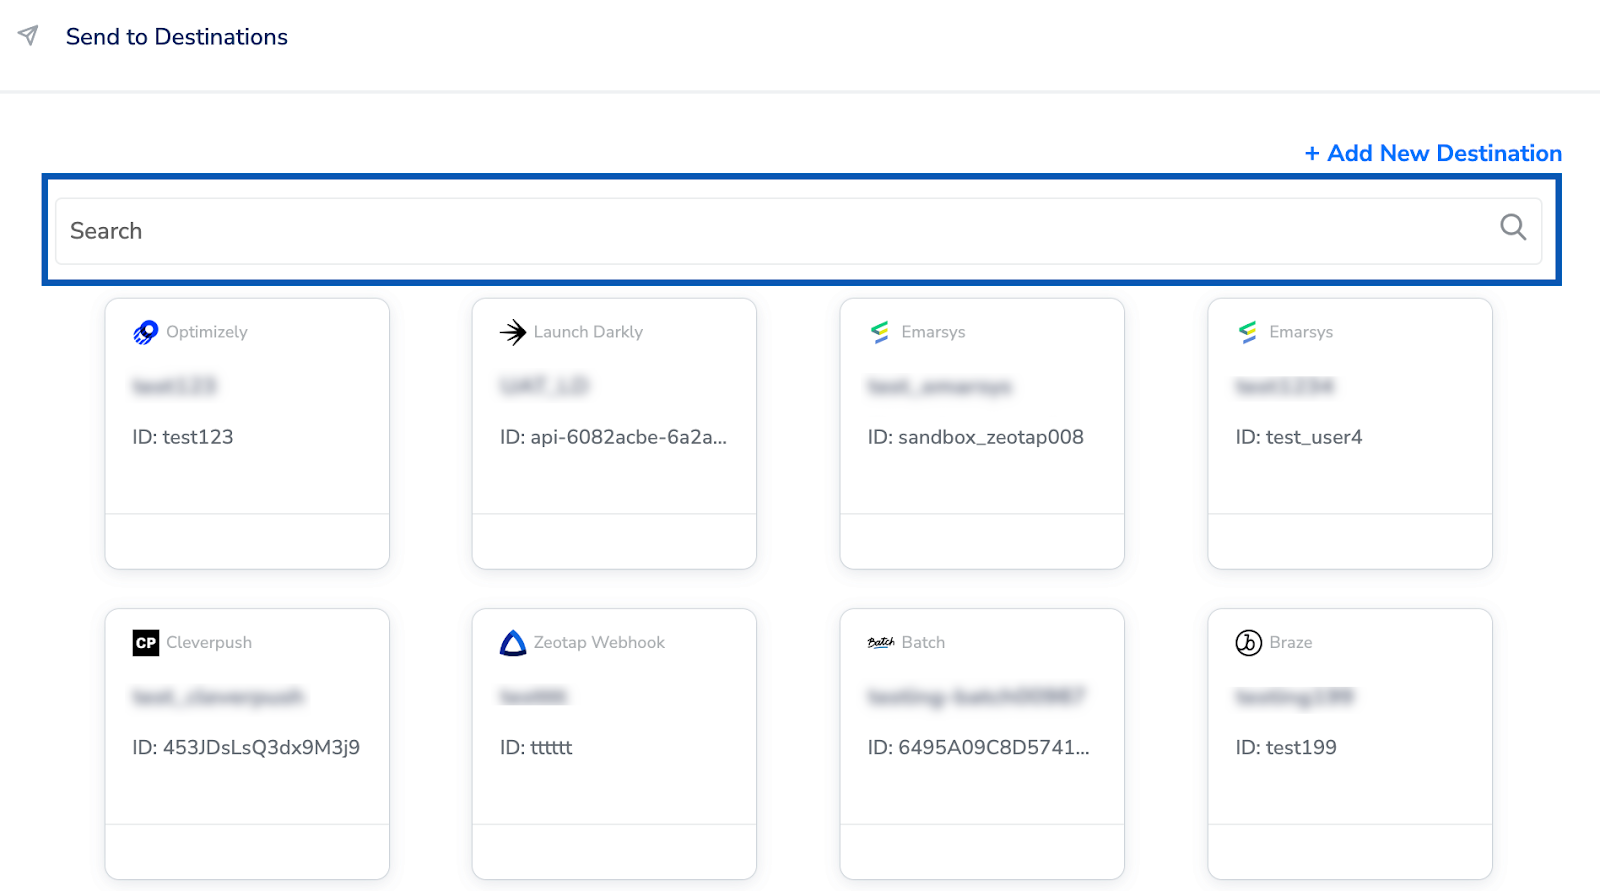
 Choose the destination from the list of available destinations by using the search feature.
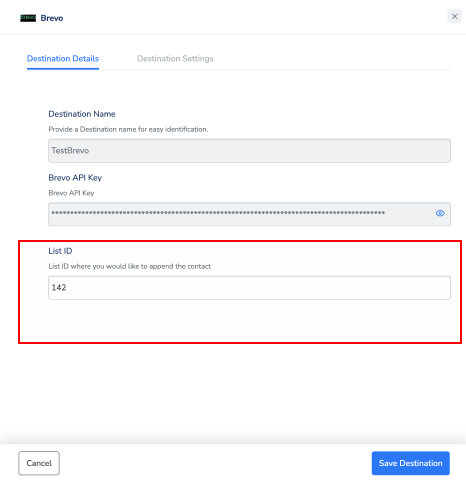
 Under the Destination Details tab, the Access Token field is automatically populated based on the value that you have entered while creating the destination. List ID must be filled as a workflow level input while attaching the destination.
 Under the Destination Settings tab, choose the Action and mapping as per your requirement.
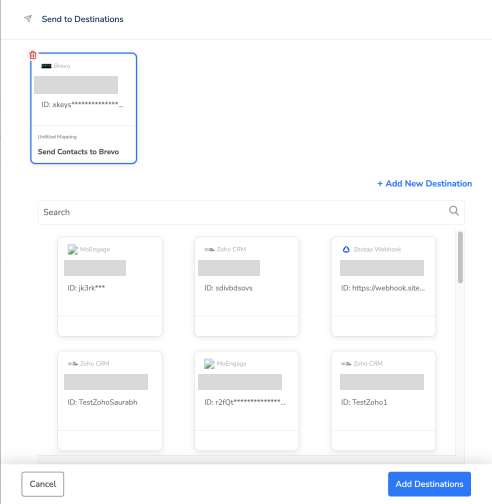
Upon clicking Save Destination. The destination is attached as shown in the image below.
Under the Destination Settings tab, choose the Action and mapping as per your requirement.
Upon clicking Save Destination. The destination is attached as shown in the image below.