> ## Documentation Index
> Fetch the complete documentation index at: https://docs.zeotap.com/llms.txt
> Use this file to discover all available pages before exploring further.
# Batch
## Overview
Batch is a mobile marketing automation platform that enables marketers to engage with their mobile app users through push notifications, in-app messaging and email. Integrated with Zeotap it provides a range of features and capabilities that enable marketers to create personalised and relevant experiences for their users and drive engagement, retention and revenue. Use this integration to send custom audiences to Batch. A custom audience can contain a list of custom user IDs, advertising IDs (GAID or IDFA) or install IDs.
## Supported Identifiers
This integration supports MAIDs, Custom IDs and Install IDs.
## Available Actions and Supported Features
| Action Name | [ID EXTENSION](/articles/segment-customer/extend-your-audience#id-extension) | [DELETE](https://docs.zeotap.com/articles/#!integrate-customer/delta-upload-and-delete-functions) | [DELTA UPLOAD](https://docs.zeotap.com/articles/#!integrate-customer/delta-upload-and-delete-functions) |
| :---------------------------- | :--------------------------------------------------------------------------- | :------------------------------------------------------------------------------------------------ | :------------------------------------------------------------------------------------------------------ |
| Send Advertising IDs to Batch | ✅ | - | ✅ |
| Send Install IDs to Batch | - | - | - |
| Send Custom IDs to Batch | - | - | - |
| Send Attributes to Batch | - | - | ✅ |
## Prerequisites
The following are the prerequisites before proceeding with this integration:
* Ensure that you have a Batch account. After logging into the Batch account you are redirected to the Batch dashboard.
* Ensure that you have integrated or set up your mobile applications with Batch. The already integrated mobile applications appear on the Batch dashboard.
## Components of Batch
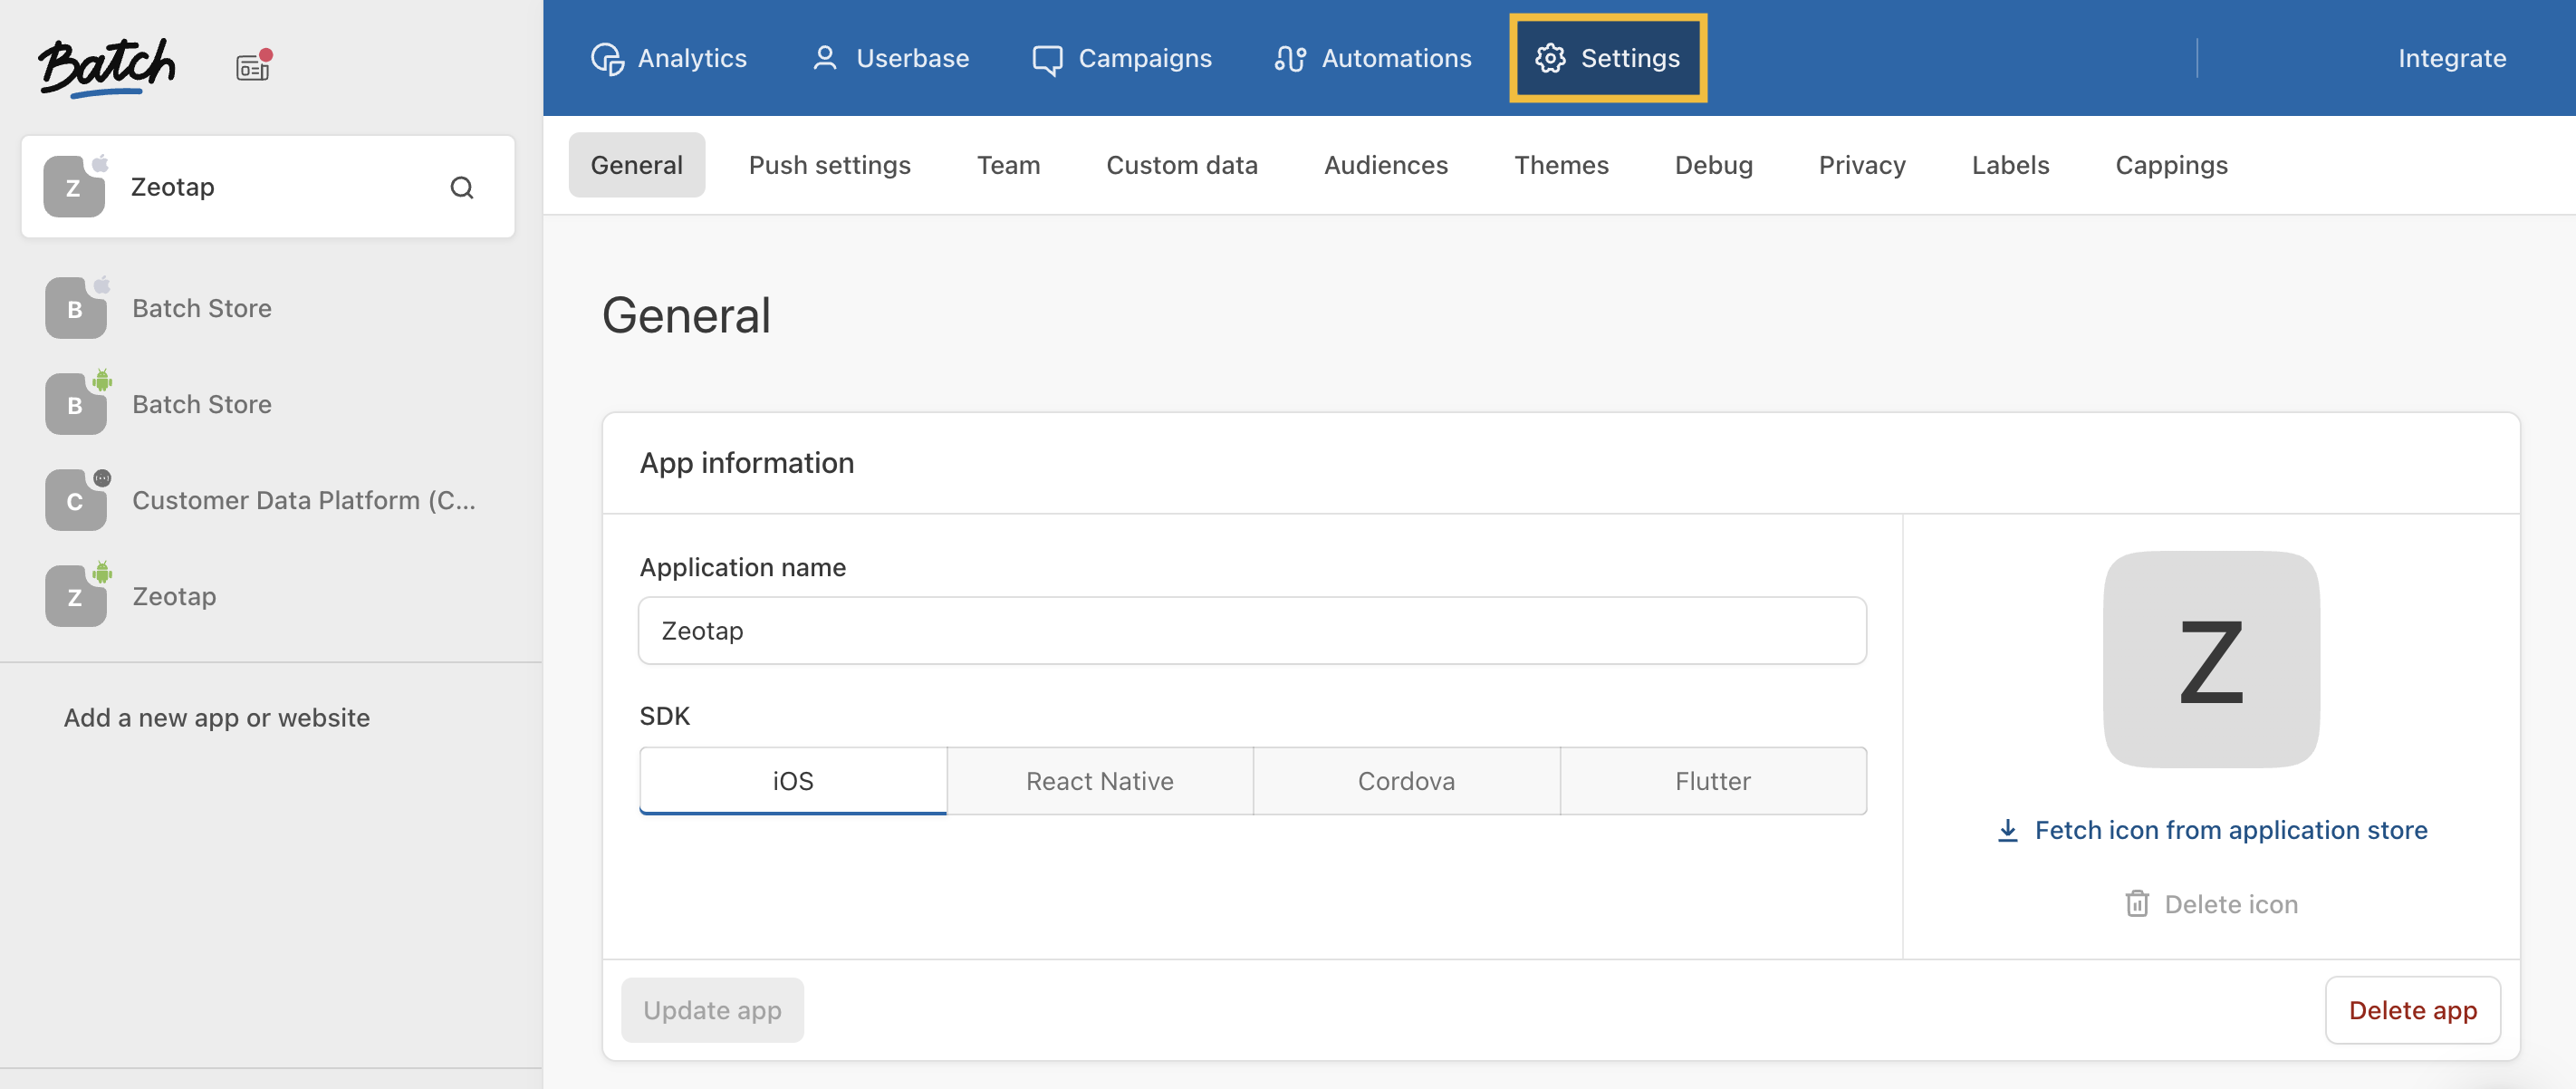
To obtain the components of Batch, navigate to the Batch Dashboard and click SETTINGS from the top panel as shown below.
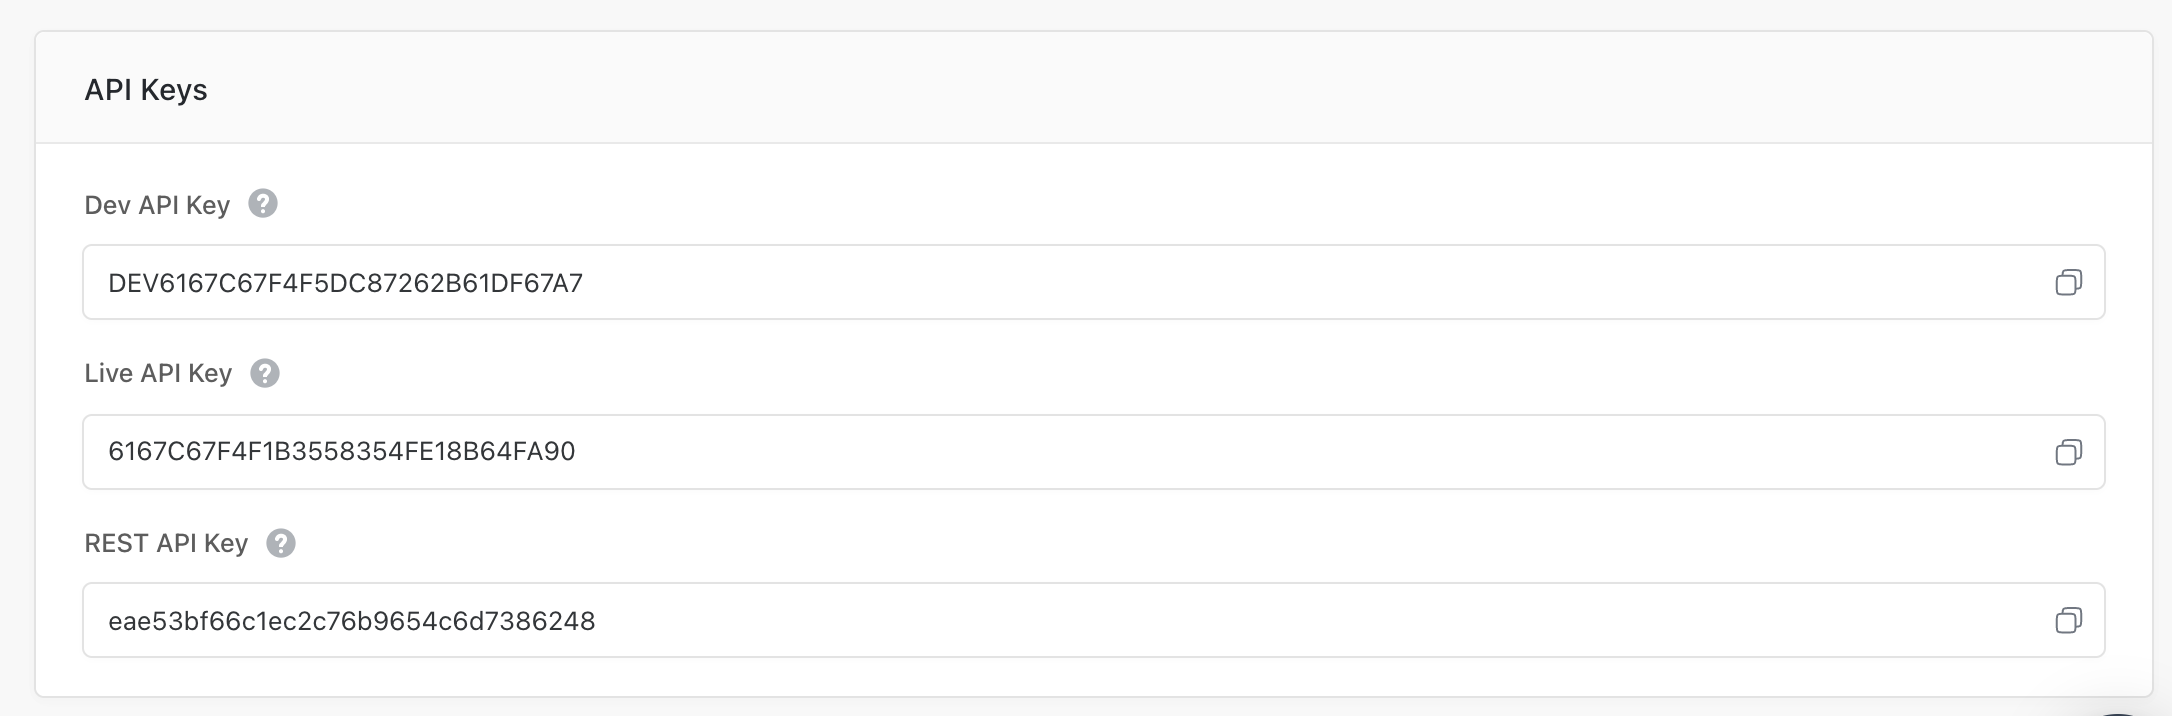
 The **General** tab of the **SETTINGS** page displays the API keys. Copy the **Live API Key** and **REST API Key**\* and use them while creating the destination.
 ## Create a Destination for Batch
Perform the following steps to create a Destination for Batch:
Log into the Zeotap CDP App and go to the **DESTINATIONS** application.
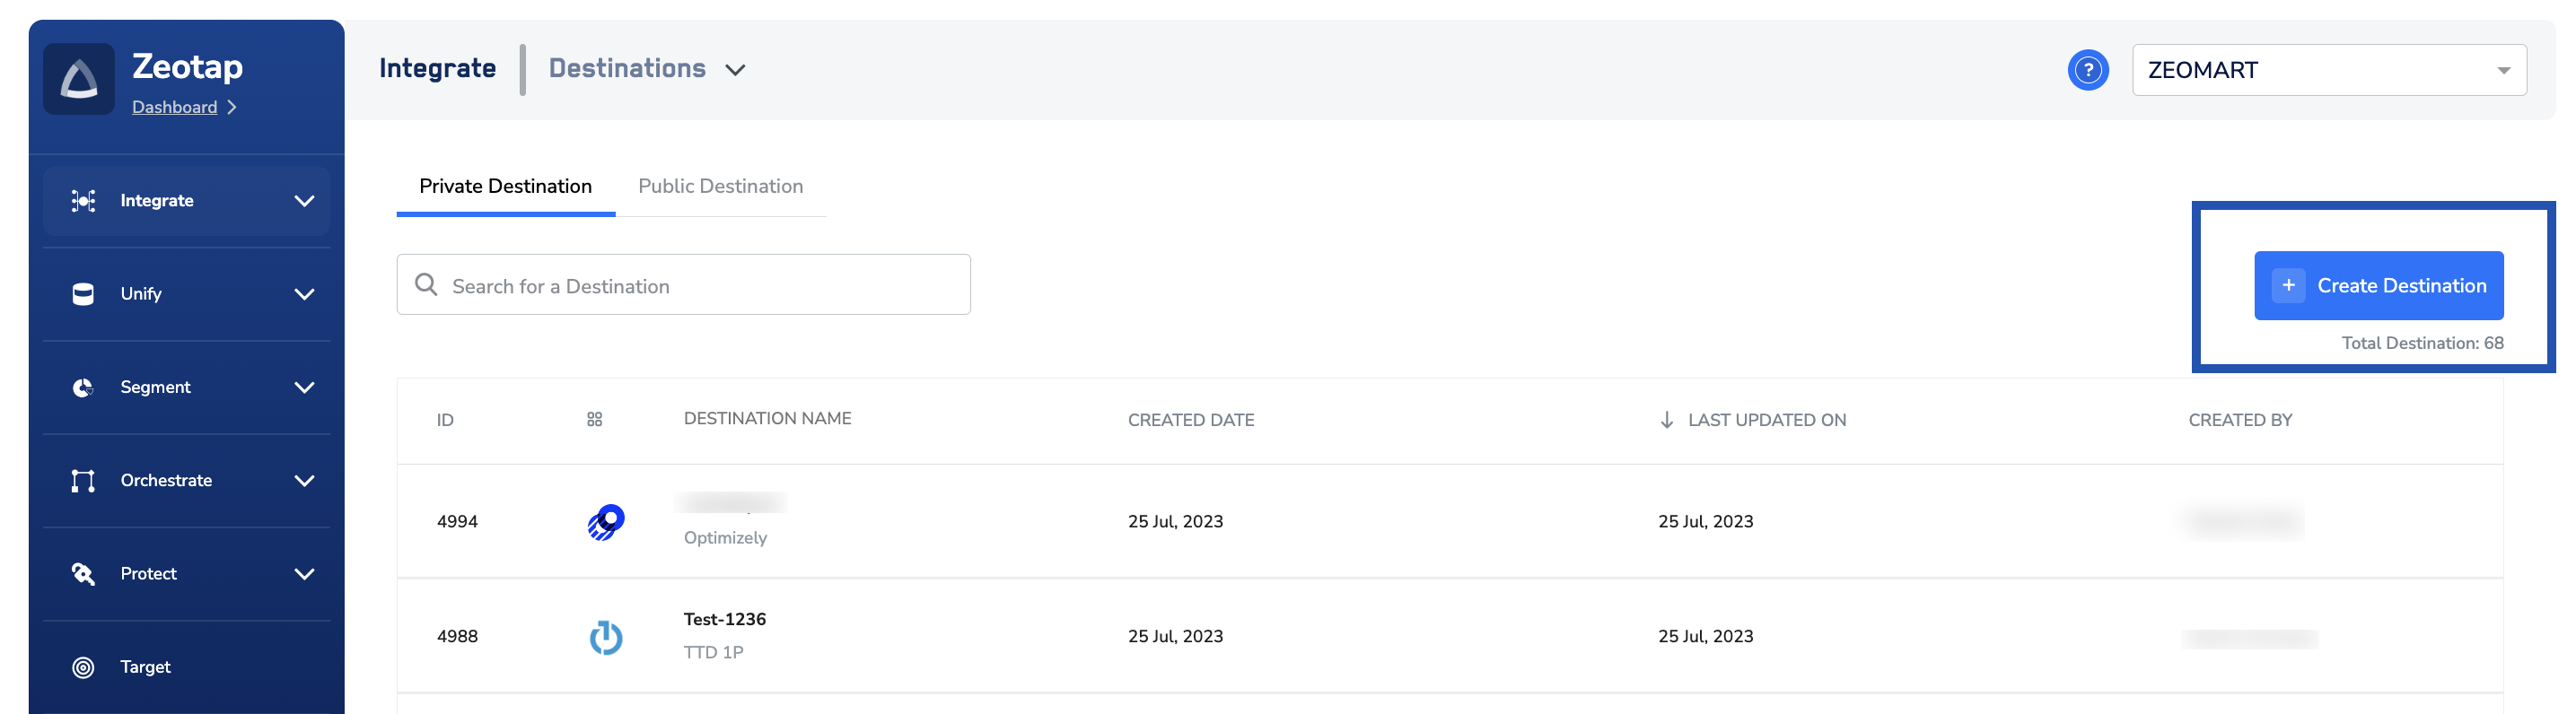
Click **+ Create Destination**.
## Create a Destination for Batch
Perform the following steps to create a Destination for Batch:
Log into the Zeotap CDP App and go to the **DESTINATIONS** application.
Click **+ Create Destination**.
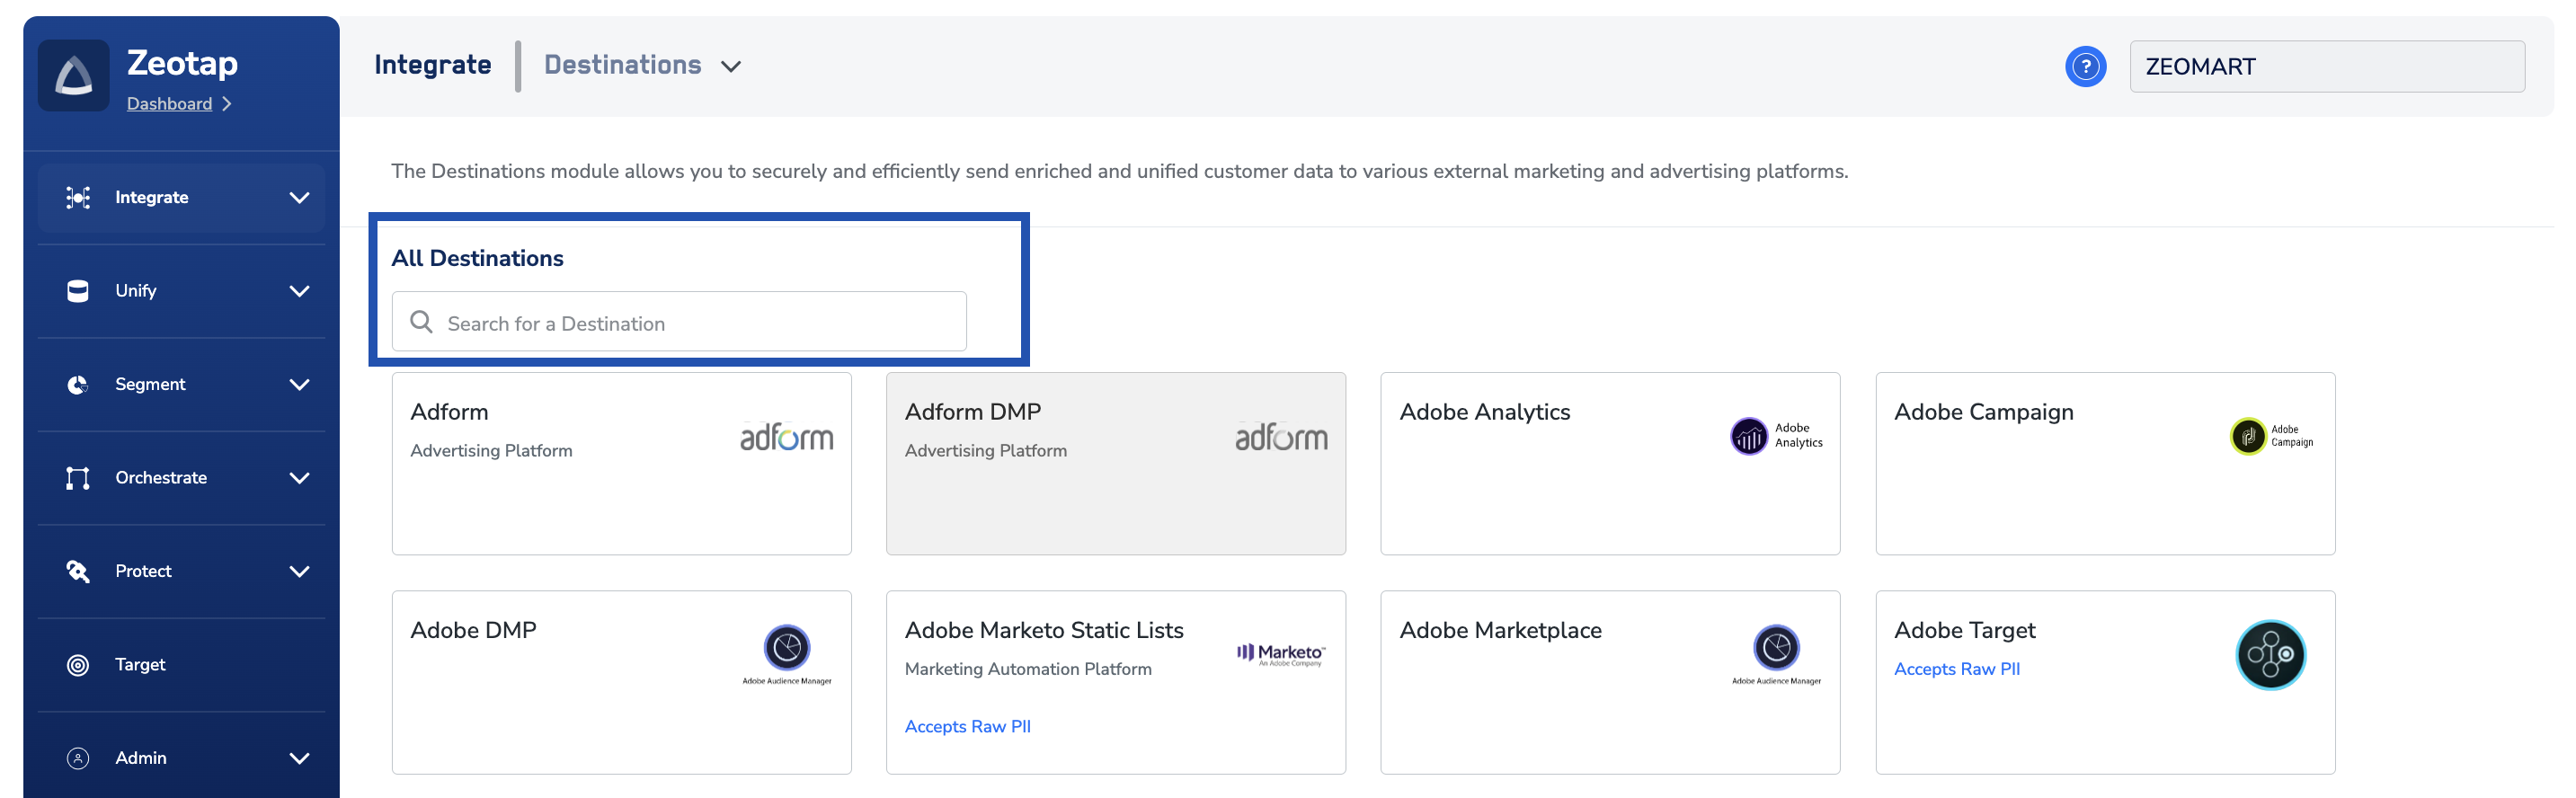
 Under **All Destinations**, search for \*\* \*\*.
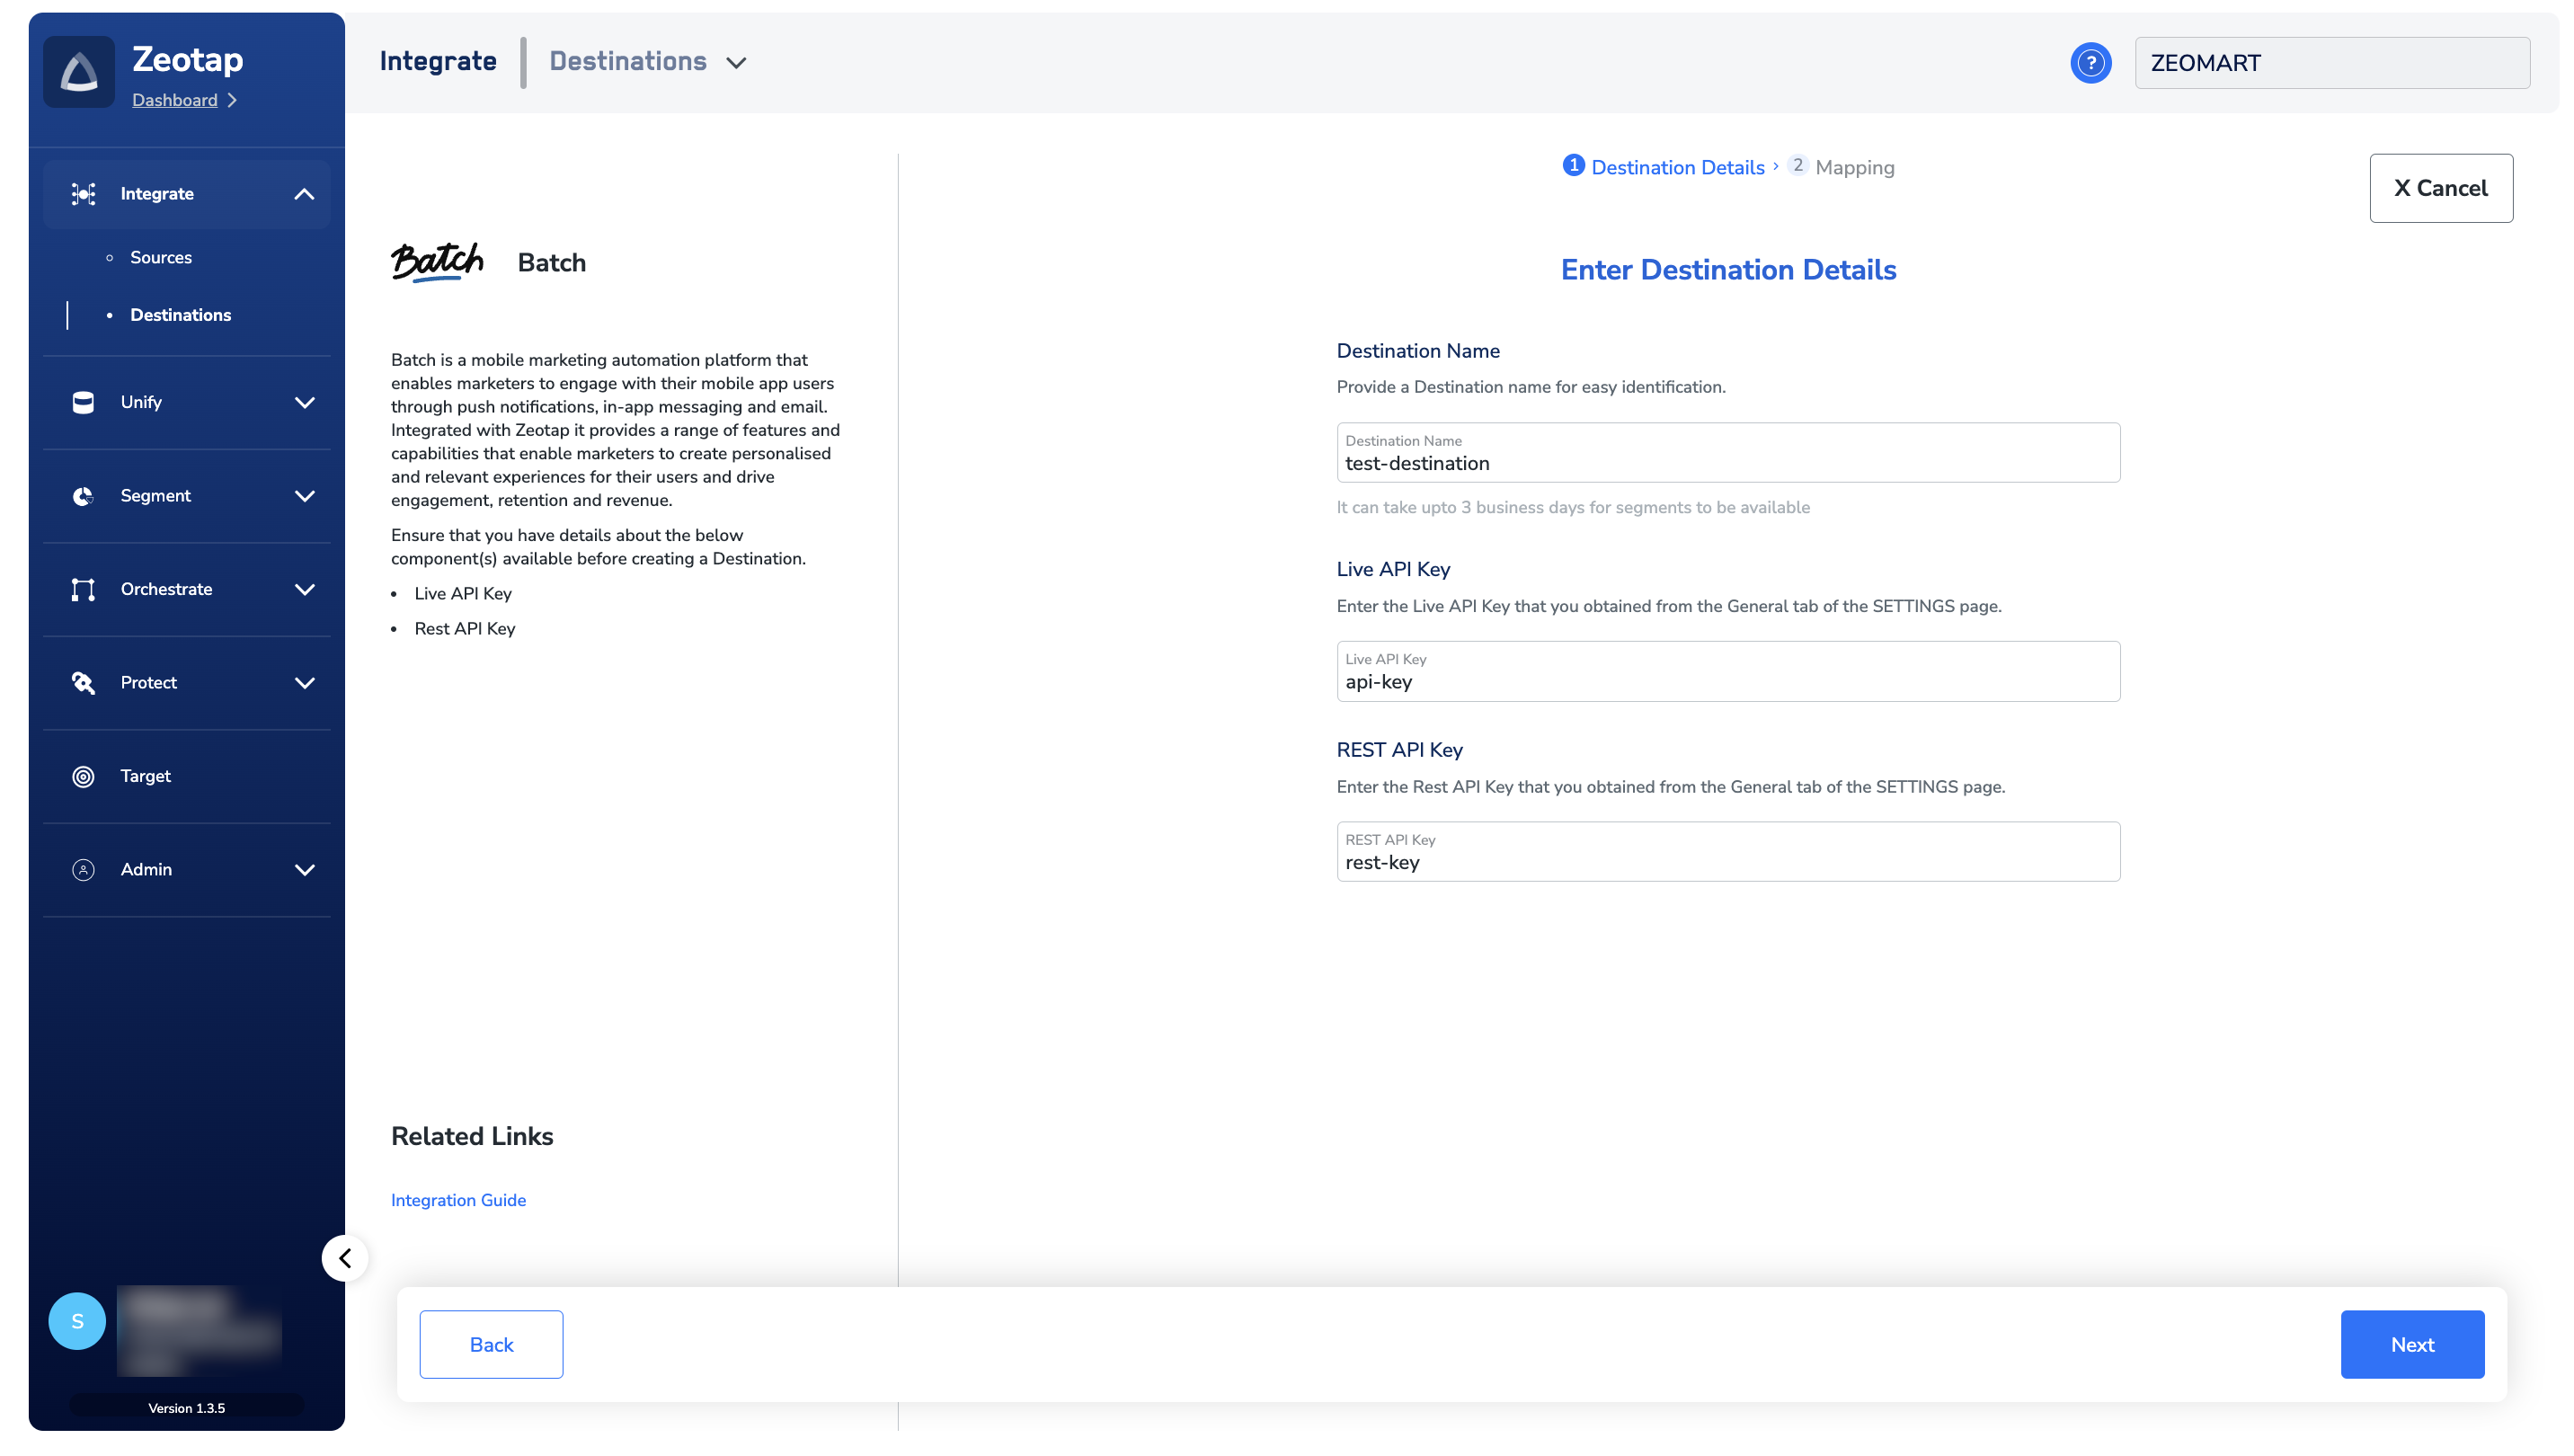
 Click **Batch.** A screen appears displaying details about the particular destination towards the left. On the right-hand side of the screen find a list of fields that are required for the integration to be established. Enter the required details as mentioned in the following steps:
a. Enter a name for the Destination.
b. Enter the **Live API Key** and the **REST API Key**.
c. Review all the values entered above and then click **Next** to proceed to mapping.
Click **Batch.** A screen appears displaying details about the particular destination towards the left. On the right-hand side of the screen find a list of fields that are required for the integration to be established. Enter the required details as mentioned in the following steps:
a. Enter a name for the Destination.
b. Enter the **Live API Key** and the **REST API Key**.
c. Review all the values entered above and then click **Next** to proceed to mapping.
 In the new screen that appears, choose the appropriate Action and mapping as explained below.
**Note**
*The terms Audiences and Segments are used interchangeably to refer to customer cohorts belonging to a specific category. For example, an Audience or a segment can be a specific group of customers who are over 18 years of age and have performed an `addToCart` event within the last 30 days.*
## Link an Audience to the Batch Destination
For information about how to link an Audience or segment to the created Destination in **Audiences** and **Target** applications, refer [here](/articles/integrate-customer/link-an-audience-to-the-destination). Note that it can take up to three business days for the segment to be available at the Batch seat. In addition, ensure that you link only one Destination at a time to avoid activation issues.
a. Choose the desired [action](/articles/integrate-customer/destinations#actionsanchor) under **Choose your Action** and then choose the corresponding identifiers under **Map the Fields**. You can choose one of the following actions as per your requirement. Based on the action you choose, the [Output Identifiers](https://docs.zeotap.com/articles/segment-customer/choose-the-output-identifiers) that are accepted by the platform such as, MAIDs, Custom ID, Install ID are displayed. Here, you can map the respective Catalogue fields to the Destination fields.
i. Choose **Send Advertising IDs to Batch** to send advertising identifiers, such as MAIDs, to the Batch platform.
ii. Choose **Send Install IDs to Batch** to send Install IDs generated by Batch when a new user is created in the Batch application.
* Ensure all Install IDs are ingested into Zeotap before using **Send Install Ids to Batch** as an action.
* Ensure that the identifiers are sent to Batch in the following format only:
```bash theme={null}
Test_-_Batch_Send_Custom_IDs_1562_install_ids for Install IDs
Test_-_Batch_Send_Custom_IDs_1563_advertising_ids for Advertiser IDs.
```
iii. Choose **Send Custom IDs to Batch** to send custom identifiers of your choice to Batch.
iv. Choose **Send attributes to Batch** to send attributes such as First Name, Last Name, Email Address, Gender, Age, and others to Batch. Ensure that you have created the attribute in batch before using it in Zeotap CDP.
b. Once the mapping is complete, click **Create Destination**. The created Destination then gets listed in the **Audiences** application, which can be linked to an Audience/segment. Ensure that you link only one Destination at a time to avoid activation issues.
In the new screen that appears, choose the appropriate Action and mapping as explained below.
**Note**
*The terms Audiences and Segments are used interchangeably to refer to customer cohorts belonging to a specific category. For example, an Audience or a segment can be a specific group of customers who are over 18 years of age and have performed an `addToCart` event within the last 30 days.*
## Link an Audience to the Batch Destination
For information about how to link an Audience or segment to the created Destination in **Audiences** and **Target** applications, refer [here](/articles/integrate-customer/link-an-audience-to-the-destination). Note that it can take up to three business days for the segment to be available at the Batch seat. In addition, ensure that you link only one Destination at a time to avoid activation issues.
a. Choose the desired [action](/articles/integrate-customer/destinations#actionsanchor) under **Choose your Action** and then choose the corresponding identifiers under **Map the Fields**. You can choose one of the following actions as per your requirement. Based on the action you choose, the [Output Identifiers](https://docs.zeotap.com/articles/segment-customer/choose-the-output-identifiers) that are accepted by the platform such as, MAIDs, Custom ID, Install ID are displayed. Here, you can map the respective Catalogue fields to the Destination fields.
i. Choose **Send Advertising IDs to Batch** to send advertising identifiers, such as MAIDs, to the Batch platform.
ii. Choose **Send Install IDs to Batch** to send Install IDs generated by Batch when a new user is created in the Batch application.
* Ensure all Install IDs are ingested into Zeotap before using **Send Install Ids to Batch** as an action.
* Ensure that the identifiers are sent to Batch in the following format only:
```bash theme={null}
Test_-_Batch_Send_Custom_IDs_1562_install_ids for Install IDs
Test_-_Batch_Send_Custom_IDs_1563_advertising_ids for Advertiser IDs.
```
iii. Choose **Send Custom IDs to Batch** to send custom identifiers of your choice to Batch.
iv. Choose **Send attributes to Batch** to send attributes such as First Name, Last Name, Email Address, Gender, Age, and others to Batch. Ensure that you have created the attribute in batch before using it in Zeotap CDP.
b. Once the mapping is complete, click **Create Destination**. The created Destination then gets listed in the **Audiences** application, which can be linked to an Audience/segment. Ensure that you link only one Destination at a time to avoid activation issues.
 ## View Pushed Audiences on Batch Dashboard
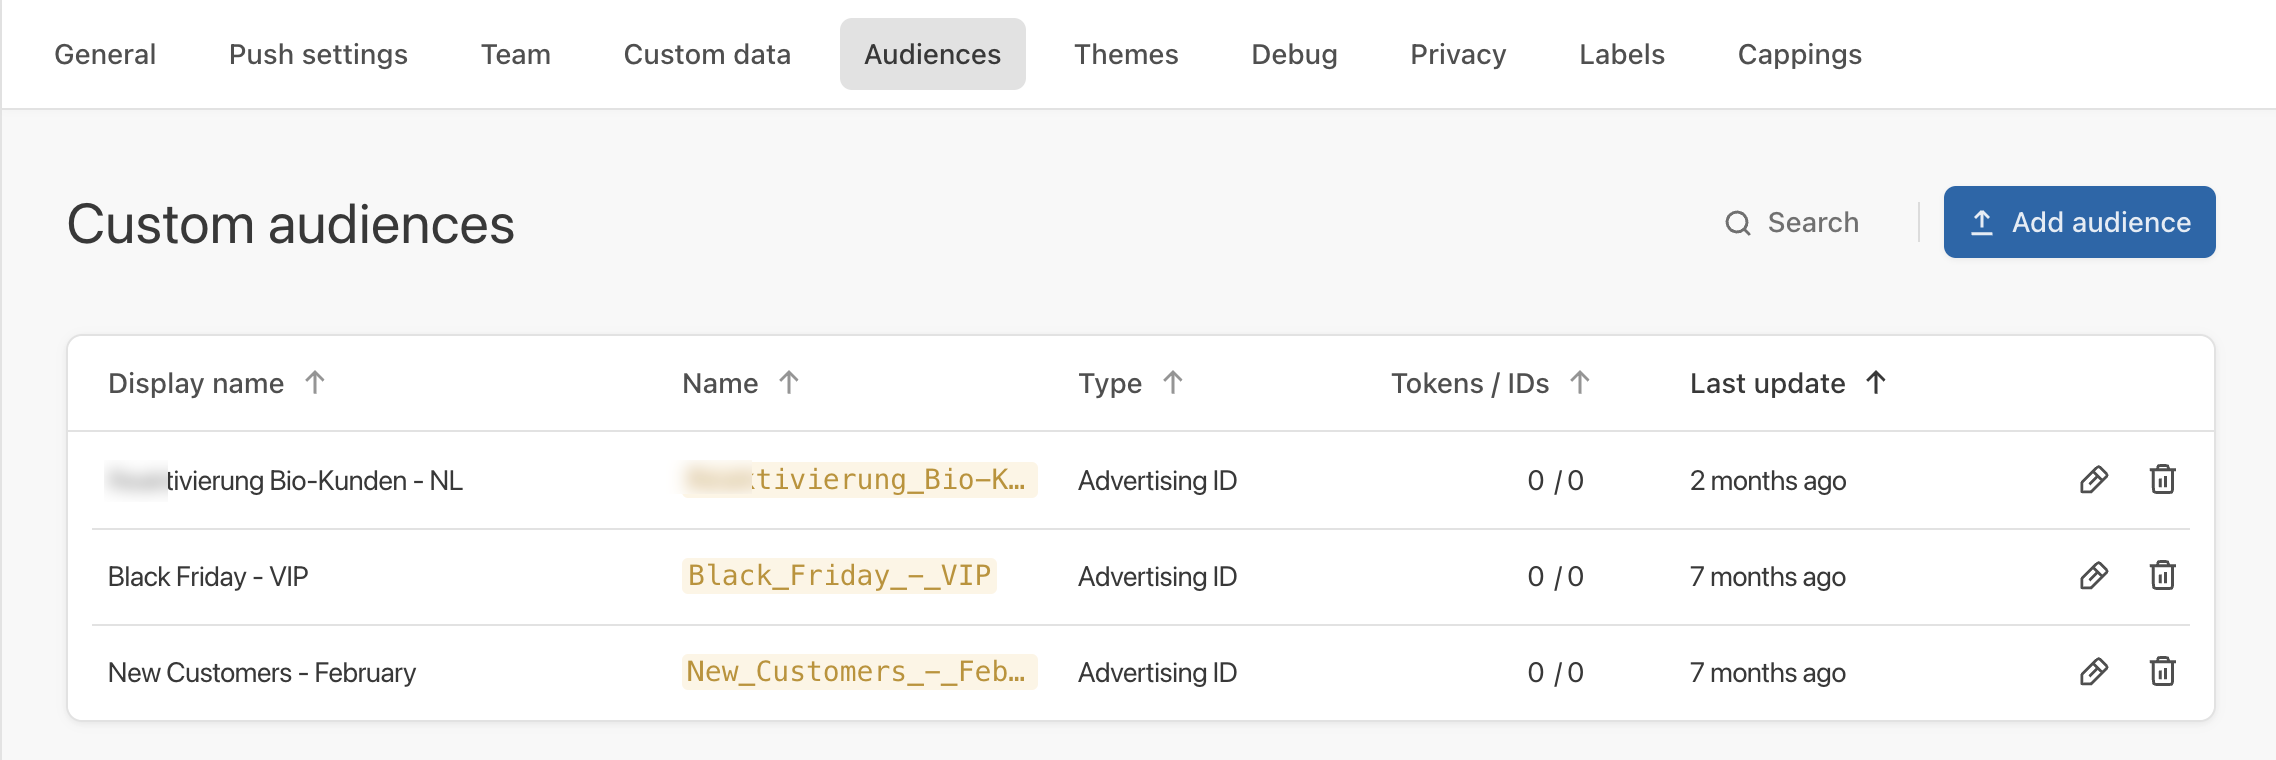
The first-party and third-party audiences (segments) pushed by the Zeotap CDP appear on the Batch dashboard under the **Audiences** tab as shown in the image below.
**Note:**
The tokens are provided by Batch or the integrated mobile application. Currently, Zeotap does not support these tokens. Zeotap only supports MAIDs for this integration. Therefore, under the Tokens/IDs column, you can only find values for IDs.
## View Pushed Audiences on Batch Dashboard
The first-party and third-party audiences (segments) pushed by the Zeotap CDP appear on the Batch dashboard under the **Audiences** tab as shown in the image below.
**Note:**
The tokens are provided by Batch or the integrated mobile application. Currently, Zeotap does not support these tokens. Zeotap only supports MAIDs for this integration. Therefore, under the Tokens/IDs column, you can only find values for IDs.
 **Note:**
Below are some important links from Batch documentation.
* To learn more about which targeting options you can use to segment your user base, click [here](https://help.batch.com/en/articles/3344016-which-targeting-options-can-i-use-to-segment-my-user-base).
* To learn more about how to exclude a custom audience from your targeting, click [here](https://help.batch.com/en/articles/3011024-how-to-exclude-a-custom-audience-from-my-targeting).
## User Disqualification from Audiences in Zeotap CDP
This integration supports user disqualification from audiences. That is, a user can be disqualified from an audience (segment) for various reasons, such as not meeting audience criteria, consent requirements or other conditions set for a particular audience.
* When a user disqualifies from an audience, Zeotap CDP initiates a user deletion request in the next refresh cycle. These requests are sent to the audiences linked to the specific destination.
* The disqualified users are excluded from the audiences based on the configured refresh frequency for a particular audience.
* User disqualification is a programmatic process that works automatically. You do not need to specify anything to trigger the disqualification and exclusion of users from audiences.
**Note:**
Below are some important links from Batch documentation.
* To learn more about which targeting options you can use to segment your user base, click [here](https://help.batch.com/en/articles/3344016-which-targeting-options-can-i-use-to-segment-my-user-base).
* To learn more about how to exclude a custom audience from your targeting, click [here](https://help.batch.com/en/articles/3011024-how-to-exclude-a-custom-audience-from-my-targeting).
## User Disqualification from Audiences in Zeotap CDP
This integration supports user disqualification from audiences. That is, a user can be disqualified from an audience (segment) for various reasons, such as not meeting audience criteria, consent requirements or other conditions set for a particular audience.
* When a user disqualifies from an audience, Zeotap CDP initiates a user deletion request in the next refresh cycle. These requests are sent to the audiences linked to the specific destination.
* The disqualified users are excluded from the audiences based on the configured refresh frequency for a particular audience.
* User disqualification is a programmatic process that works automatically. You do not need to specify anything to trigger the disqualification and exclusion of users from audiences.