> ## Documentation Index
> Fetch the complete documentation index at: https://docs.zeotap.com/llms.txt
> Use this file to discover all available pages before exploring further.
# Appendix for SFMC Journey Builder
You must have an Admin account to be able to access all the features of Salesforce Marketing Cloud Journey Builder. To proceed with the integration, log into the Salesforce console and start by creating a package.
## Create a Package
For this integration, a new role has to be created. Perform the following steps to create the new package:
Navigate to **Settings** > **Setup** > **Apps** > **Installed** **Packages**. The existing list of packages is displayed.
Click **New**.
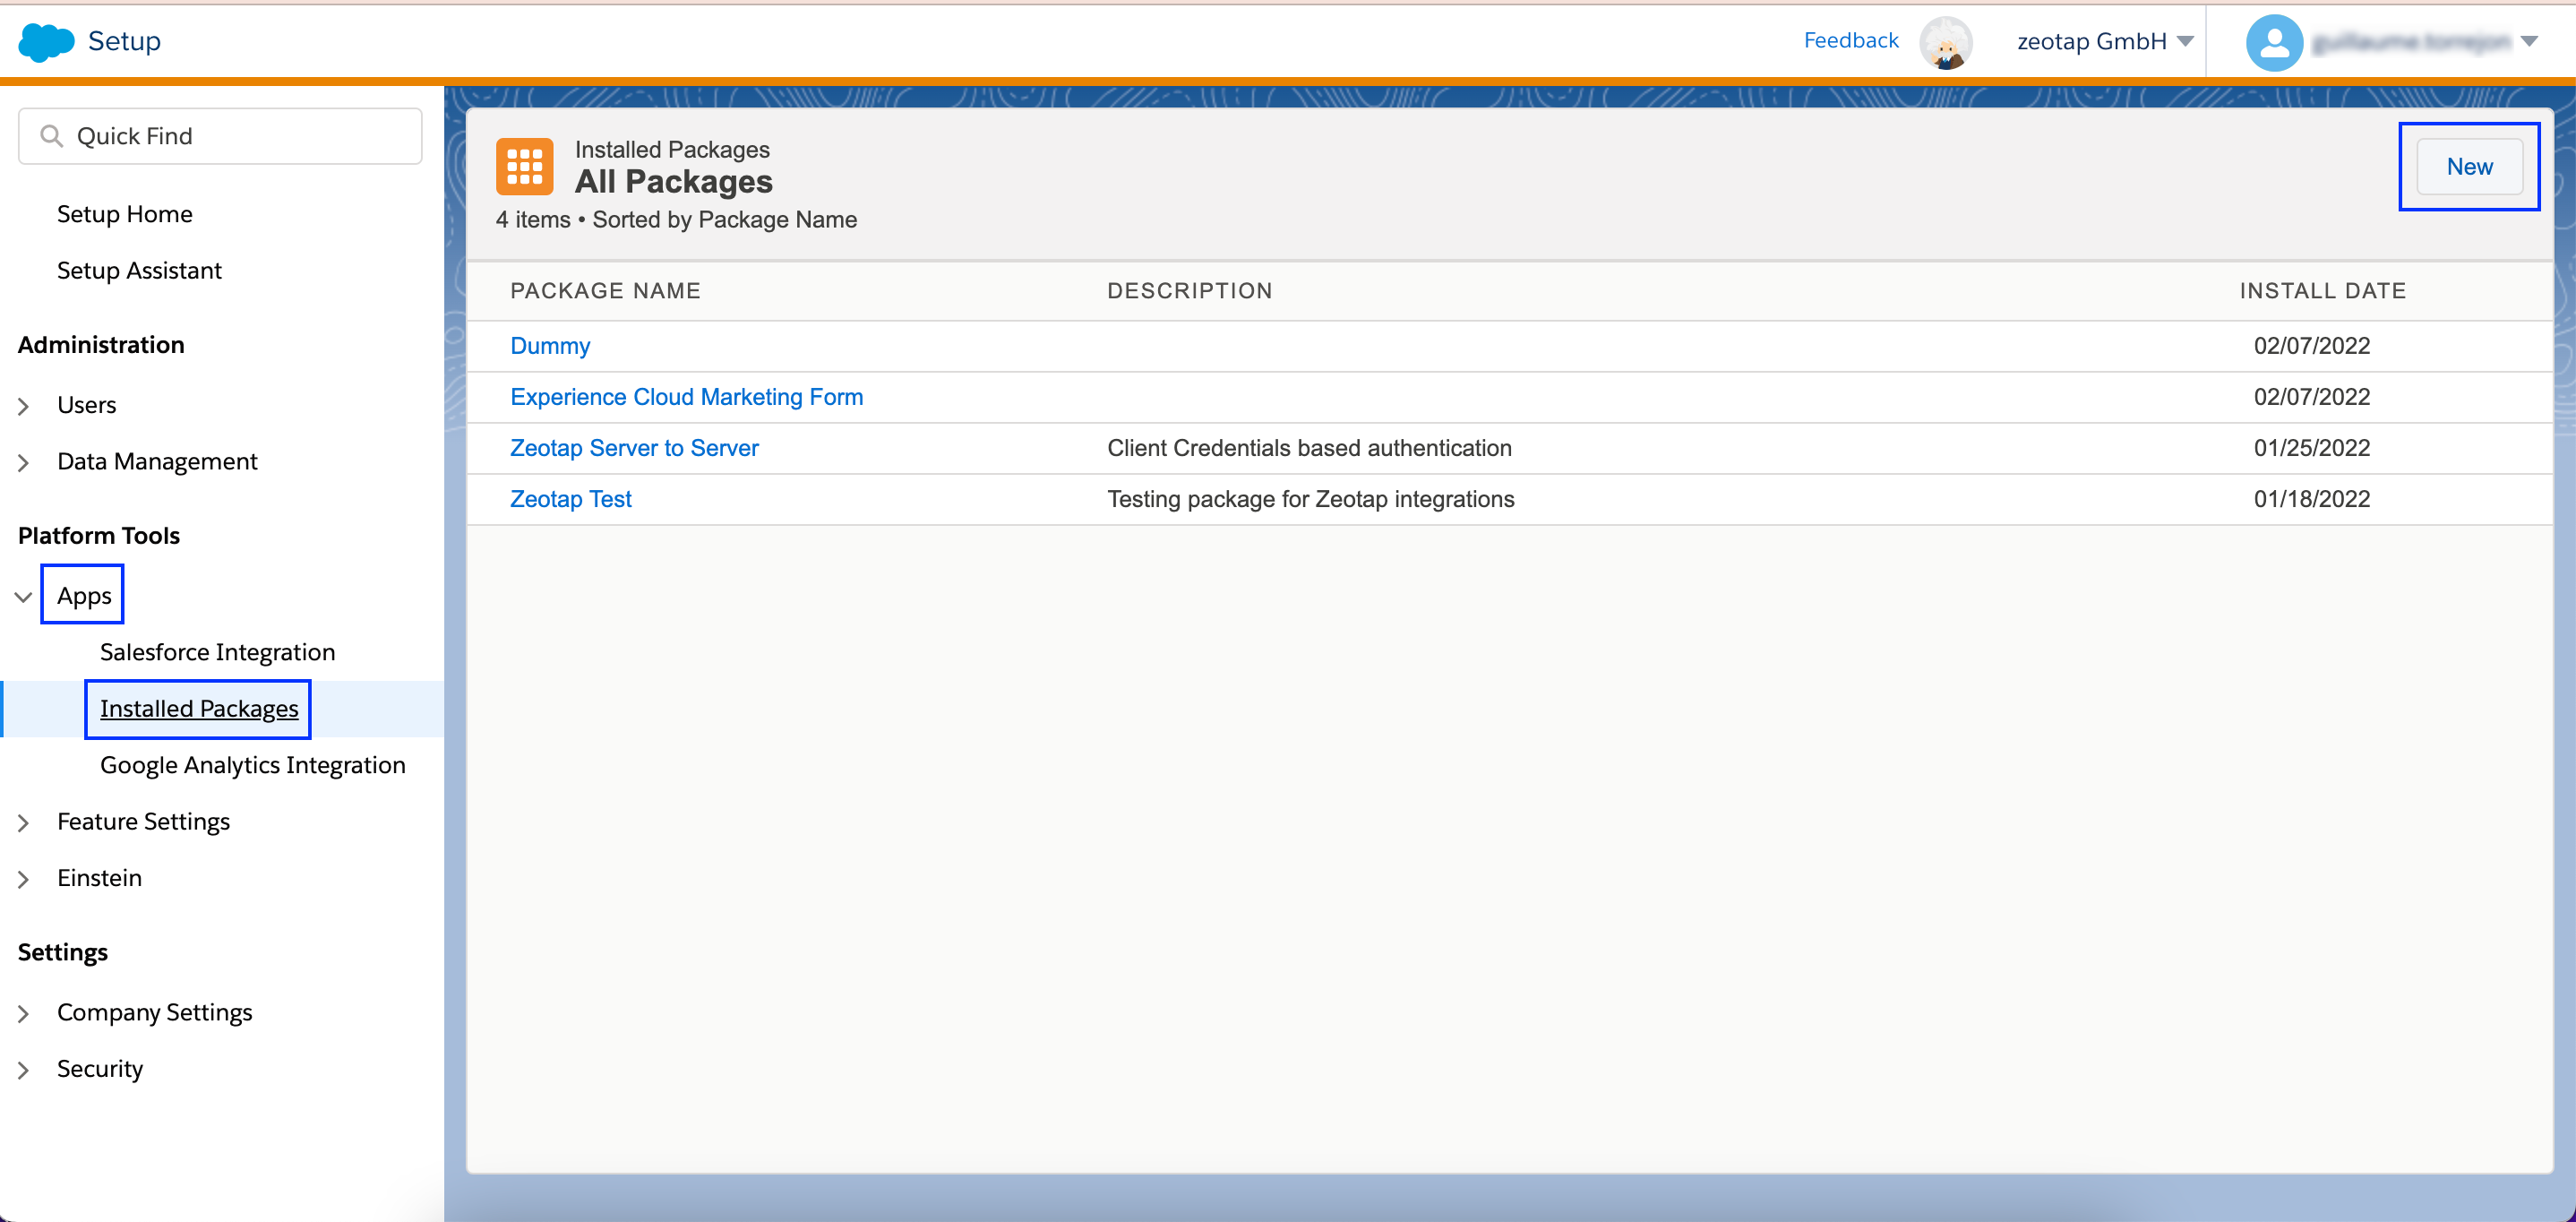 Enter a name for the package and save the changes. We recommend to include the word **Zeotap** in the package name for easy identification.
Click the package you created, and navigate to **Add Component**.
Enter a name for the package and save the changes. We recommend to include the word **Zeotap** in the package name for easy identification.
Click the package you created, and navigate to **Add Component**.
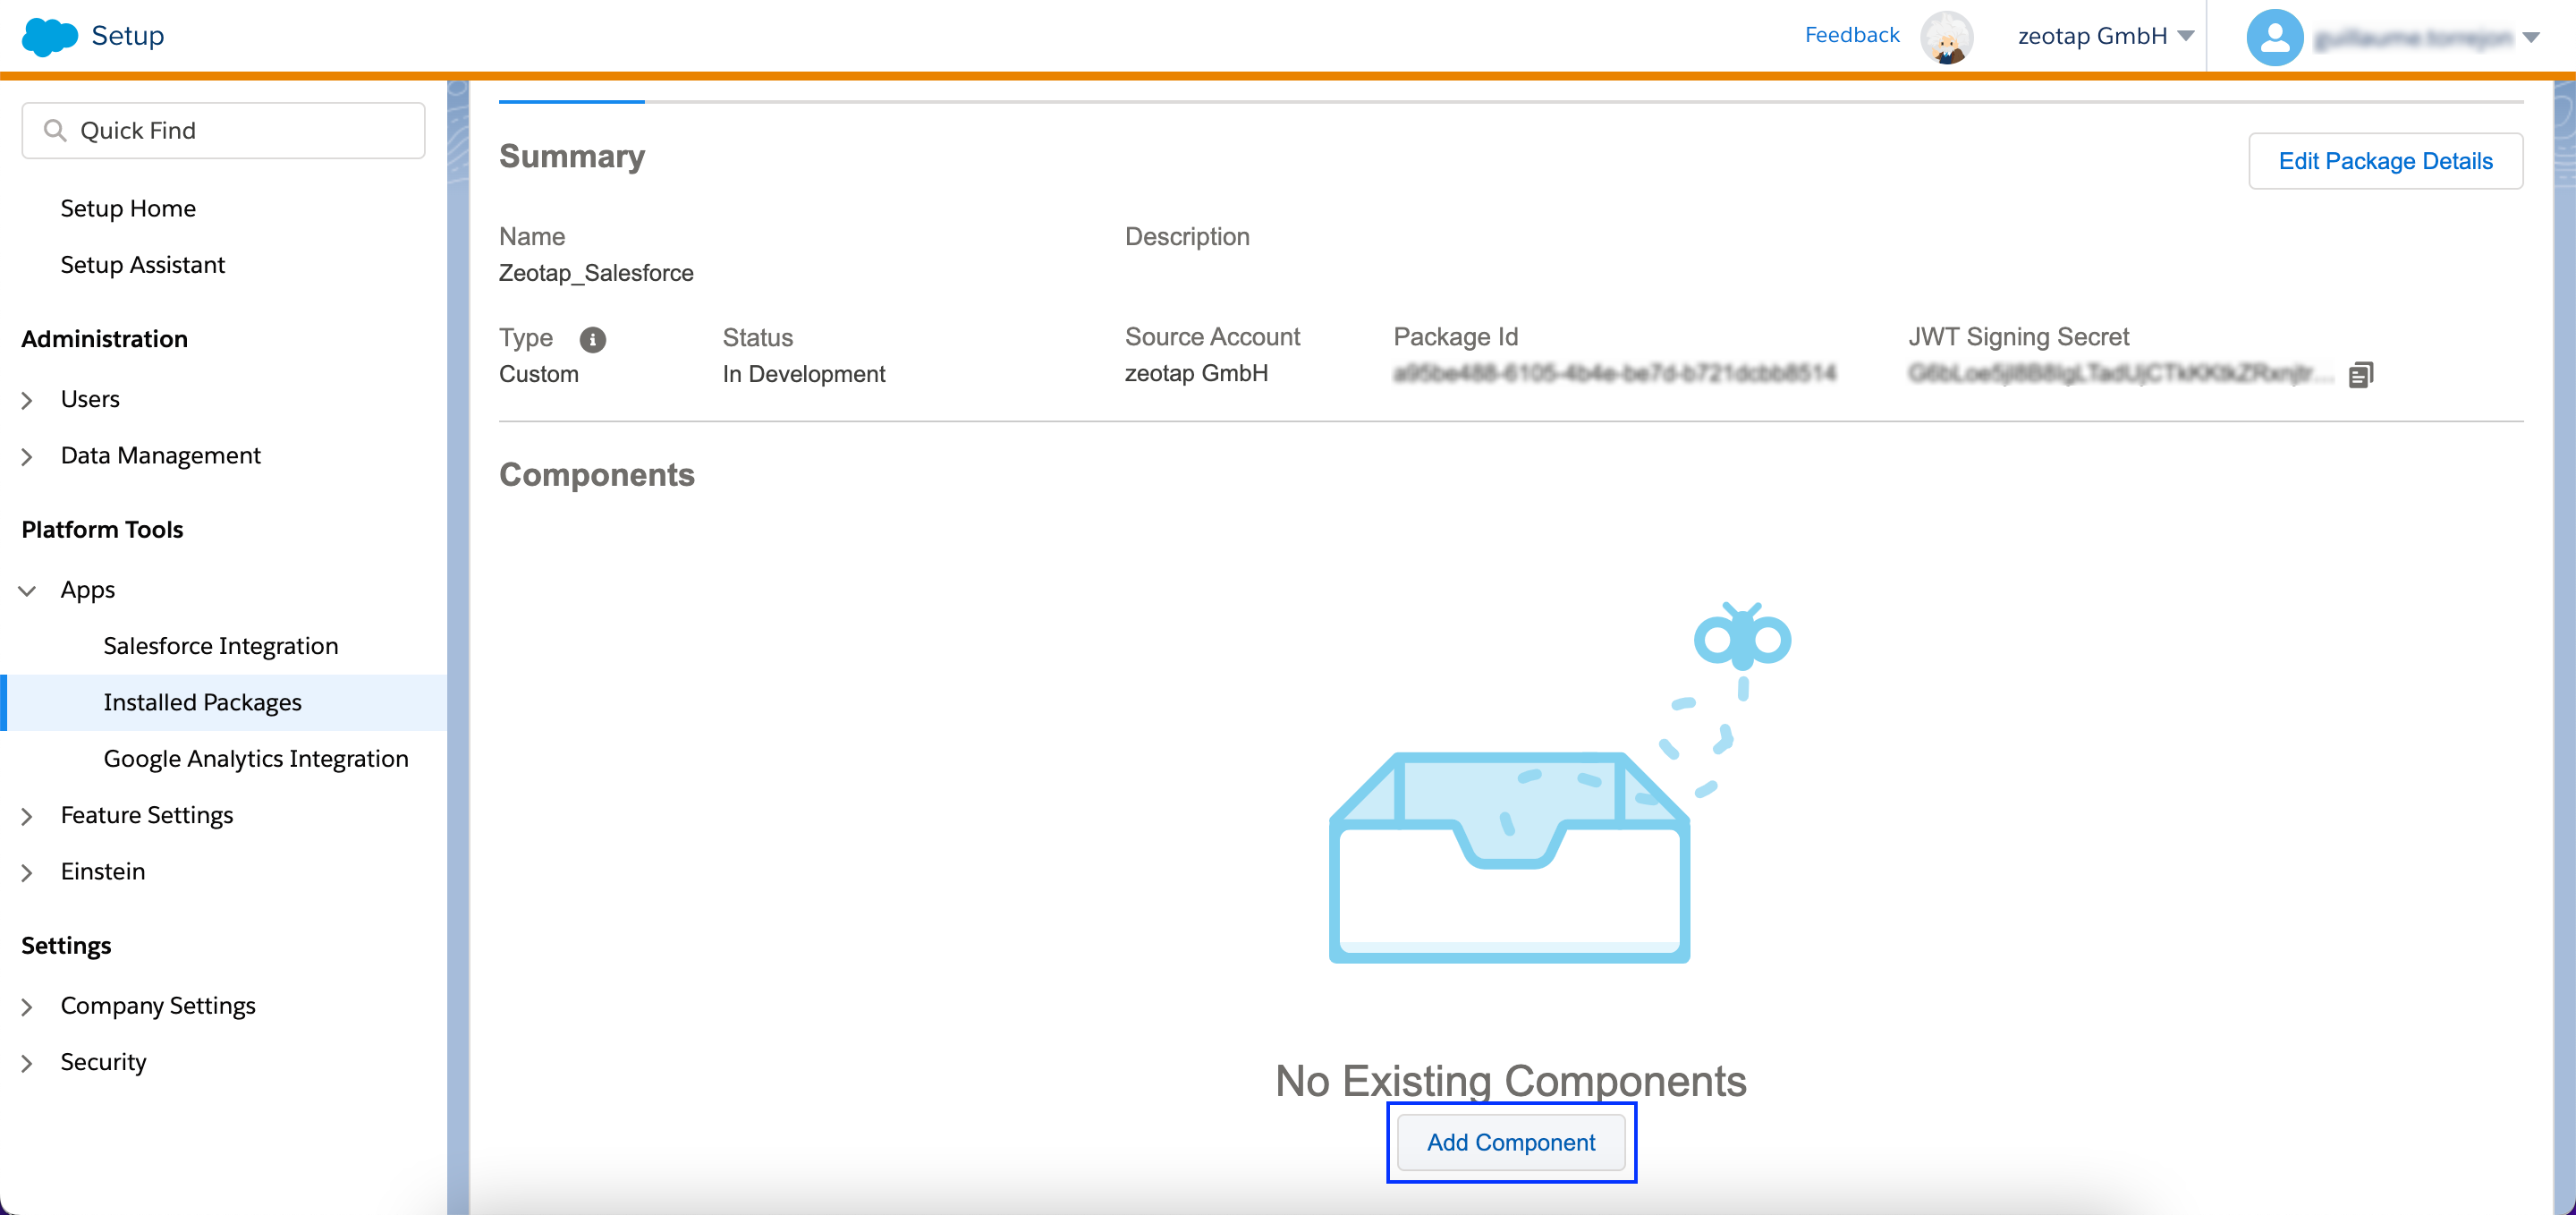 Choose **API Integration** as the Component Type.
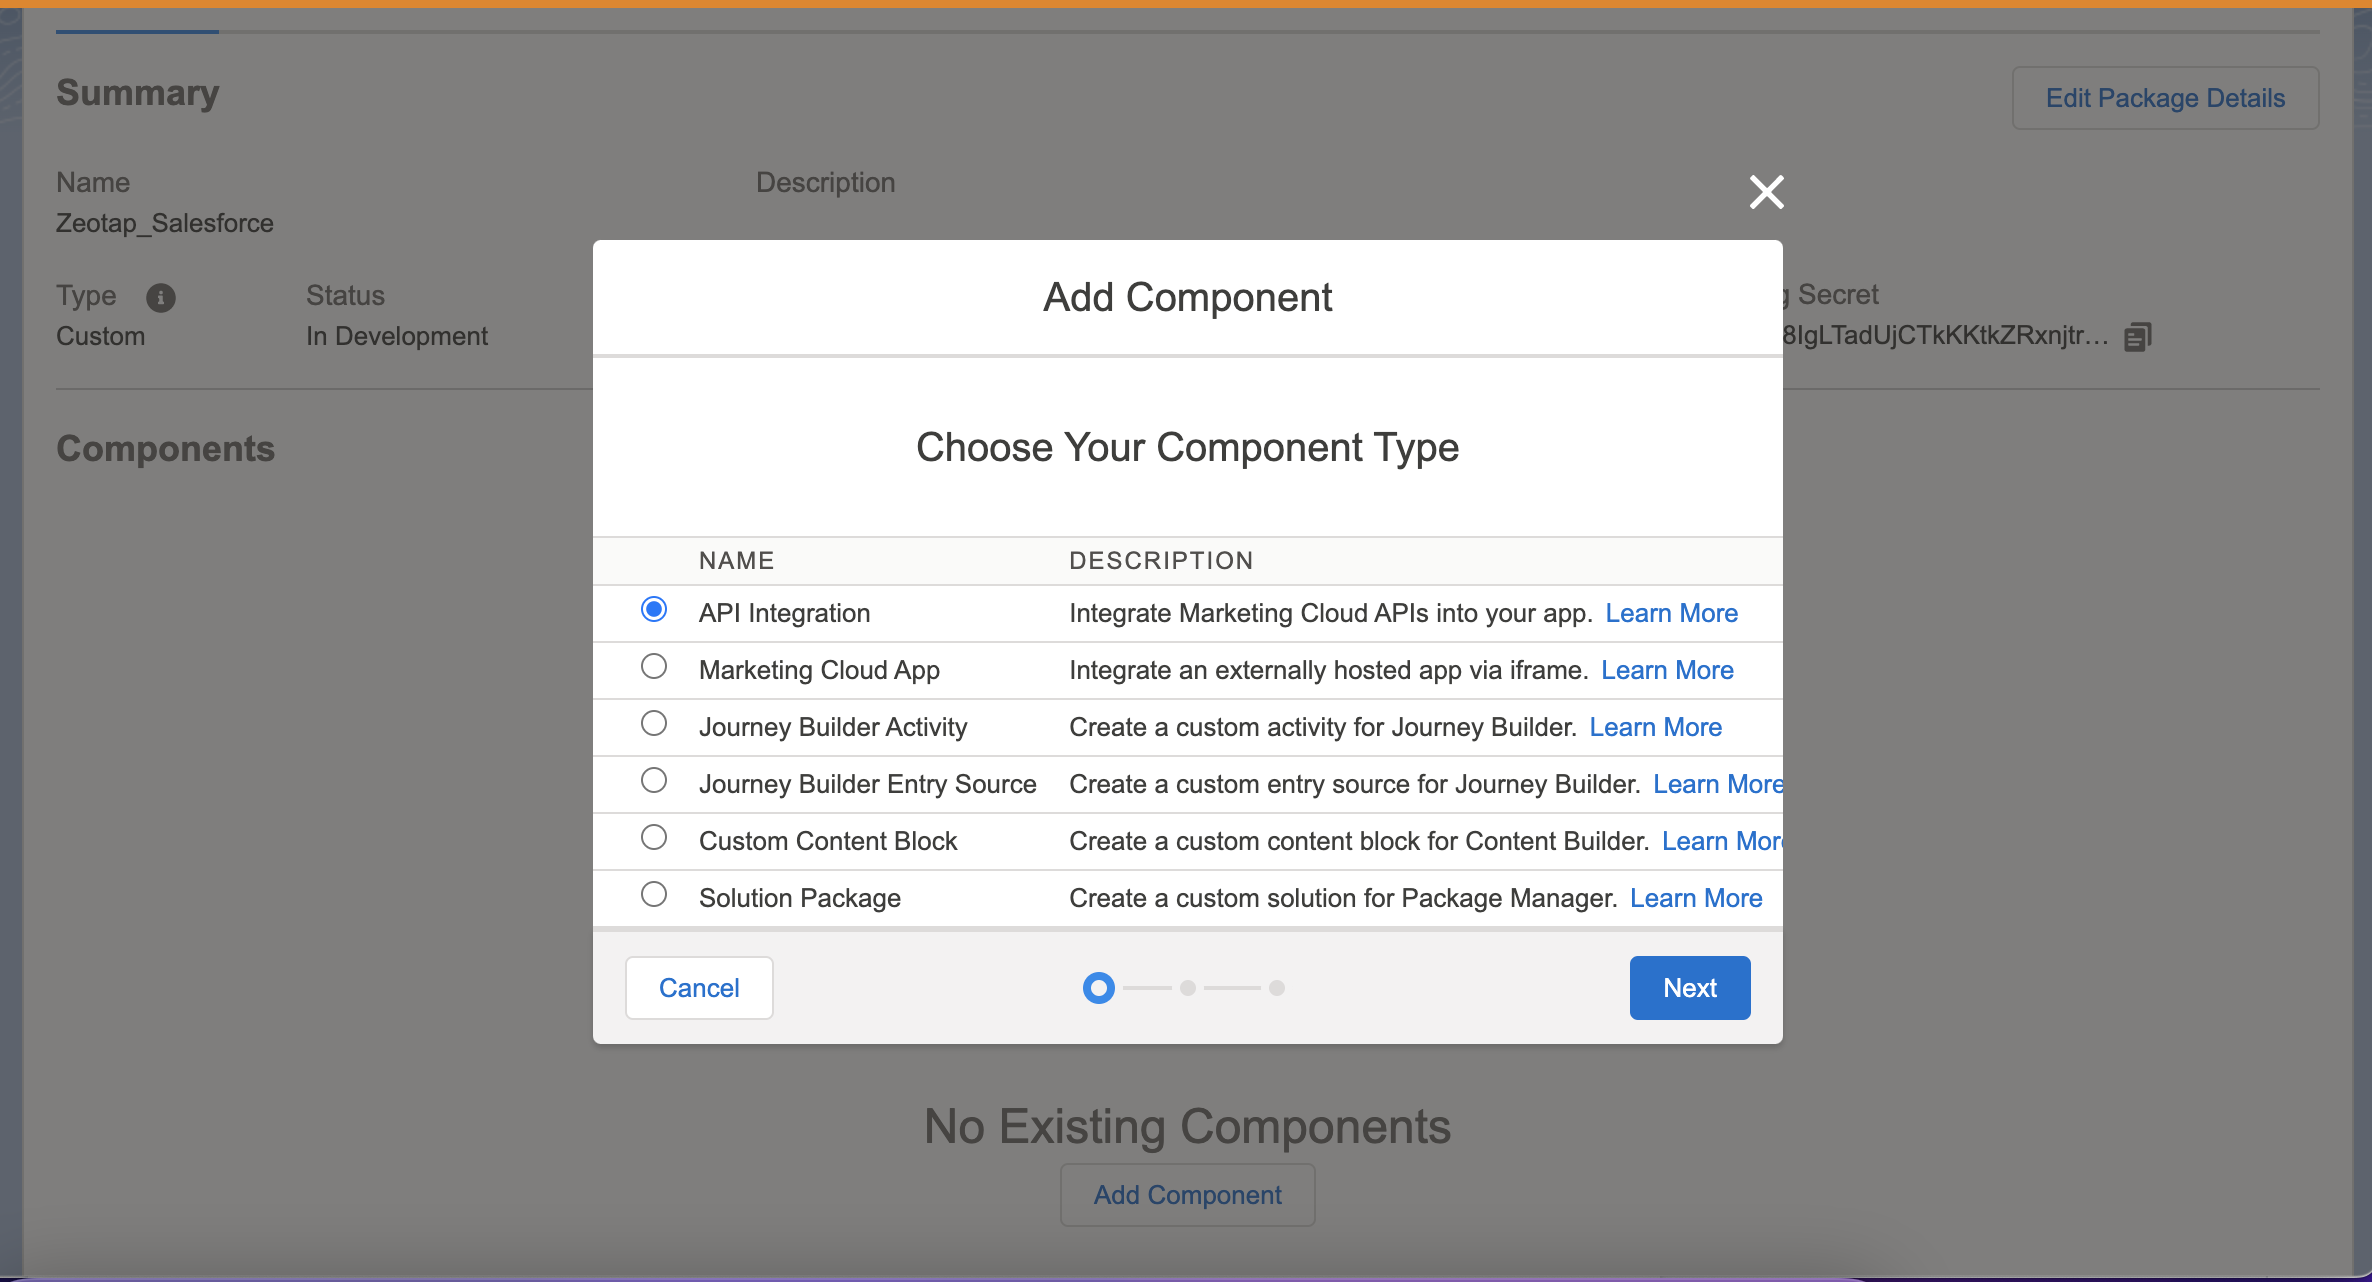 Click **Next**.
Choose **Server-to-Server** as the Integration Type.
Click **Next**.
Choose **Server-to-Server** as the Integration Type.
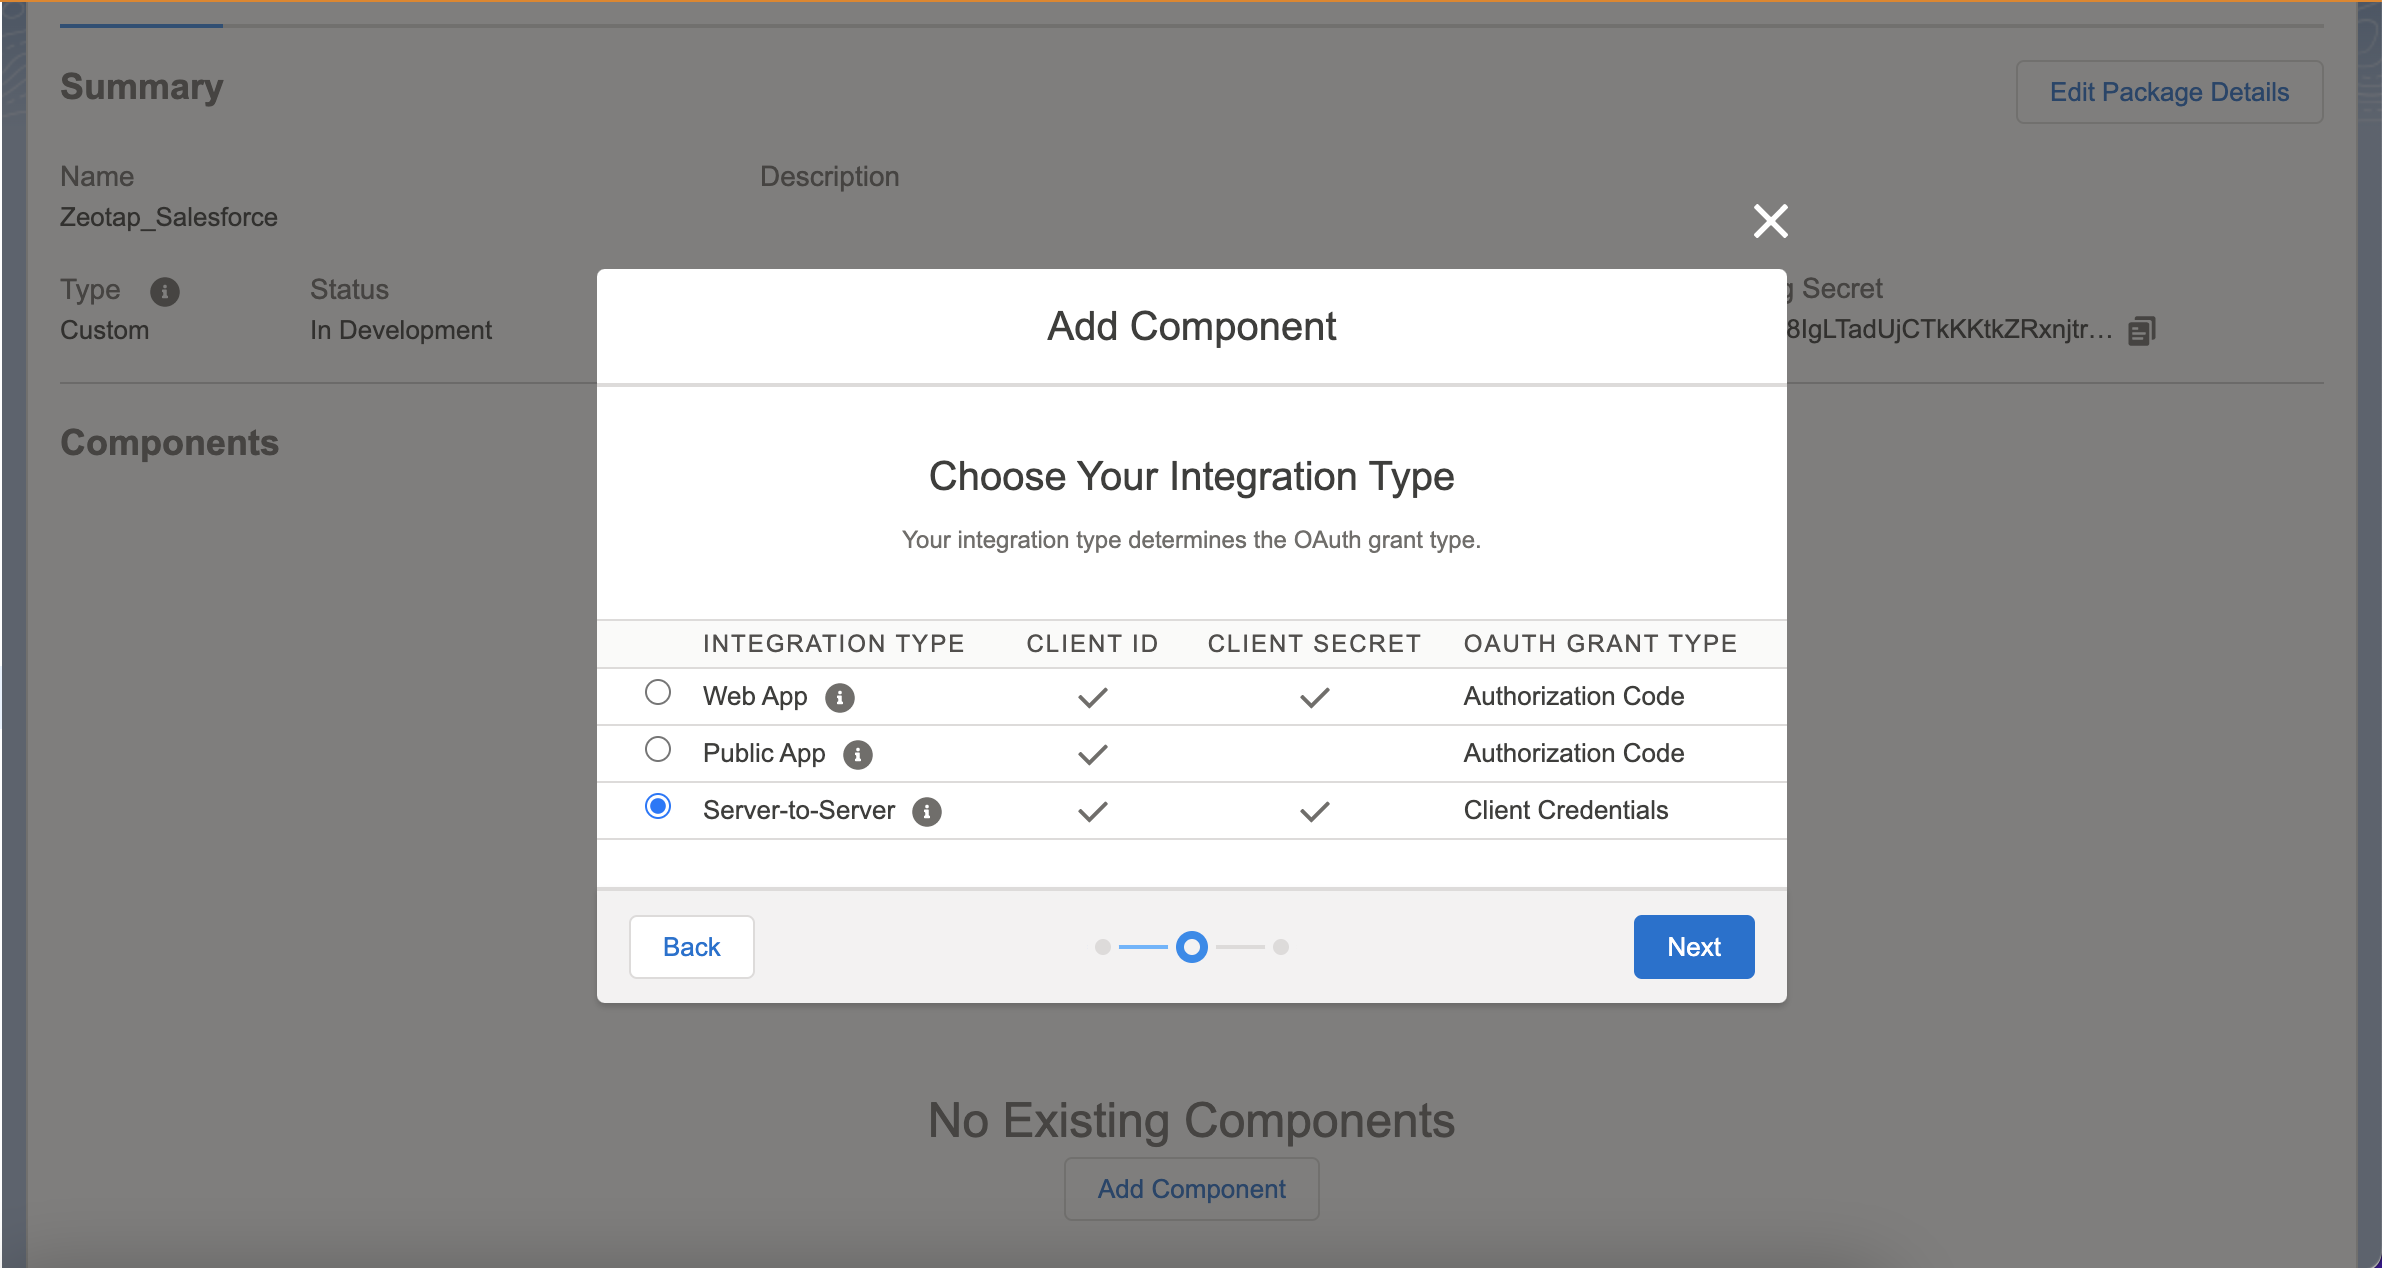 Click **Next**.
In the new window that appears, select the following permissions:
a. Check "READ" under **Contacts** > **List and Subscribers** section.
Click **Next**.
In the new window that appears, select the following permissions:
a. Check "READ" under **Contacts** > **List and Subscribers** section.
b. Check "READ" under **Automations** > **Journey builder** section.
**Note:**
Note that failing to add these permissions, may lead SFMC to send an `Insufficient Privileges error`.
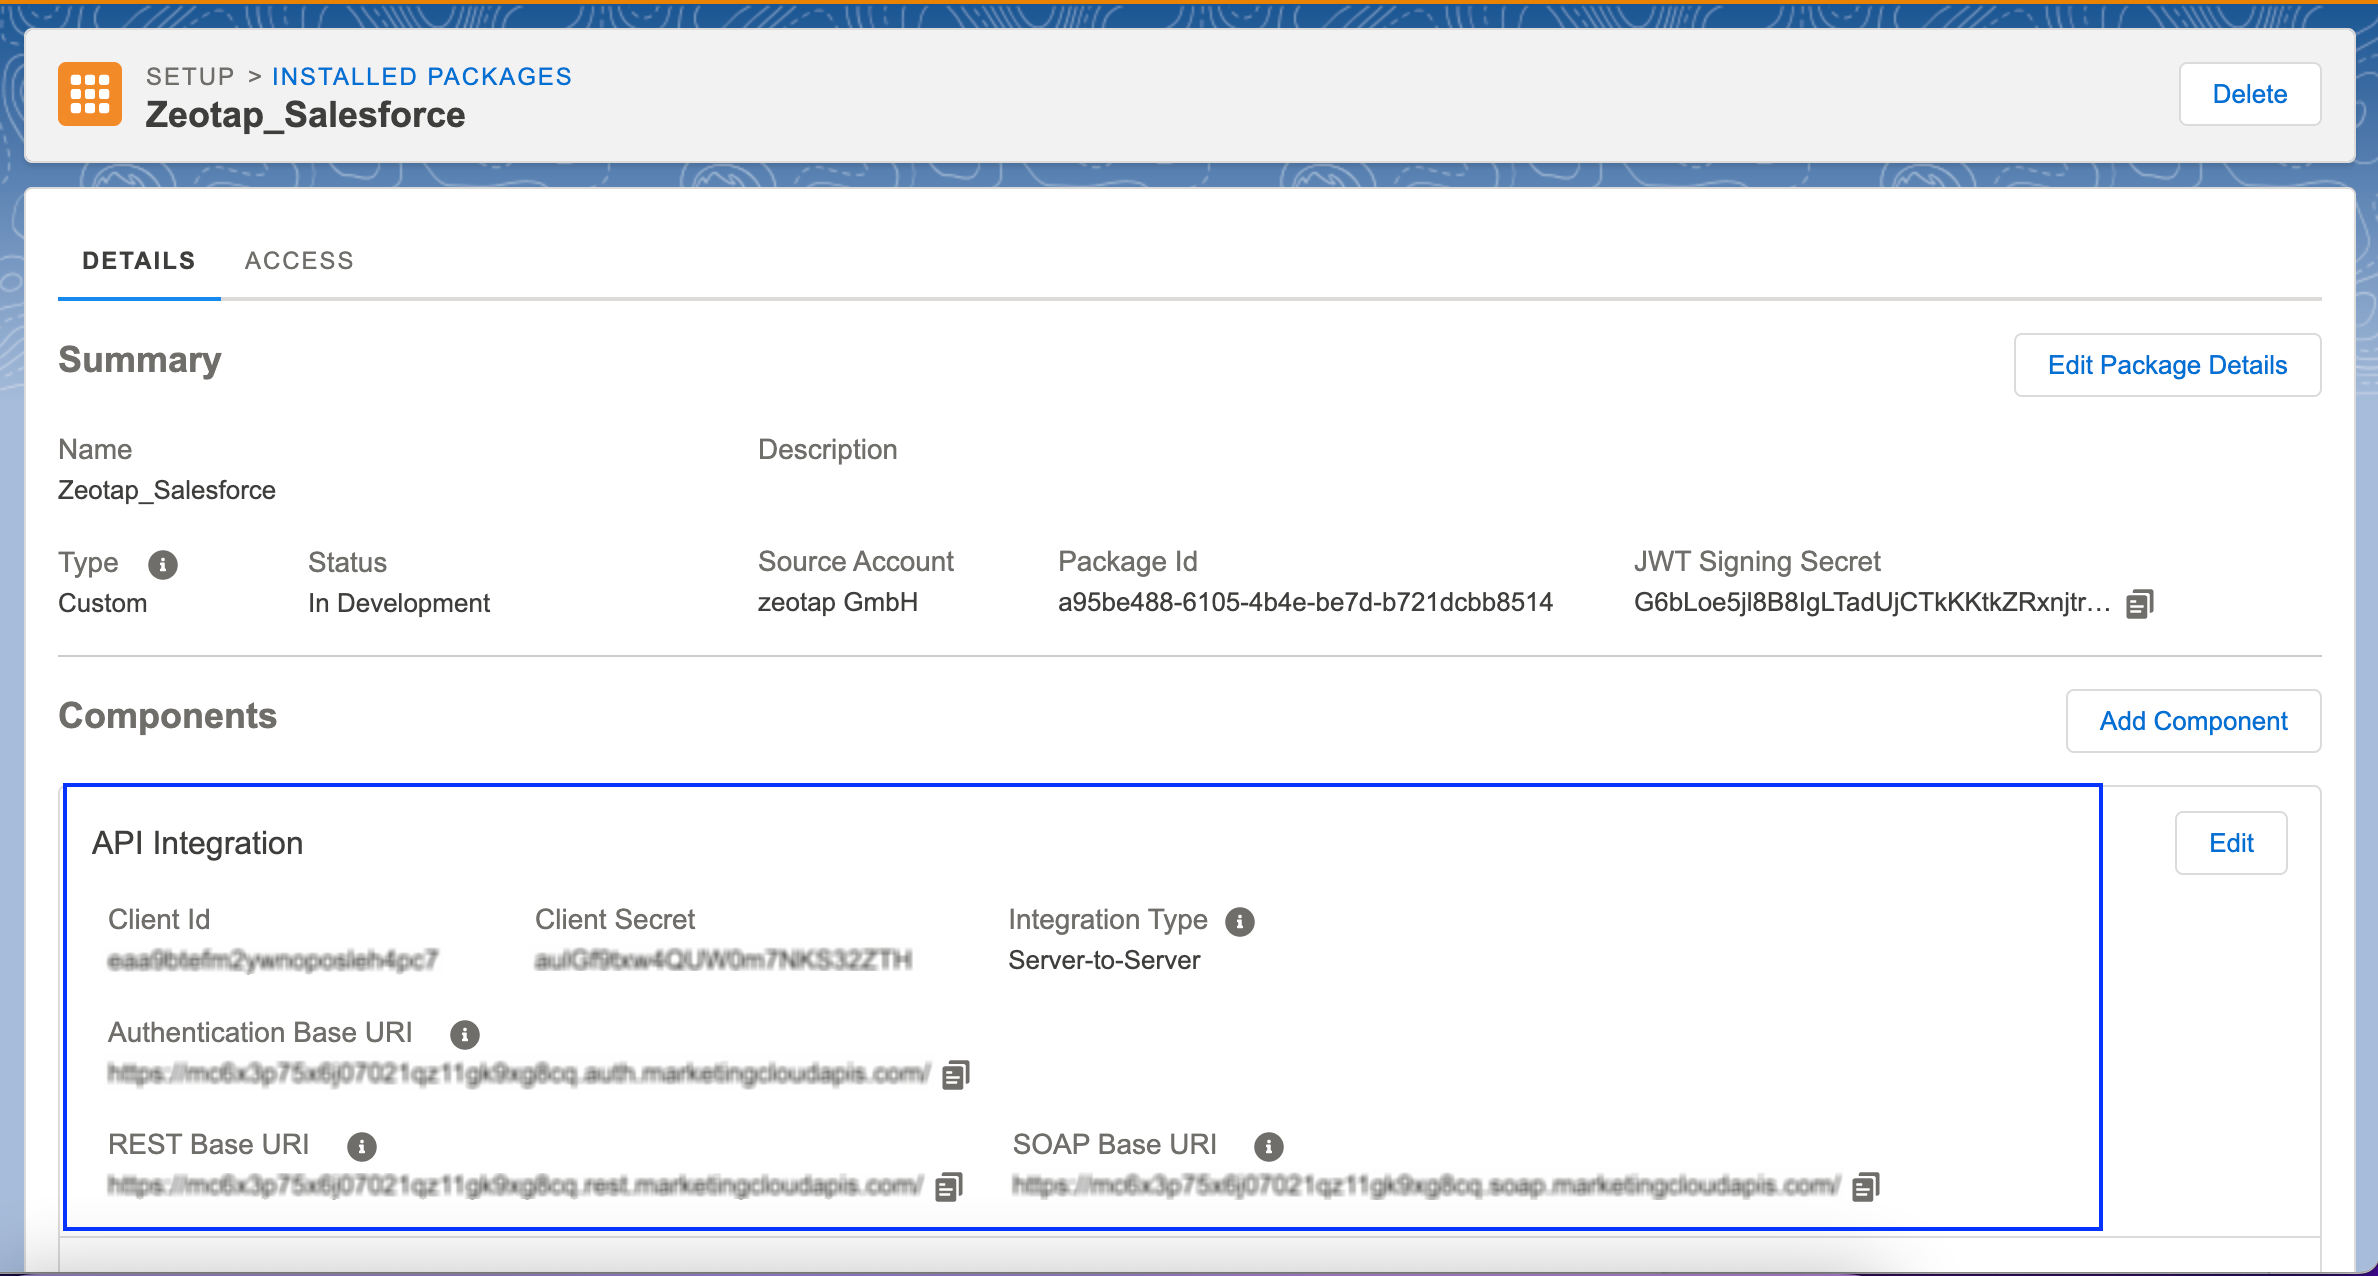
Click **Save**. The API Integration details are visible under the package summary.
 ## Create a Data Extension Table
To send data to the Data Extension table of Salesforce Marketing Cloud, start by creating a data extension table. To do so, perform the following steps:
Navigate to **Audience Builder > Contact Builder > Data Extensions** in the Salesforce Marketing Cloud console.
Click **Create**.
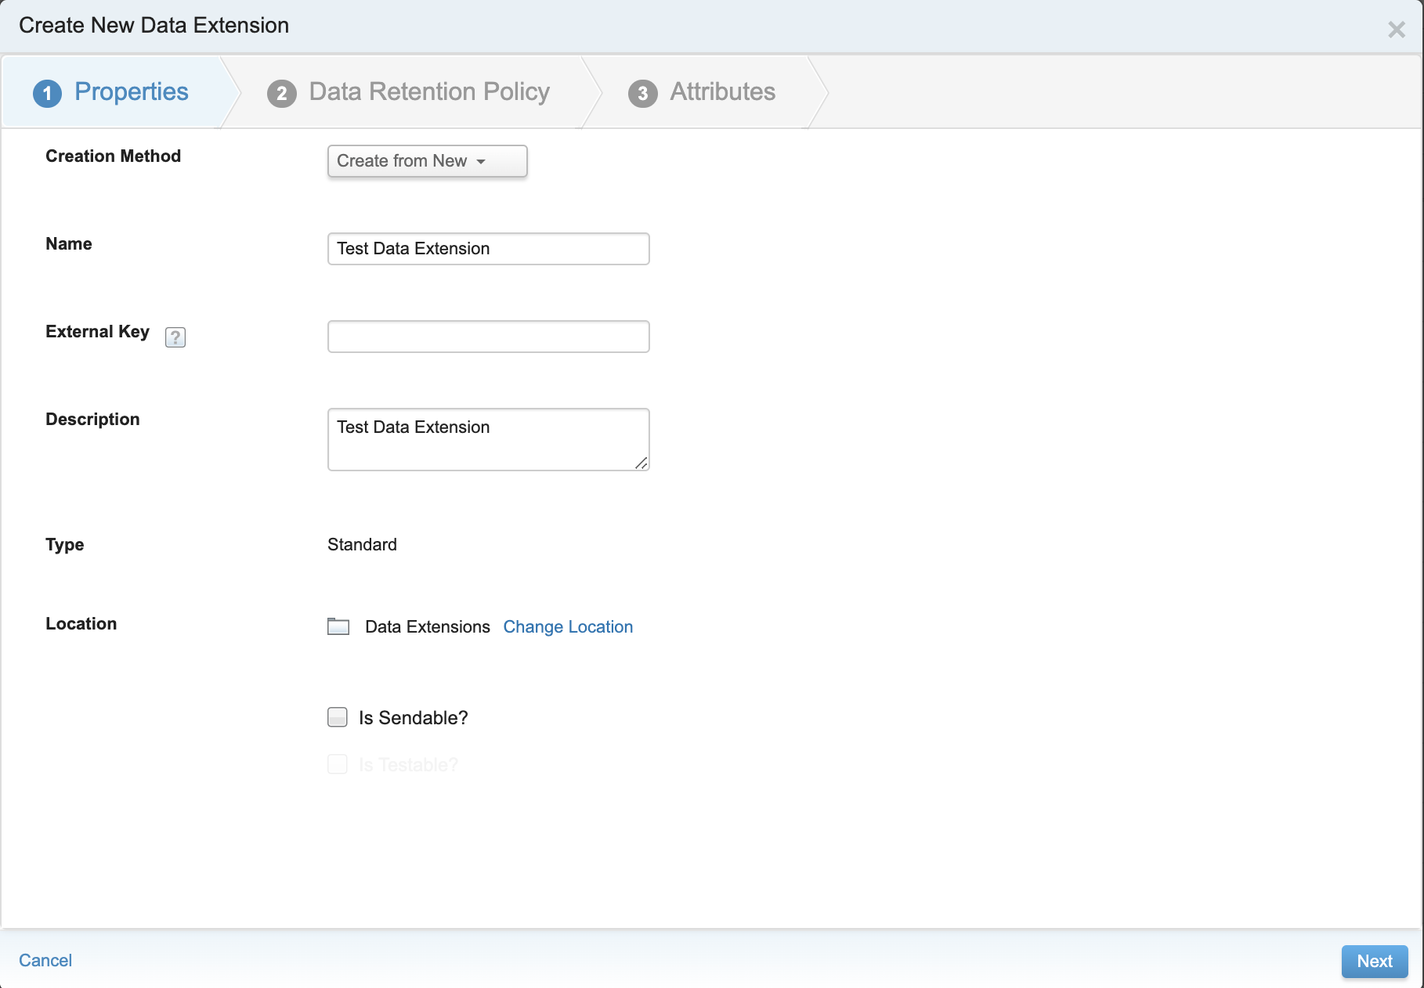
Under **Properties** section, enter the following details:
## Create a Data Extension Table
To send data to the Data Extension table of Salesforce Marketing Cloud, start by creating a data extension table. To do so, perform the following steps:
Navigate to **Audience Builder > Contact Builder > Data Extensions** in the Salesforce Marketing Cloud console.
Click **Create**.
Under **Properties** section, enter the following details:
a. Use the drop-down menu to choose **Create from New** for **Creation Method**.
b. Provide a suitable **Name** for the table and relevant **Description** in the respective fields.
c. For **External Key**, use the system-generated key if the external key is not provided.
d. Currently, only **Standard** is supported as the **Type** (Data Extension).
e. Select the **Is Sendable?** checkbox to enable sending messages to this data extension.
 Under **Data Retention Policy**, enter the required **Data Extension** details.
Under **Attributes**, depending on the downstream system that you wish to use for activating your audience, configure as below.
a. If you wish to use the **CONNECT** module for activating your audience (segment), then perform the following steps:
Under **Data Retention Policy**, enter the required **Data Extension** details.
Under **Attributes**, depending on the downstream system that you wish to use for activating your audience, configure as below.
a. If you wish to use the **CONNECT** module for activating your audience (segment), then perform the following steps:
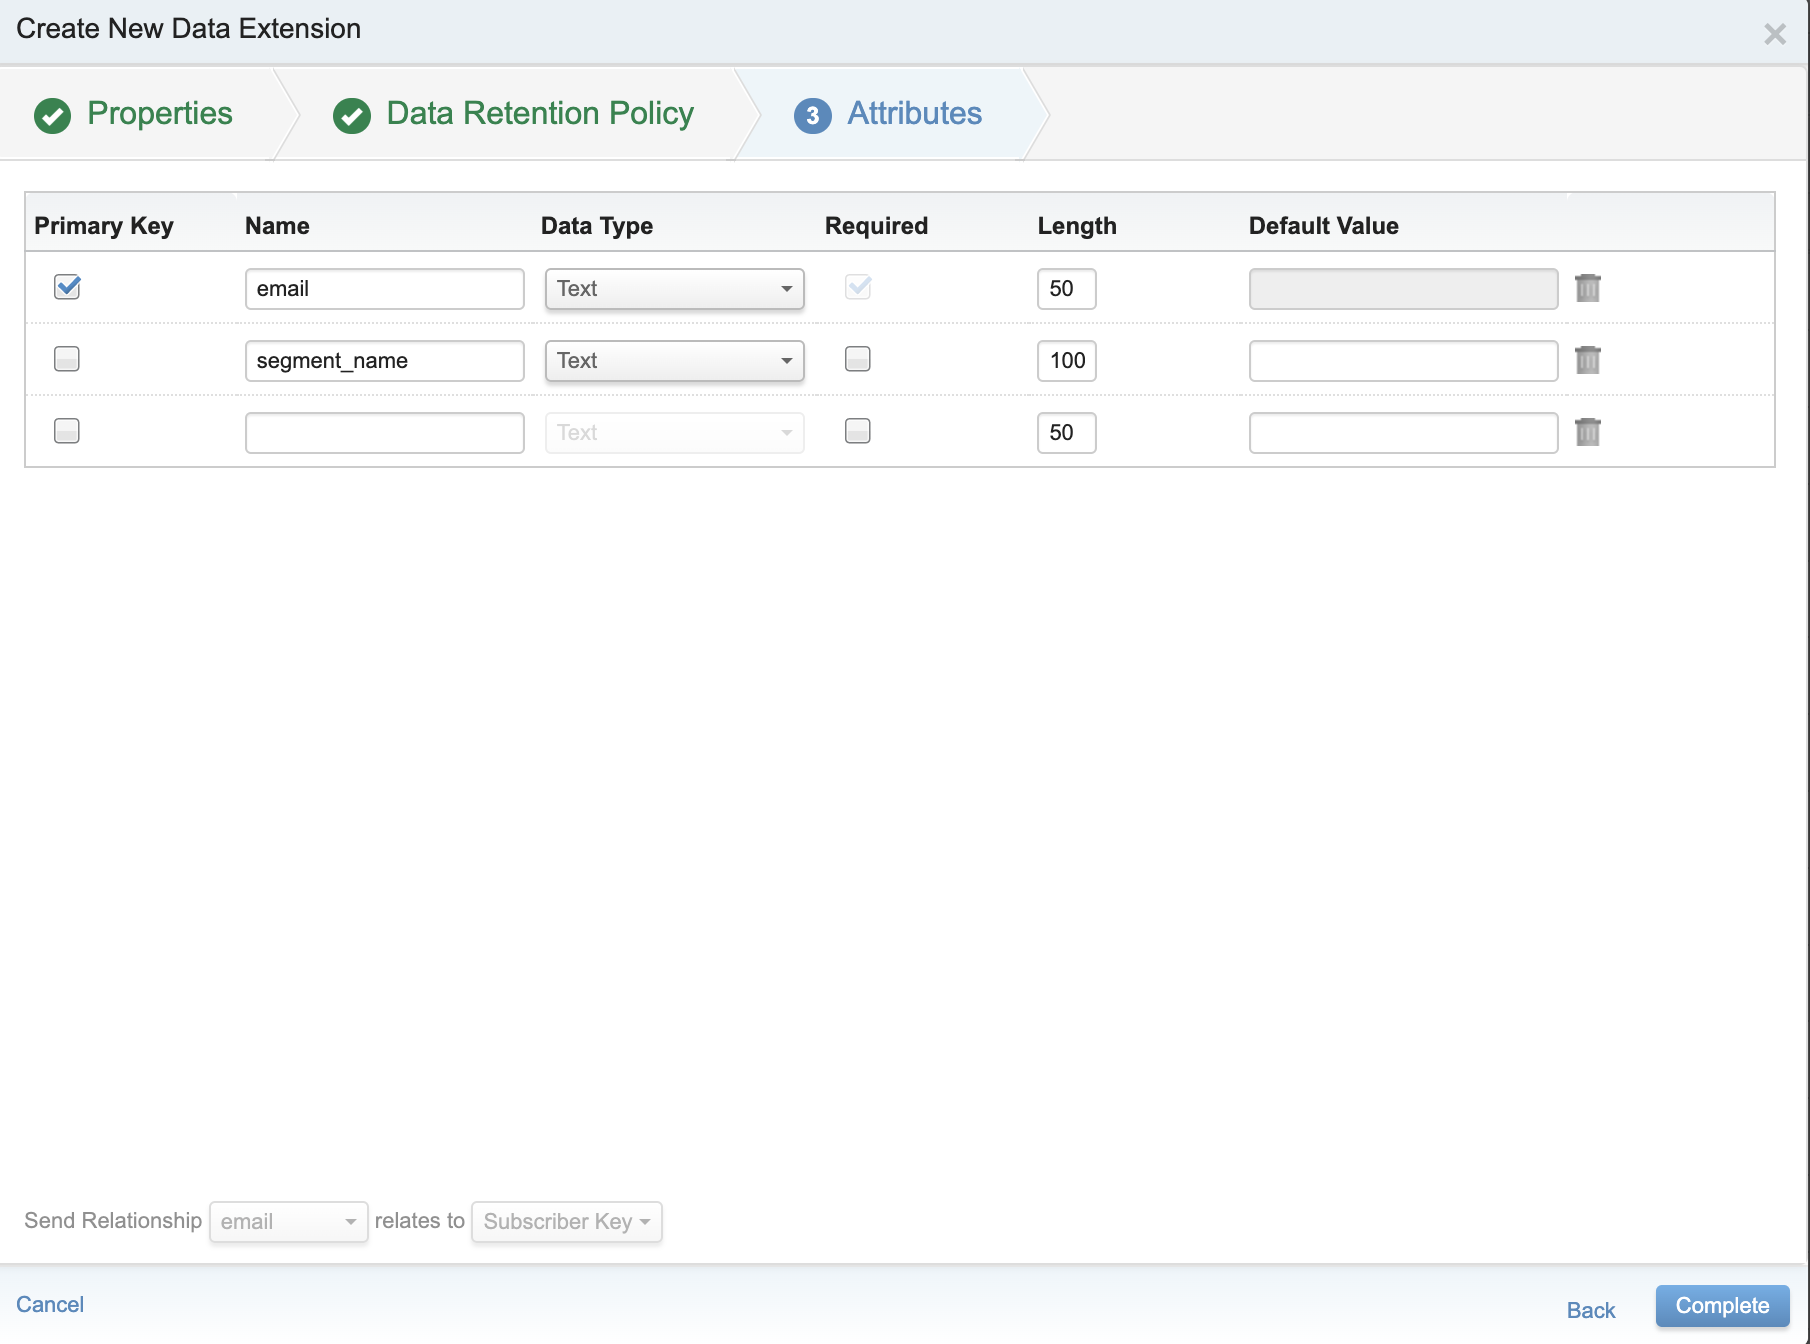
i. Zeotap supports data syncing to only two columns - **email** and **segment\_name**. Ensure that you add these two columns in the table.
ii. Configure email as the **Primary Key** using the check box provided.
iii. Enter the **Length** details based on the size of the **emails** and **segment\_name** that the customer sends.
iv. Review all the fields and Click **Complete.**
 Review the fields and click **Complete**.
**Note:**
Ensure that the **Name** of all the attributes provided while creating the data extension table should be exactly same as the Destination field name under **Map the fields** when creating the Destination. For example, if you create email as a column in the data extension, then make sure you add the Destination field as email for which you would like to send the email data from Zeotap CDP.
Review the fields and click **Complete**.
**Note:**
Ensure that the **Name** of all the attributes provided while creating the data extension table should be exactly same as the Destination field name under **Map the fields** when creating the Destination. For example, if you create email as a column in the data extension, then make sure you add the Destination field as email for which you would like to send the email data from Zeotap CDP.