> ## Documentation Index
> Fetch the complete documentation index at: https://docs.zeotap.com/llms.txt
> Use this file to discover all available pages before exploring further.
# Apache Kafka
## Overview
Apache Kafka is an open-source distributed event streaming platform used by thousands of companies for high-performance data pipelines, streaming analytics, data integration, and mission-critical applications. Integrated with Zeotap CDP, it allows you to efficiently send event information in real-time through our Journeys module for consumption in Kafka.
## Supported Identifiers/Attributes
This integration allows you to send any identifiers and attributes of your choice. However you must first configure the topic in your Kafka account along with its attributes, to send data from Zeotap CDP to Kafka.
## Prerequisites
Ensure that you obtain the following prerequisites before starting the integration:
* **Kafka Broker Host** – This is the hostname and port of the Kafka broker. This information is typically specified in the server.properties file under the listeners property in the Kafka installation directory or provided by the administrator managing the Kafka cluster. For example, broker1.example.com:9092.
* **Broker API Key** – This is the API key used to authenticate with the Kafka broker. This credential is usually obtained from the administrator or through the Kafka management interface of the cloud provider, such as *Confluent Cloud* or *AWS MSK*.
* **Broker API Secret** – This is the API secret paired with the Broker API Key for authentication. This is also provided by the administrator or available in the Kafka management interface of the cloud provider.
* **Data Format** – This specifies the format in which the data is sent from Zeotap CDP to Kafka. Currently, **AVRO** and **JSON** formats are supported. If you choose **AVRO**, then you need to provide the following additional details. **In addition, ensure that the fields defined as mandatory in your schema registry are mapped to valid columns that contain data, under Destination Mapping in Zeotap CDP. Otherwise, it might result in destination failure.**
* **Require for Schema Registry URL** – This is the endpoint URL of the Schema Registry service, available during setup or in the Kafka deployment's configuration settings. For Confluent Cloud, this information is listed in the "Schema Registry" section of the dashboard.
* **Schema Registry API Key** – This is the API key required to access the Schema Registry. This key can be obtained from the administrator or generated in the "API Keys" section of the Schema Registry management interface in Confluent Cloud.
* **Schema Registry API Secret** – This is the secret corresponding to the Schema Registry API Key, available in the same section as the API Key or provided by the administrator.
* **Topic Name** - This acts as a label for organising and identifying the grouped data in Kafka. Ensure that you configure the Topic in kafka along with its attributes, before using it in Zeotap CDP.
For example, if the Topic Name is "Topic 1", then the associated information grouped under it might include attributes such as First Name, Last Name and Email.
## Destination Setup
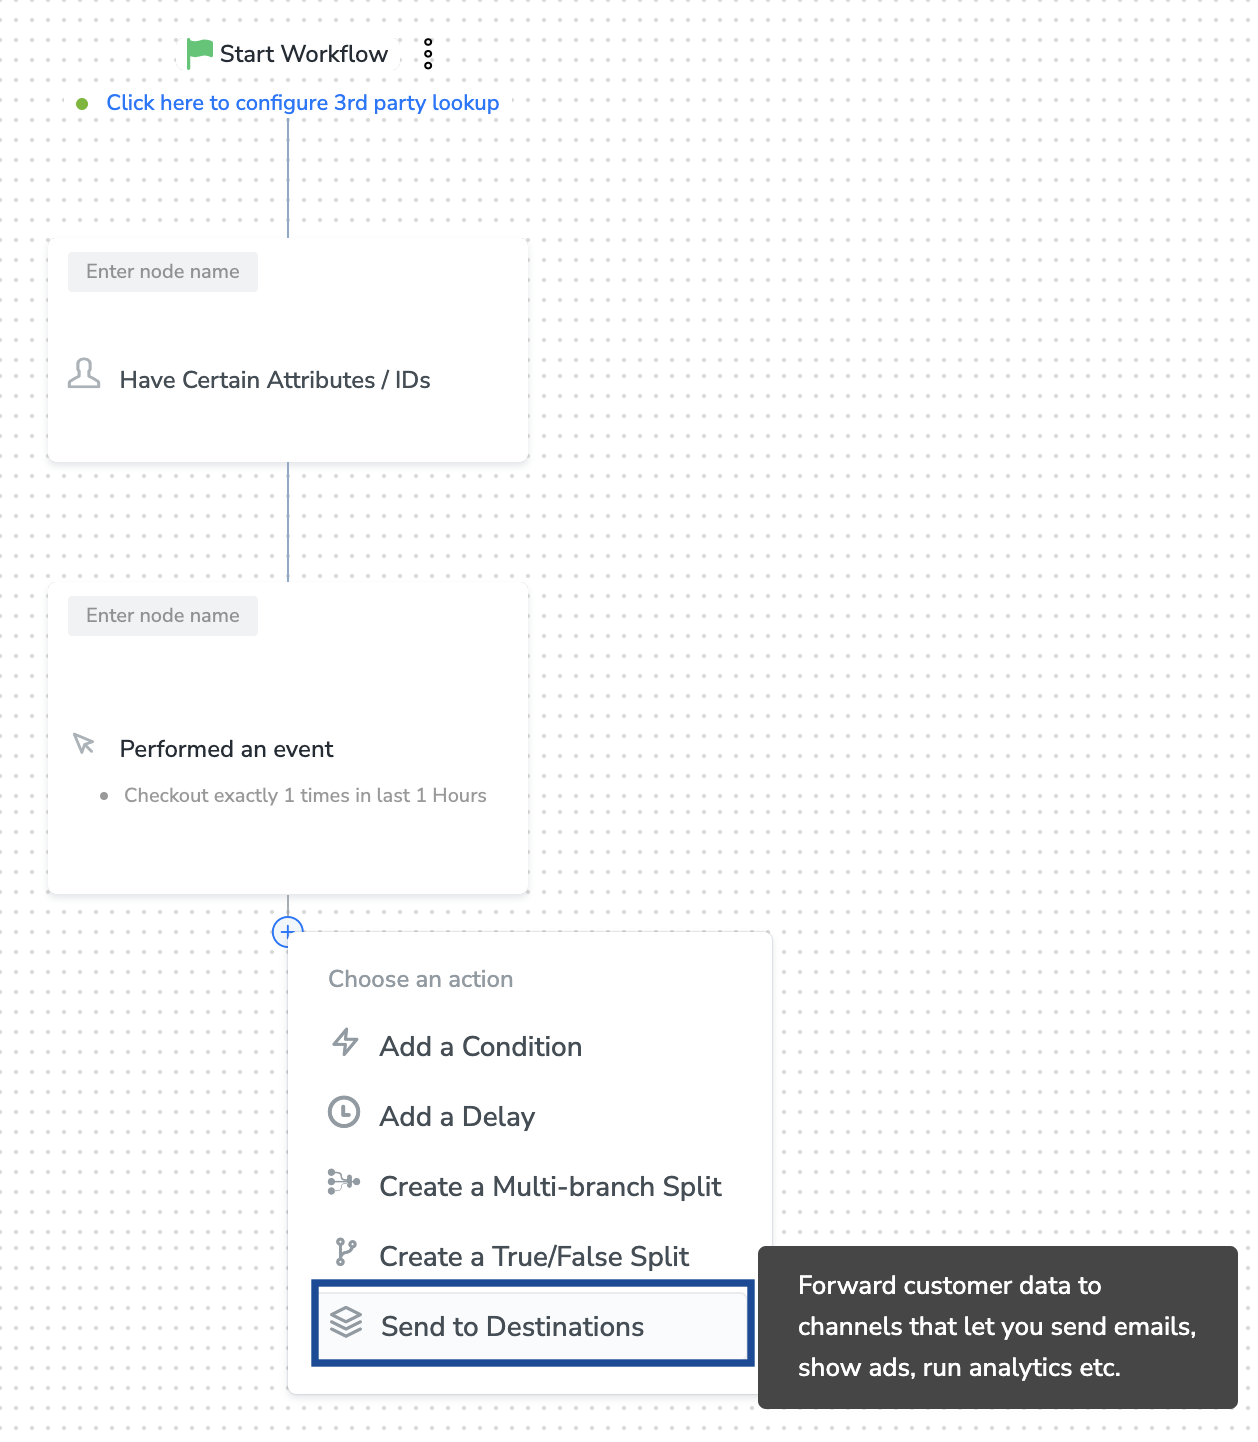
Once you have taken care of the prerequisites mentioned above, you can proceed to [creating workflow in Journeys](https://docs.zeotap.com/articles/orchestrate-customer/create-a-workflow) (Zeotap CDP). After you have applied filters or added conditions for your users in Journeys as mentioned in [Create a Workflow](https://docs.zeotap.com/articles/orchestrate-customer/create-a-workflow), you can activate them in **Apache Kafka** in the **Send to Destinations** node as shown below.
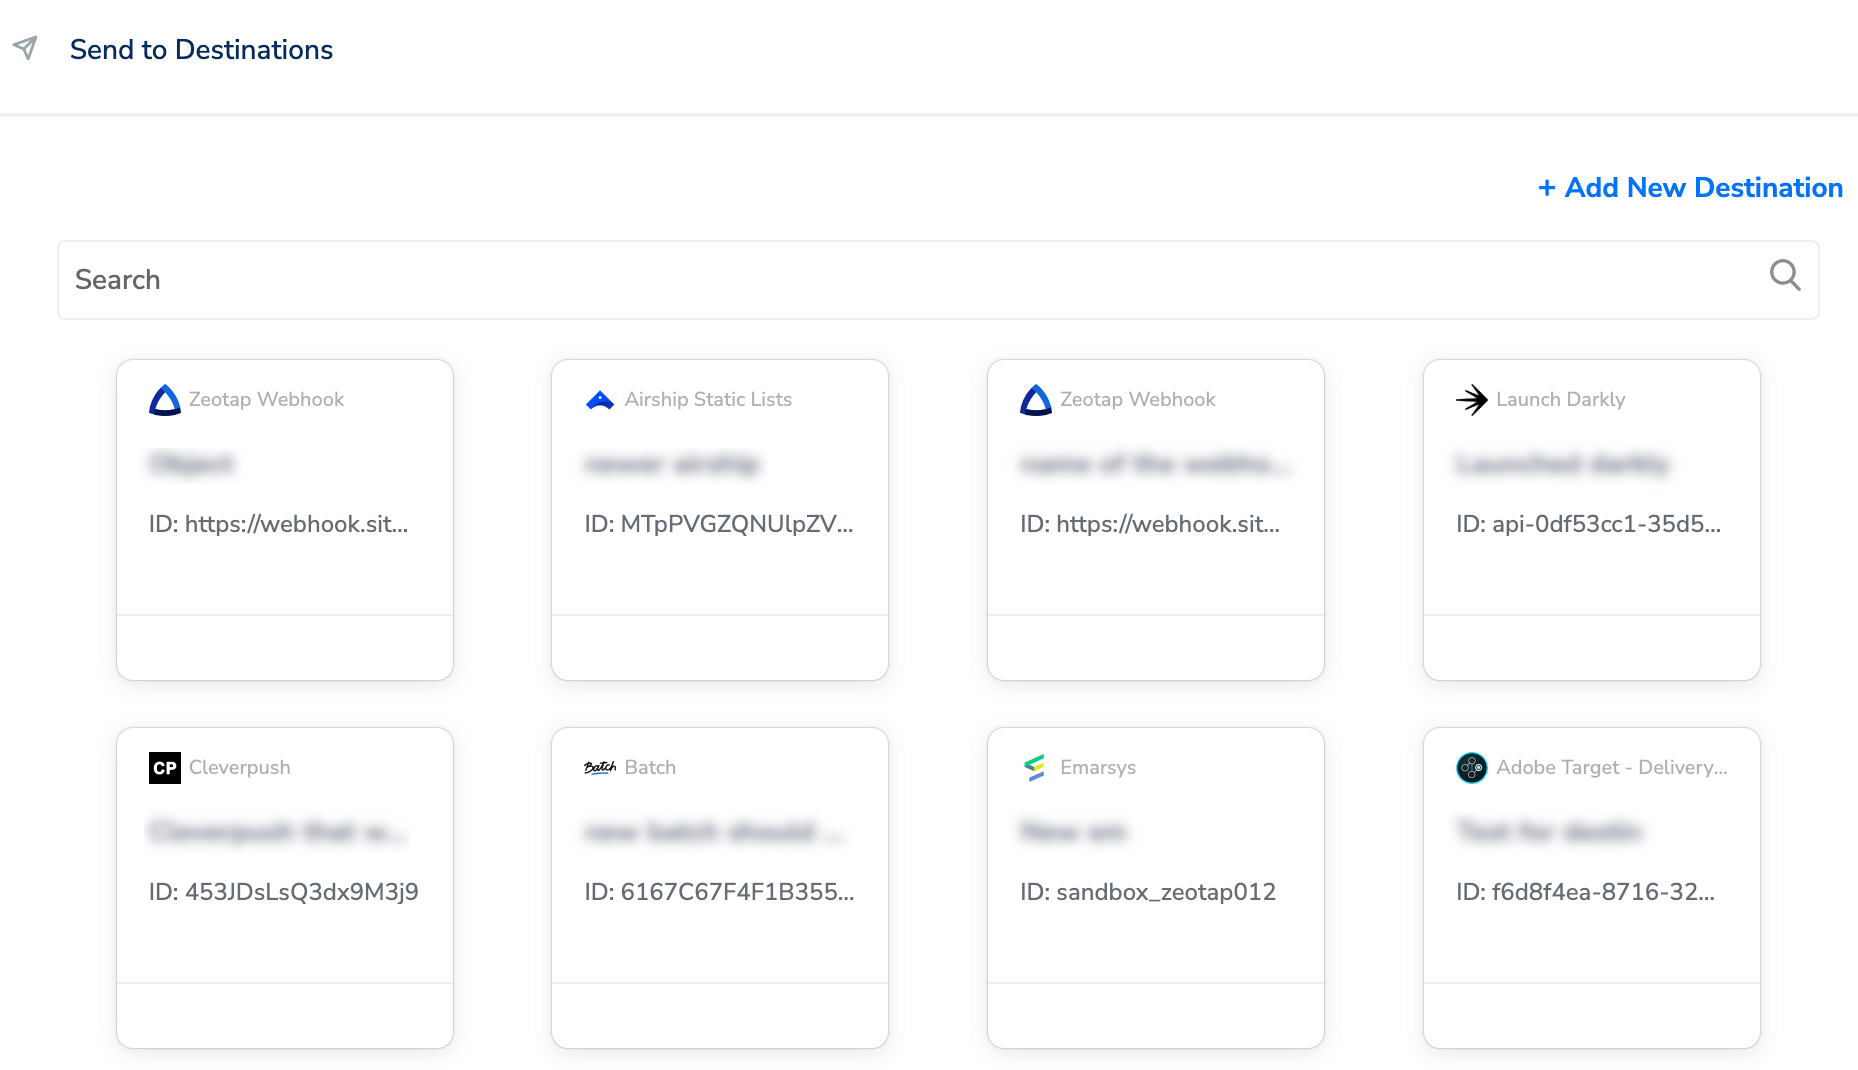
 A new window appears, where you can set up your destination. You can use an already existing destination from the list of available Destinations or create a new one by clicking **+ Add New Destination**.
**Note:**
To use an existing destination for activation in Journeys, click [here](/articles/integrate-customer/apache-kafka-destination#h2__290574186).
A new window appears, where you can set up your destination. You can use an already existing destination from the list of available Destinations or create a new one by clicking **+ Add New Destination**.
**Note:**
To use an existing destination for activation in Journeys, click [here](/articles/integrate-customer/apache-kafka-destination#h2__290574186).
 ### Add New Destination
Perform the following steps to add a new destination:
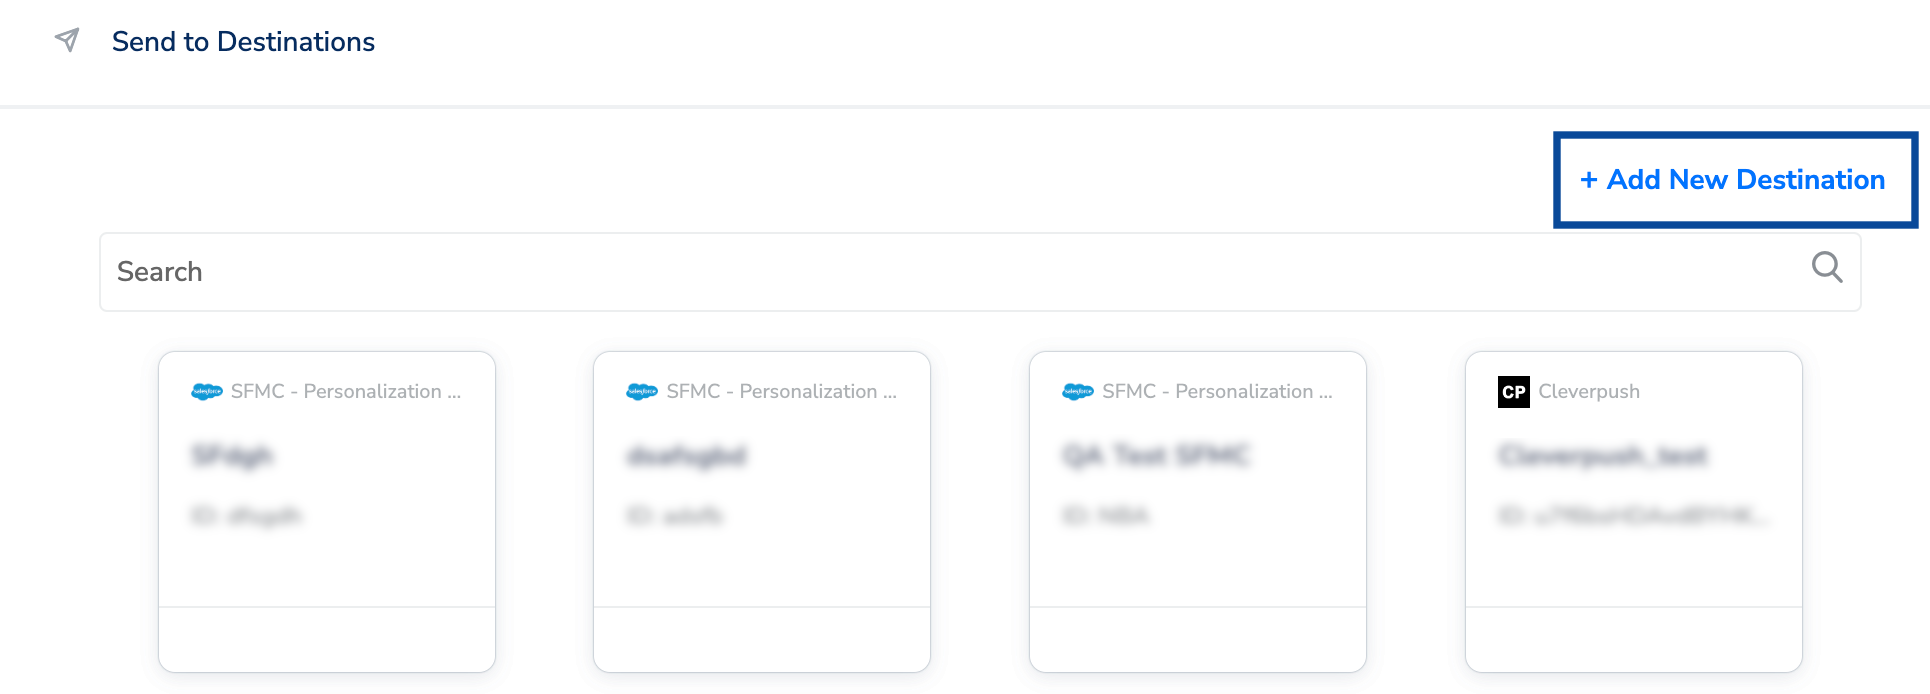
Click + **Add New Destination.**
### Add New Destination
Perform the following steps to add a new destination:
Click + **Add New Destination.**
 Search for **Kafka.**
Click **Kafka** and enter a name for the Destination.
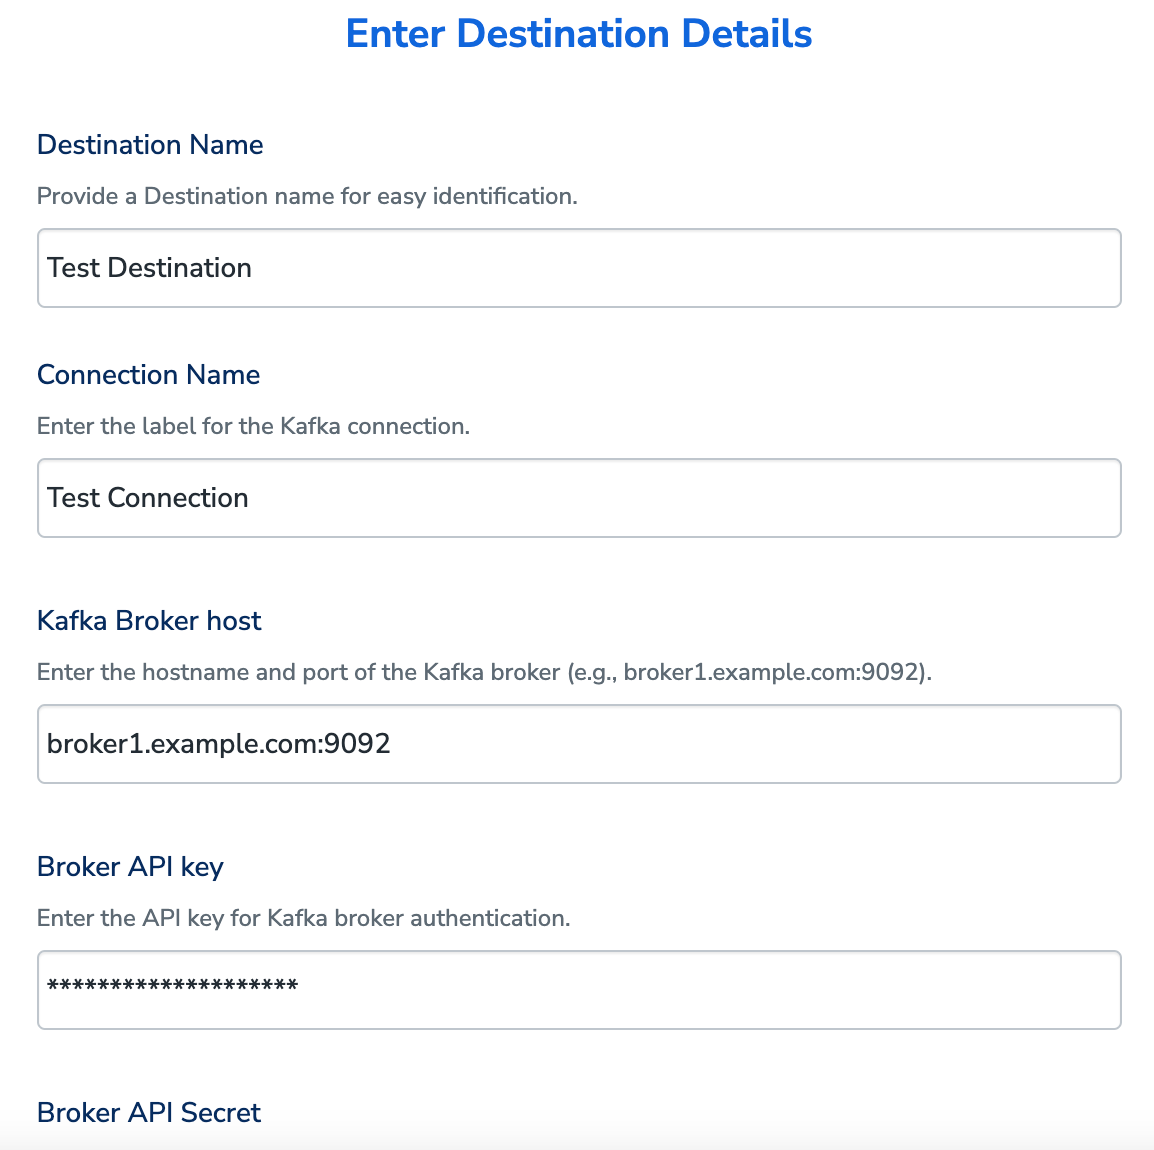
Provide a **Connection Name** to the configuration of the Kafka connection in Zeotap CDP.
Enter the **Kafka Broker Host**, **Broker API Key** and **Broker API Secret**, obtained from your Kafka account, as mentioned in the [Prerequisites](#prerequisites) section.
Search for **Kafka.**
Click **Kafka** and enter a name for the Destination.
Provide a **Connection Name** to the configuration of the Kafka connection in Zeotap CDP.
Enter the **Kafka Broker Host**, **Broker API Key** and **Broker API Secret**, obtained from your Kafka account, as mentioned in the [Prerequisites](#prerequisites) section.
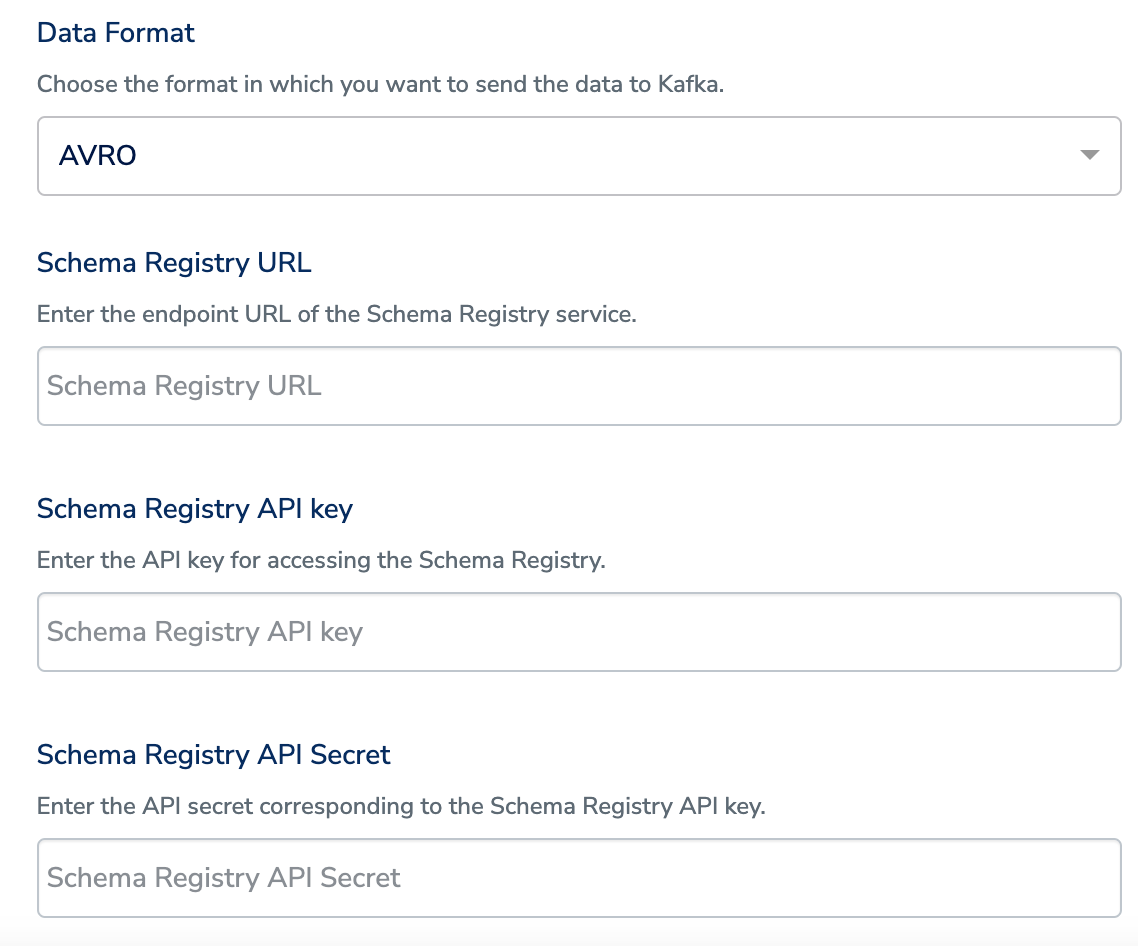
 Under **Data format**, you can either choose **AVRO** and **JSON** format to send the data to Kafka.
a. If you choose **AVRO**, then enter the **Schema Registry URL, Schema Registry API Key** and **Schema Registry API Secret** obtained from your Kafka account, as mentioned in the [Prerequisites](#prerequisites) section.
Under **Data format**, you can either choose **AVRO** and **JSON** format to send the data to Kafka.
a. If you choose **AVRO**, then enter the **Schema Registry URL, Schema Registry API Key** and **Schema Registry API Secret** obtained from your Kafka account, as mentioned in the [Prerequisites](#prerequisites) section.
 b. If you choose **JSON**, then no additional steps are required. You can directly proceed to Actions and Mapping.
Review the fields entered above and click **Next**.
In the mapping screen that appears, under **Choose your Action**, select **Send data to Kafka** as the action for sending data from the workflow created in Journeys.
b. If you choose **JSON**, then no additional steps are required. You can directly proceed to Actions and Mapping.
Review the fields entered above and click **Next**.
In the mapping screen that appears, under **Choose your Action**, select **Send data to Kafka** as the action for sending data from the workflow created in Journeys.
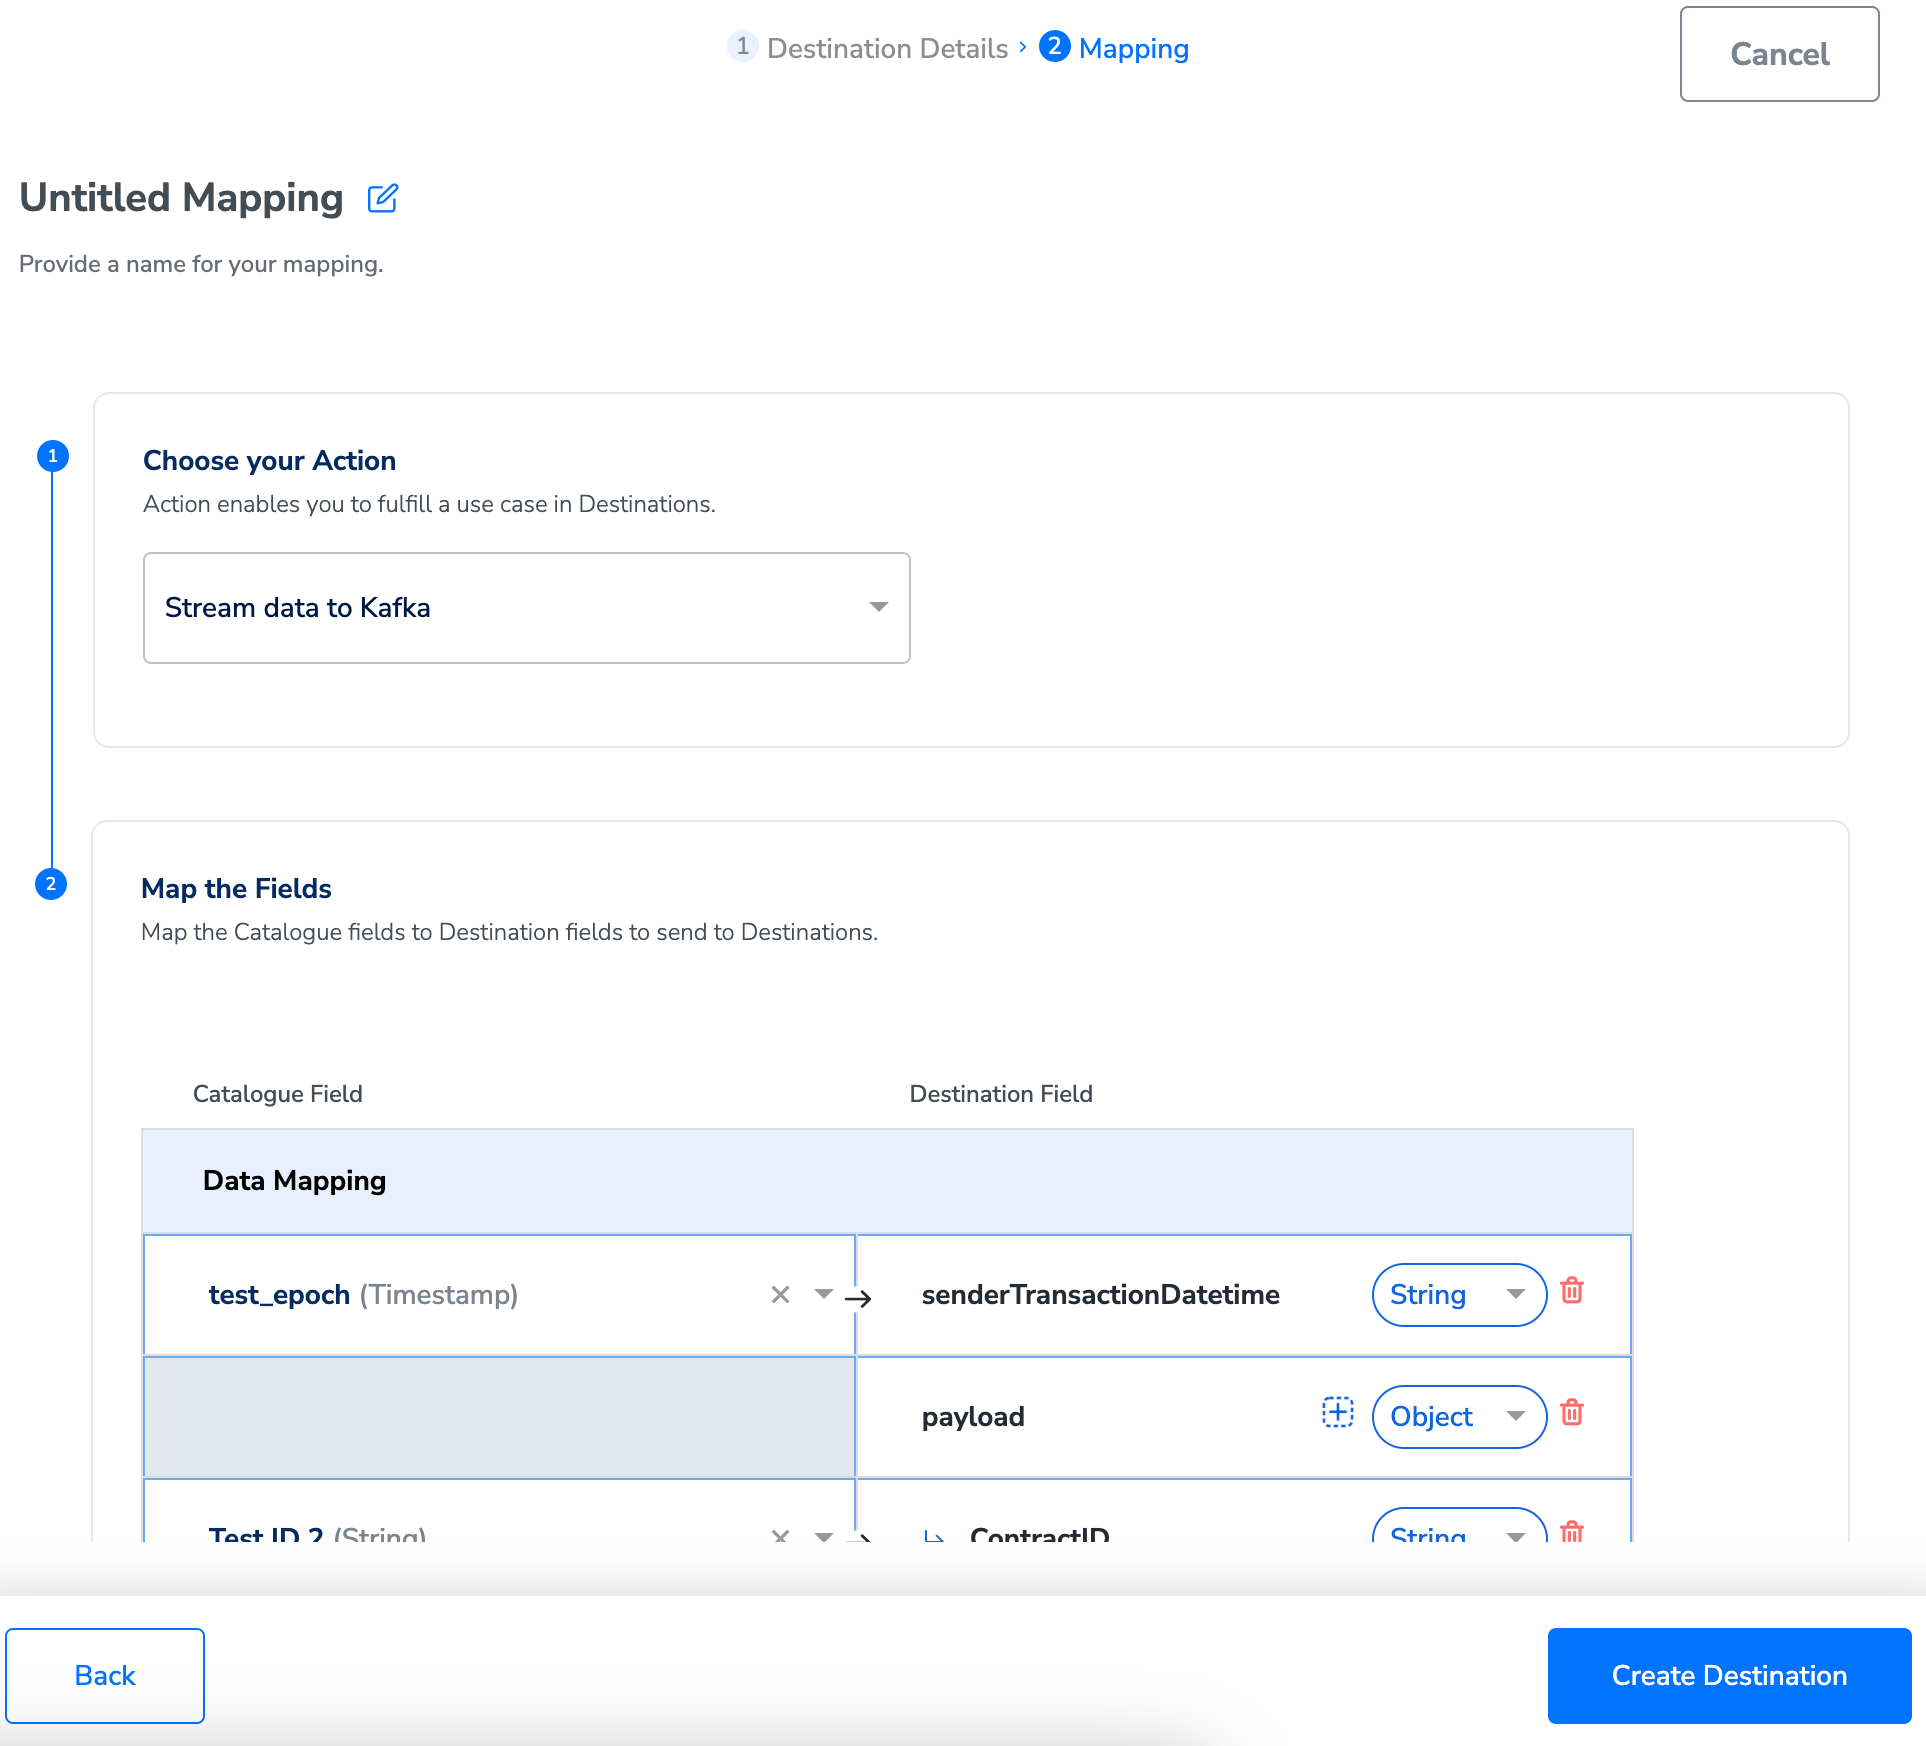 Under **Map the Fields**, use **+ Add Mapping Field** to add any number of identifiers and attributes you wish to send to Kafka. However, ensure that you have configured the Topic along with the attributes in Kafka before mapping it in Zeotap CDP. Ensure that the fields defined as mandatory in your schema registry are mapped to valid columns that contain data, under Destination Mapping in Zeotap CDP. Otherwise, it might result in destination failure.
You can use the drop-down option against each field to choose the data type for your attribute or identifier and map the corresponding Catalogue fields to the Destination fields. If you choose **Objects** or **List of Objects**, then you must also map the object properties below the object, as shown below. For more information about how to use the Objects, List of Objects in your mapping, refer [here](/articles/integrate-customer/object-list-of-objects-and-nce-support-in-destination-upload).
Under **Map the Fields**, use **+ Add Mapping Field** to add any number of identifiers and attributes you wish to send to Kafka. However, ensure that you have configured the Topic along with the attributes in Kafka before mapping it in Zeotap CDP. Ensure that the fields defined as mandatory in your schema registry are mapped to valid columns that contain data, under Destination Mapping in Zeotap CDP. Otherwise, it might result in destination failure.
You can use the drop-down option against each field to choose the data type for your attribute or identifier and map the corresponding Catalogue fields to the Destination fields. If you choose **Objects** or **List of Objects**, then you must also map the object properties below the object, as shown below. For more information about how to use the Objects, List of Objects in your mapping, refer [here](/articles/integrate-customer/object-list-of-objects-and-nce-support-in-destination-upload).
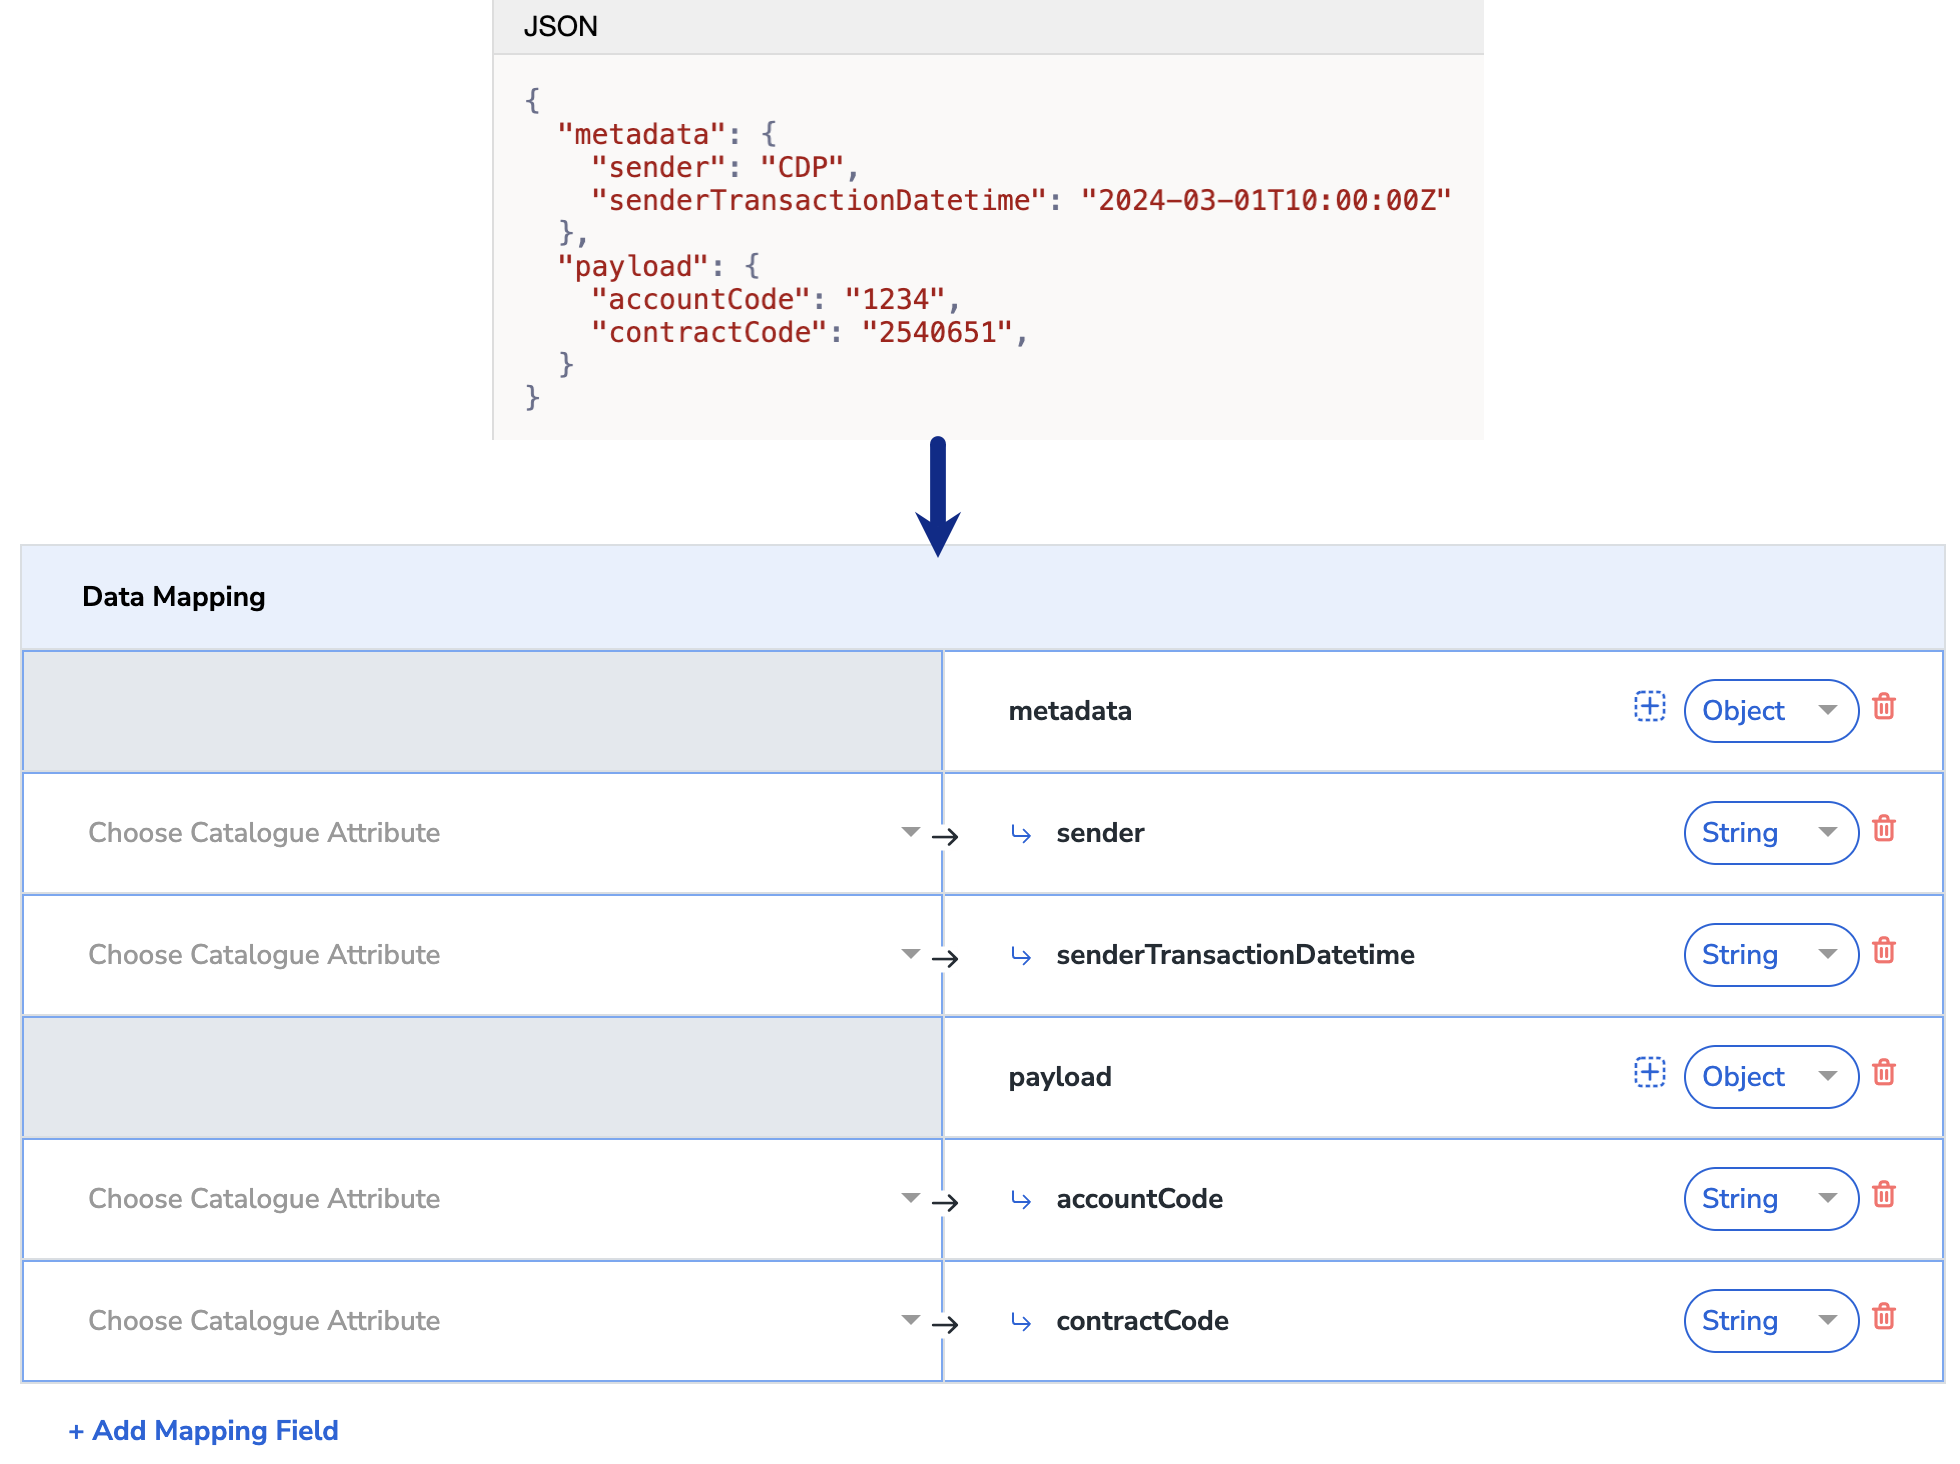
 **Example**
If the payload to you want to sent to Kafka is the following JSON, then the mapping screen appears as shown below:
**Example**
If the payload to you want to sent to Kafka is the following JSON, then the mapping screen appears as shown below:
 Once the mapping is complete, click **Create Destination**. The destination is created and made available for activation on Journeys.
## Activate the Destination on Journeys
After creating a destination, next, you need to link it in the **Send to Destination** node within the workflow, as explained below.
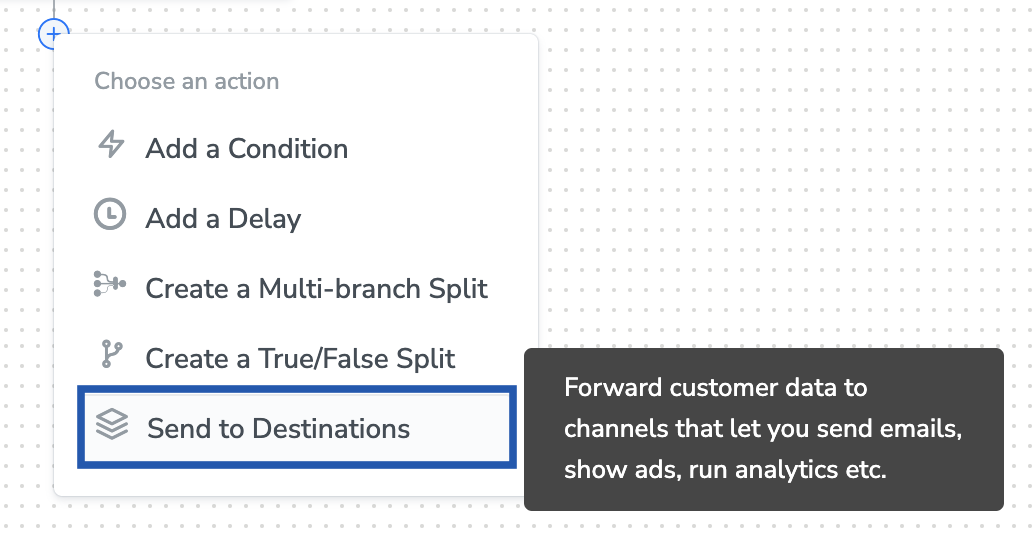
In the workflow, click **+** and choose **Send to Destinations**.
Once the mapping is complete, click **Create Destination**. The destination is created and made available for activation on Journeys.
## Activate the Destination on Journeys
After creating a destination, next, you need to link it in the **Send to Destination** node within the workflow, as explained below.
In the workflow, click **+** and choose **Send to Destinations**.
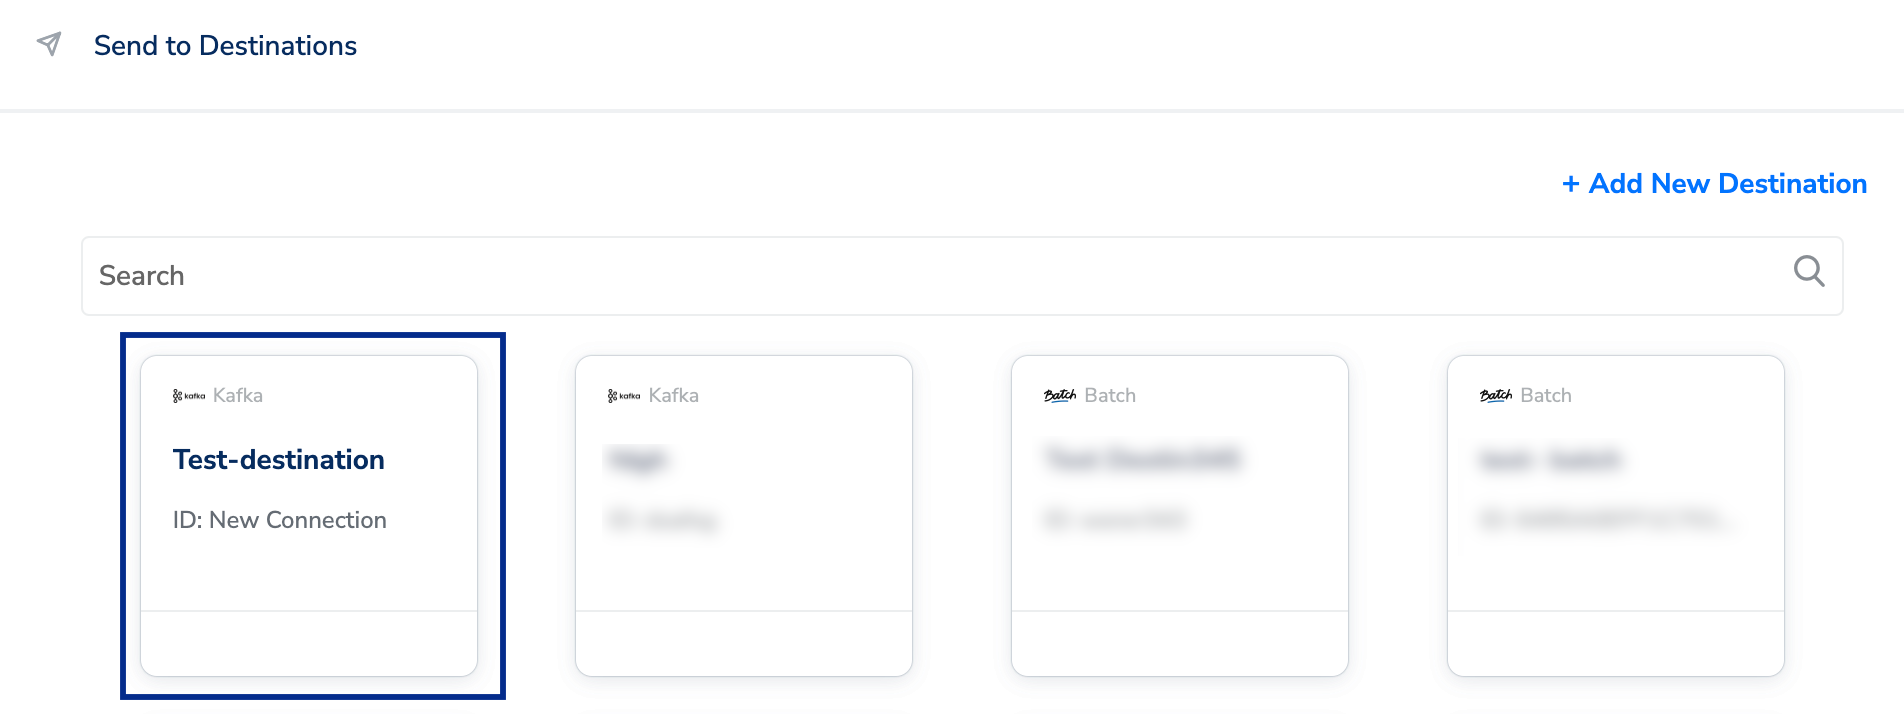
 Choose the destination from the list of available destinations by using the search feature.
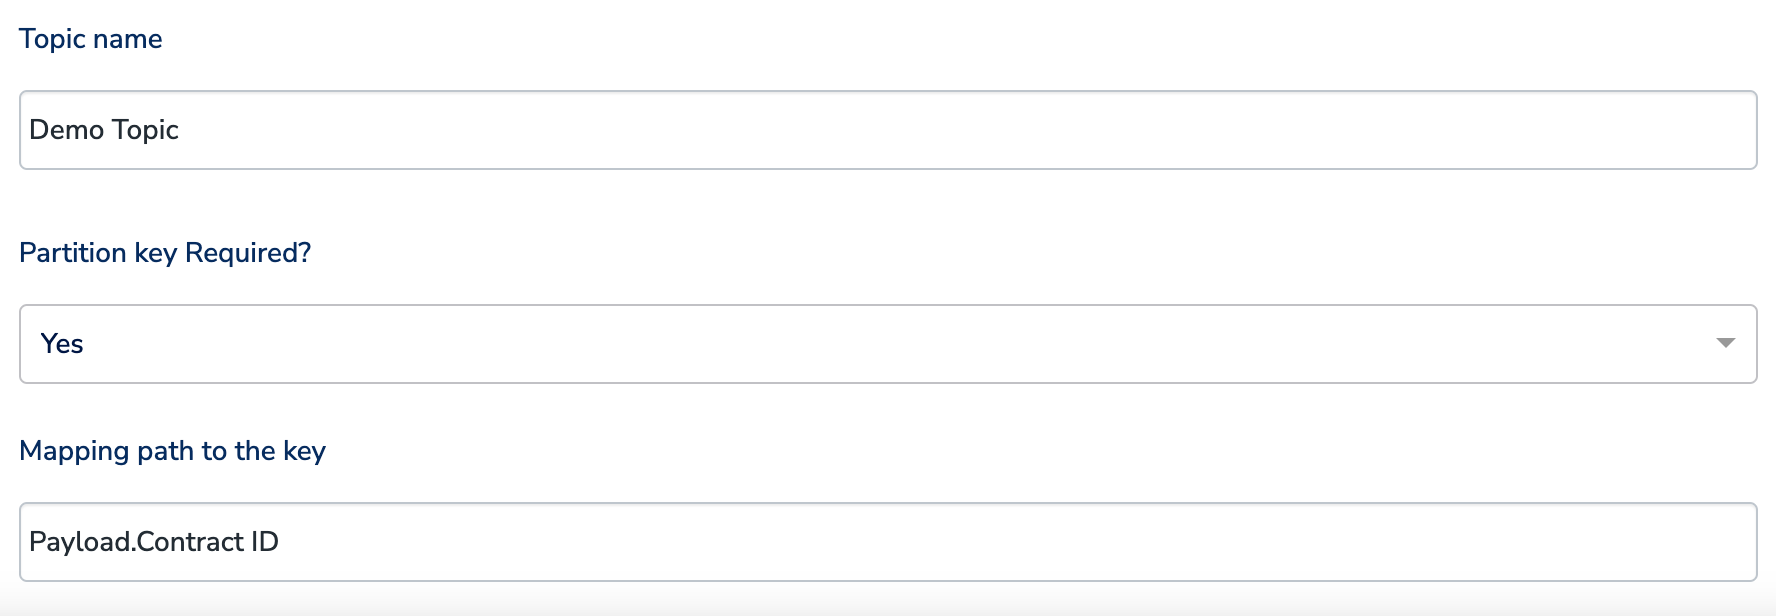
 Under the **Destination Details** tab, the **Connection Name, Kafka Broker Host**, **Broker API Key**, **Broker API Secret**, **Schema Registry URL, Schema Registry API Key** and **Schema Registry API Secret** fields are automatically populated based on the value that you had entered while creating the destination. However, you need to enter the **Topic name** and choose whether **Partition key** is required or not by using the drop-down under **Partition Key Required?**
a. If you select **Yes**, then enter the name of the attribute to use as the partition key in the **Mapping path to the key** text box. Select an attribute that determines how data partitions occur when the incoming data exceeds the data size limit.
Under the **Destination Details** tab, the **Connection Name, Kafka Broker Host**, **Broker API Key**, **Broker API Secret**, **Schema Registry URL, Schema Registry API Key** and **Schema Registry API Secret** fields are automatically populated based on the value that you had entered while creating the destination. However, you need to enter the **Topic name** and choose whether **Partition key** is required or not by using the drop-down under **Partition Key Required?**
a. If you select **Yes**, then enter the name of the attribute to use as the partition key in the **Mapping path to the key** text box. Select an attribute that determines how data partitions occur when the incoming data exceeds the data size limit.
 **Note:**
\*To use a property of an [Object](https://docs.zeotap.com/articles/unify-customer/data-types-in-catalogue/a/h2_2051284657) as the partition key, enter the attribute name provided in the Destination field (Right hand side) in the format objectname.attributename. For example, if an object named **p*- **ayload** includes properties such as **Contract ID**, **Contract Start Date**, and **Contract End Date**, and you want to use **Contract ID** as the partition key, then enter payload.ContractID in the **Mapping path to the key** text box. Note that the value for the partition key is case sensitive.*
b. If you select **No**, then you can directly proceed to the Destination Settings tab.
Under the **Destination Settings** tab, choose the Action and mapping as per your requirement.
Upon clicking **Save Destination**. The destination is attached as shown in the image below.
**Note:**
\*To use a property of an [Object](https://docs.zeotap.com/articles/unify-customer/data-types-in-catalogue/a/h2_2051284657) as the partition key, enter the attribute name provided in the Destination field (Right hand side) in the format objectname.attributename. For example, if an object named **p*- **ayload** includes properties such as **Contract ID**, **Contract Start Date**, and **Contract End Date**, and you want to use **Contract ID** as the partition key, then enter payload.ContractID in the **Mapping path to the key** text box. Note that the value for the partition key is case sensitive.*
b. If you select **No**, then you can directly proceed to the Destination Settings tab.
Under the **Destination Settings** tab, choose the Action and mapping as per your requirement.
Upon clicking **Save Destination**. The destination is attached as shown in the image below.
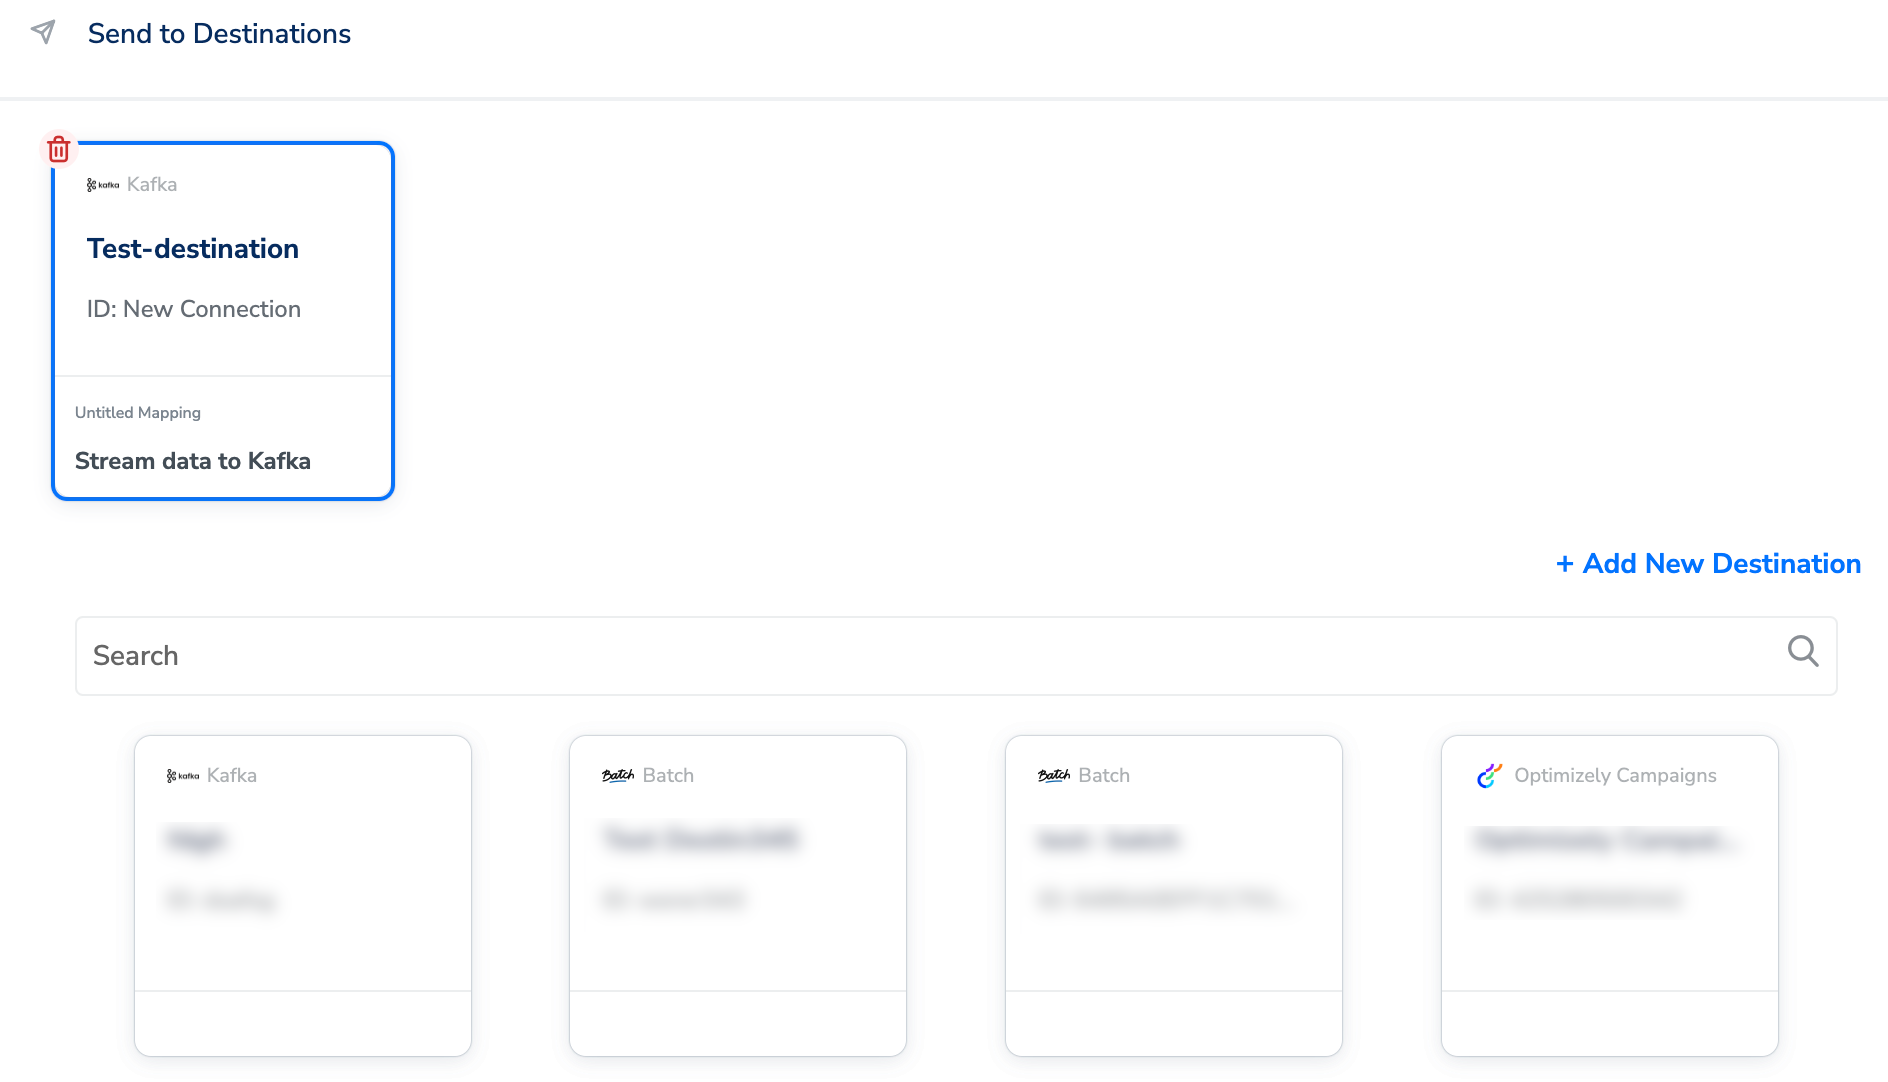 Click **Add Destinations**. You can also add multiple destinations at this step if needed.
The linked Destinations appear in the **Send to Destinations** node within the workflow as shown below. Further, you can then build and customise your workflow as needed by clicking '+' . Note that you must enter a name for your workflow in the provided text box to save it.
Click **Add Destinations**. You can also add multiple destinations at this step if needed.
The linked Destinations appear in the **Send to Destinations** node within the workflow as shown below. Further, you can then build and customise your workflow as needed by clicking '+' . Note that you must enter a name for your workflow in the provided text box to save it.
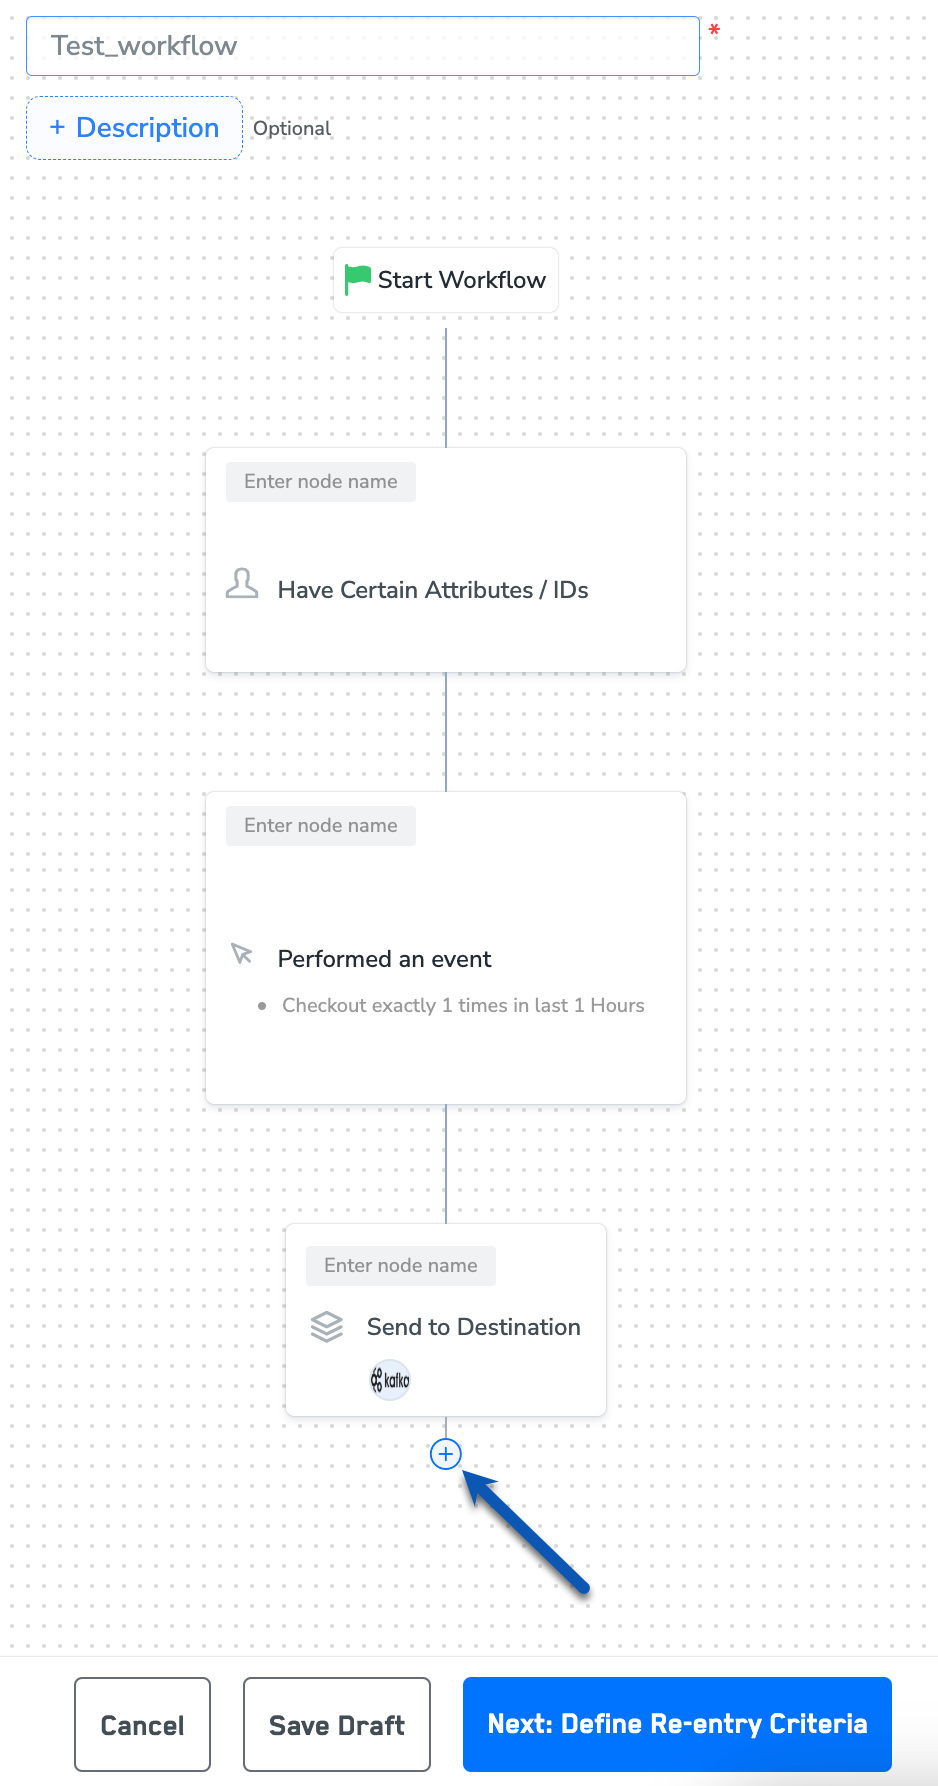 After adding conditions and filters for users, choose one of the following options:
* **Save Draft**: Enables you to revisit and edit the workflow before publishing.
* **Next: Re-entry Condition**: Determines whether a user can re-enter the same workflow.
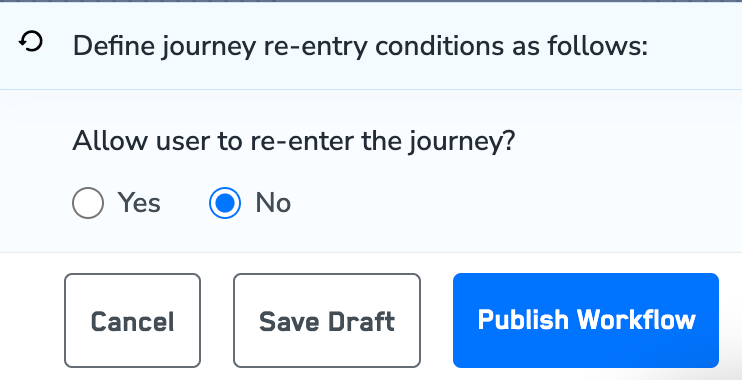
After defining the re-entry criteria, click **Publish Workflow**. The workflow appears in the Workflow listing screen with a **Published** status.
After adding conditions and filters for users, choose one of the following options:
* **Save Draft**: Enables you to revisit and edit the workflow before publishing.
* **Next: Re-entry Condition**: Determines whether a user can re-enter the same workflow.
After defining the re-entry criteria, click **Publish Workflow**. The workflow appears in the Workflow listing screen with a **Published** status.