> ## Documentation Index
> Fetch the complete documentation index at: https://docs.zeotap.com/llms.txt
> Use this file to discover all available pages before exploring further.
# Adobe Target (Delivery API)
## Overview
Adobe Target's Delivery API enables real-time personalisation and targeting of customer experiences across various channels, including web, mobile and email. It allows for the automated delivery of personalised content and offers based on customer data and behaviour, improving engagement and conversion rates.
## Supported Identifiers
This integration supports ECID, Adobe Target Session Id and Mbox Edge Number.
## Available Actions and Supported Features
| Action Name | [ID EXTENSION](/articles/segment-customer/extend-your-audience#id-extension) | [DELETE](https://docs.zeotap.com/articles/#!integrate-customer/delta-upload-and-delete-functions) | [DELTA UPLOAD](https://docs.zeotap.com/articles/#!integrate-customer/delta-upload-and-delete-functions) |
| :---------------------------------------------- | :--------------------------------------------------------------------------- | :------------------------------------------------------------------------------------------------ | :------------------------------------------------------------------------------------------------------ |
| Send identifiers to Adobe Target - Delivery API | ✅ | - | - |
| Send attributes to Adobe Target - Delivery API | - | - | - |
## Prerequisites
Ensure that you have details about the below prerequisites of Adobe Target before creating a Destination.
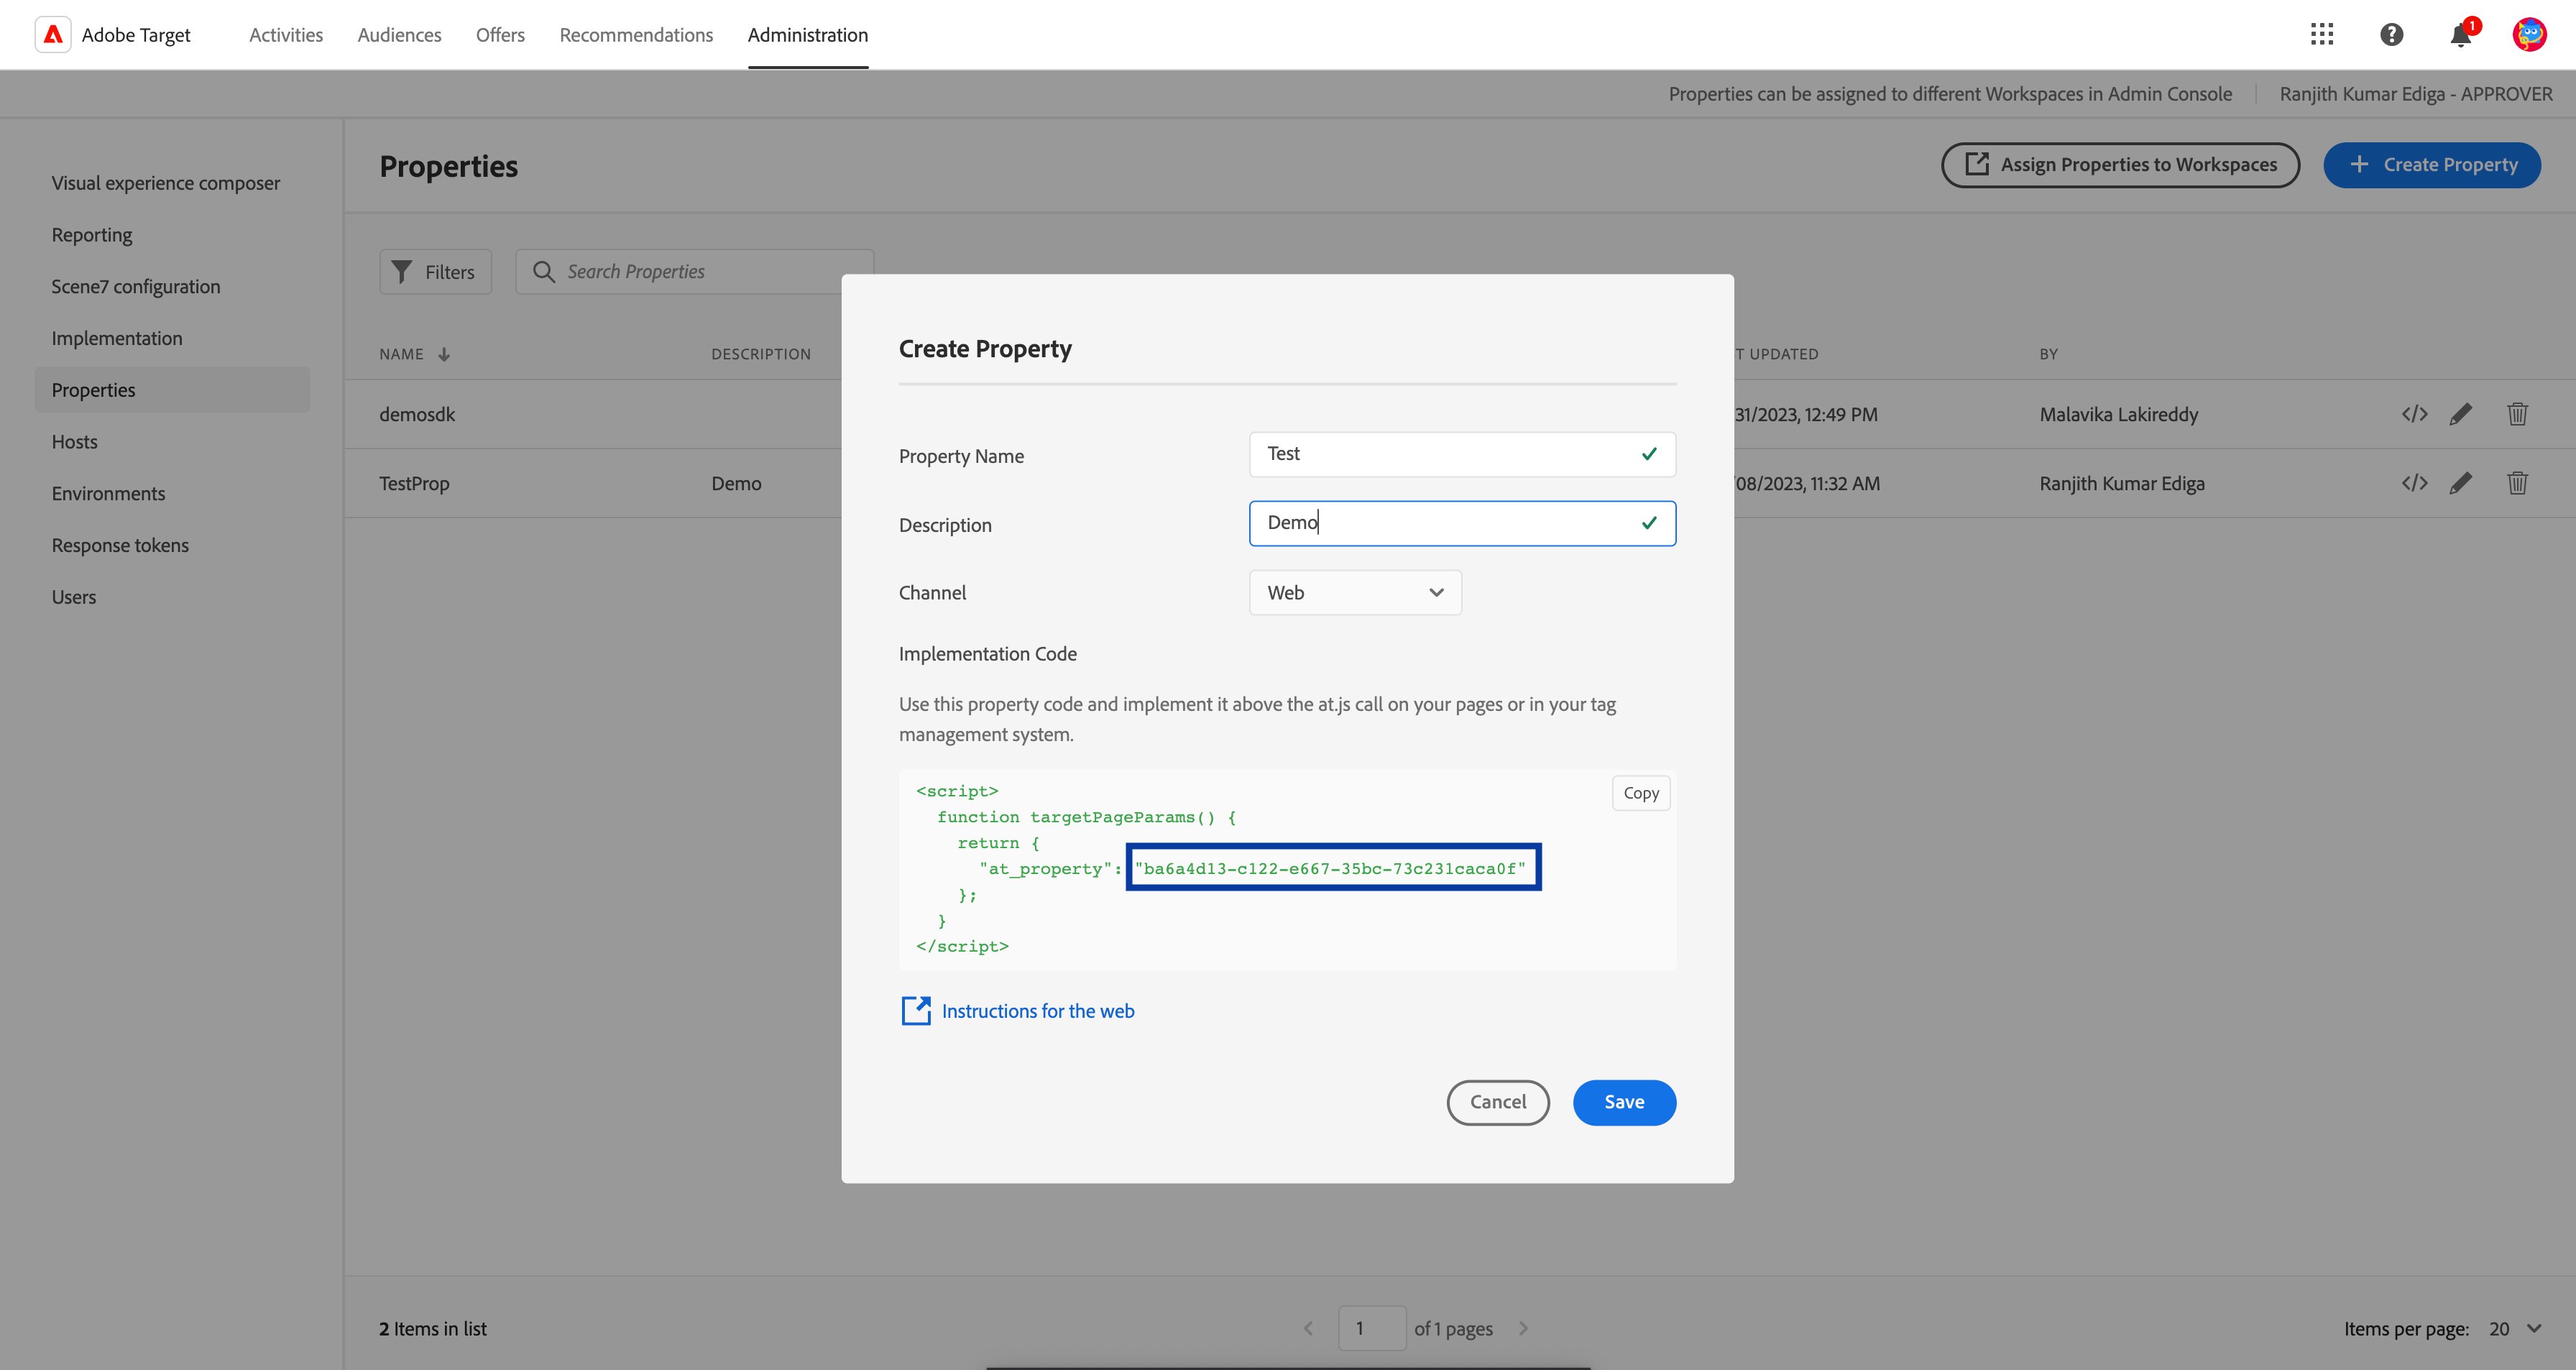
### Property Token
A Property Token is a unique identifier assigned to a specific property within Adobe Target. It is used to retrieve or update the property value for a specific instance.
You can obtain the Property Token from the Adobe Experience Platform by navigating to **Administration** > **Properties** > click open an existing property or create a new one using **+ Create Property** option. The set of characters inside the implementation code shown below is your **Property Token**.
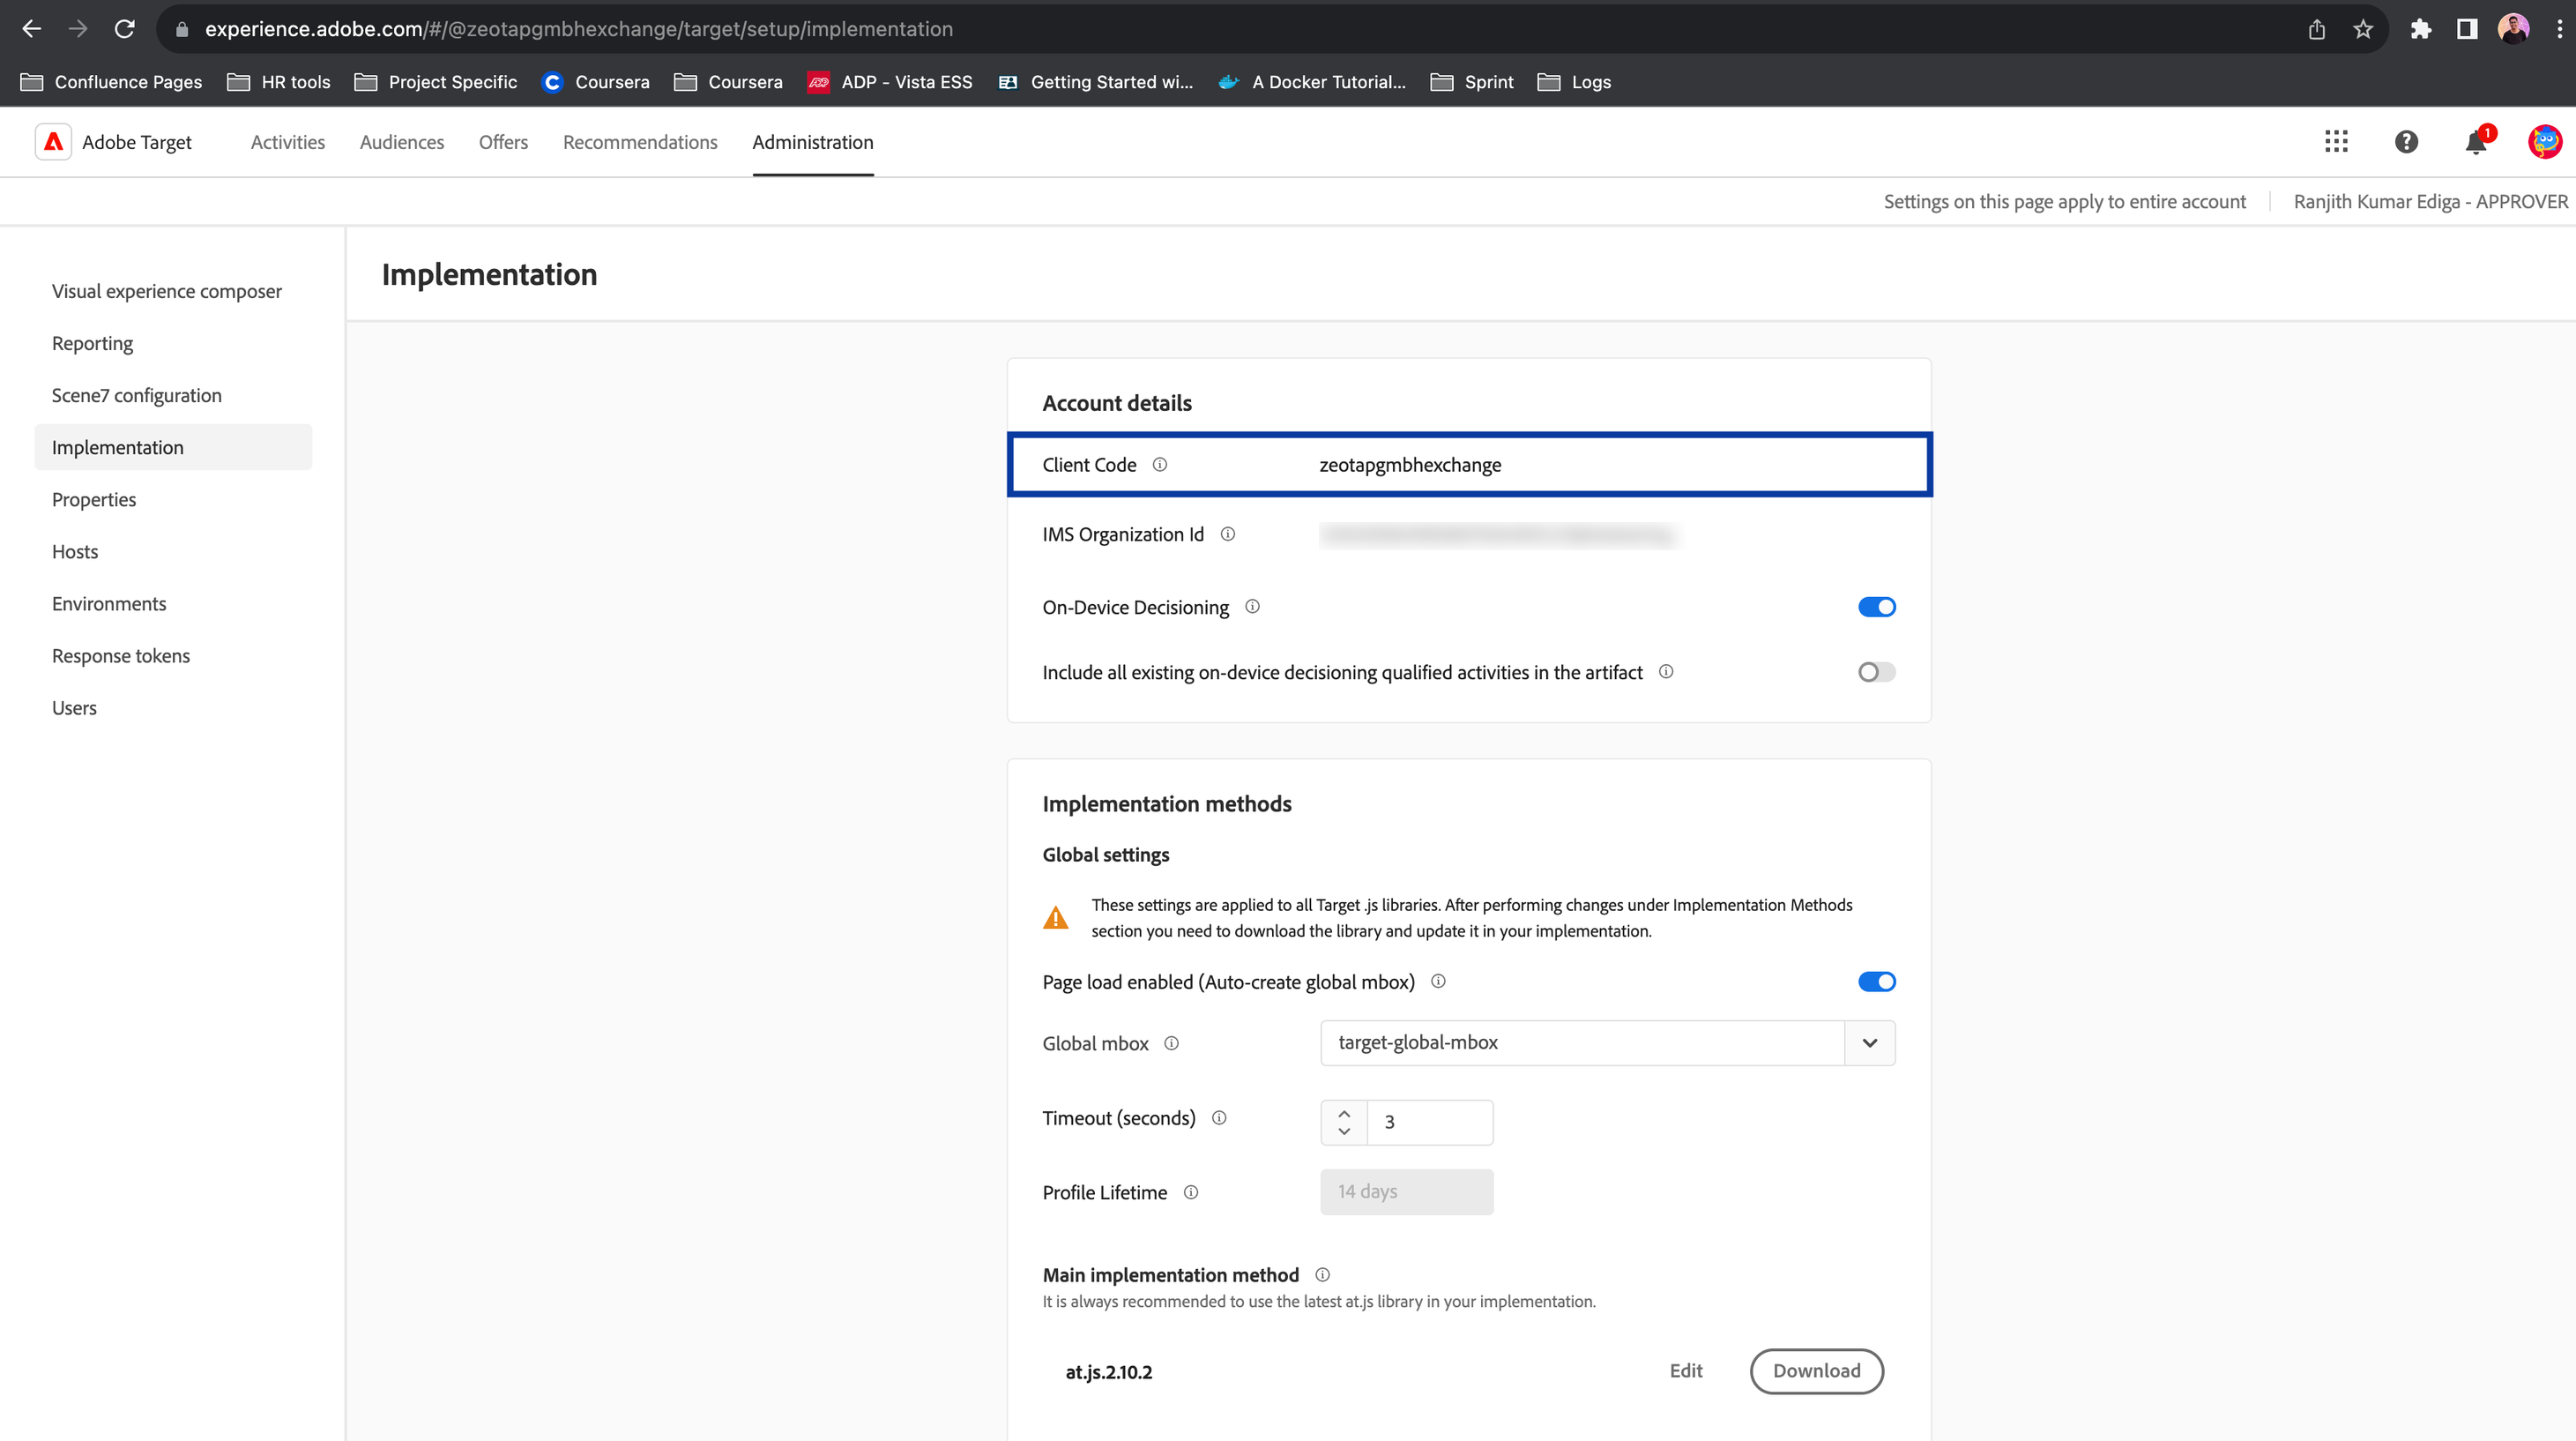
 ### Client Code
A Client Code is a unique identifier assigned to a specific client or user to track and personalise their experiences across different channels and devices.
You can obtain the Client Code from the Adobe Experience Platform by navigating to **Administration** > **Implementation** > **Account details**.
### Client Code
A Client Code is a unique identifier assigned to a specific client or user to track and personalise their experiences across different channels and devices.
You can obtain the Client Code from the Adobe Experience Platform by navigating to **Administration** > **Implementation** > **Account details**.
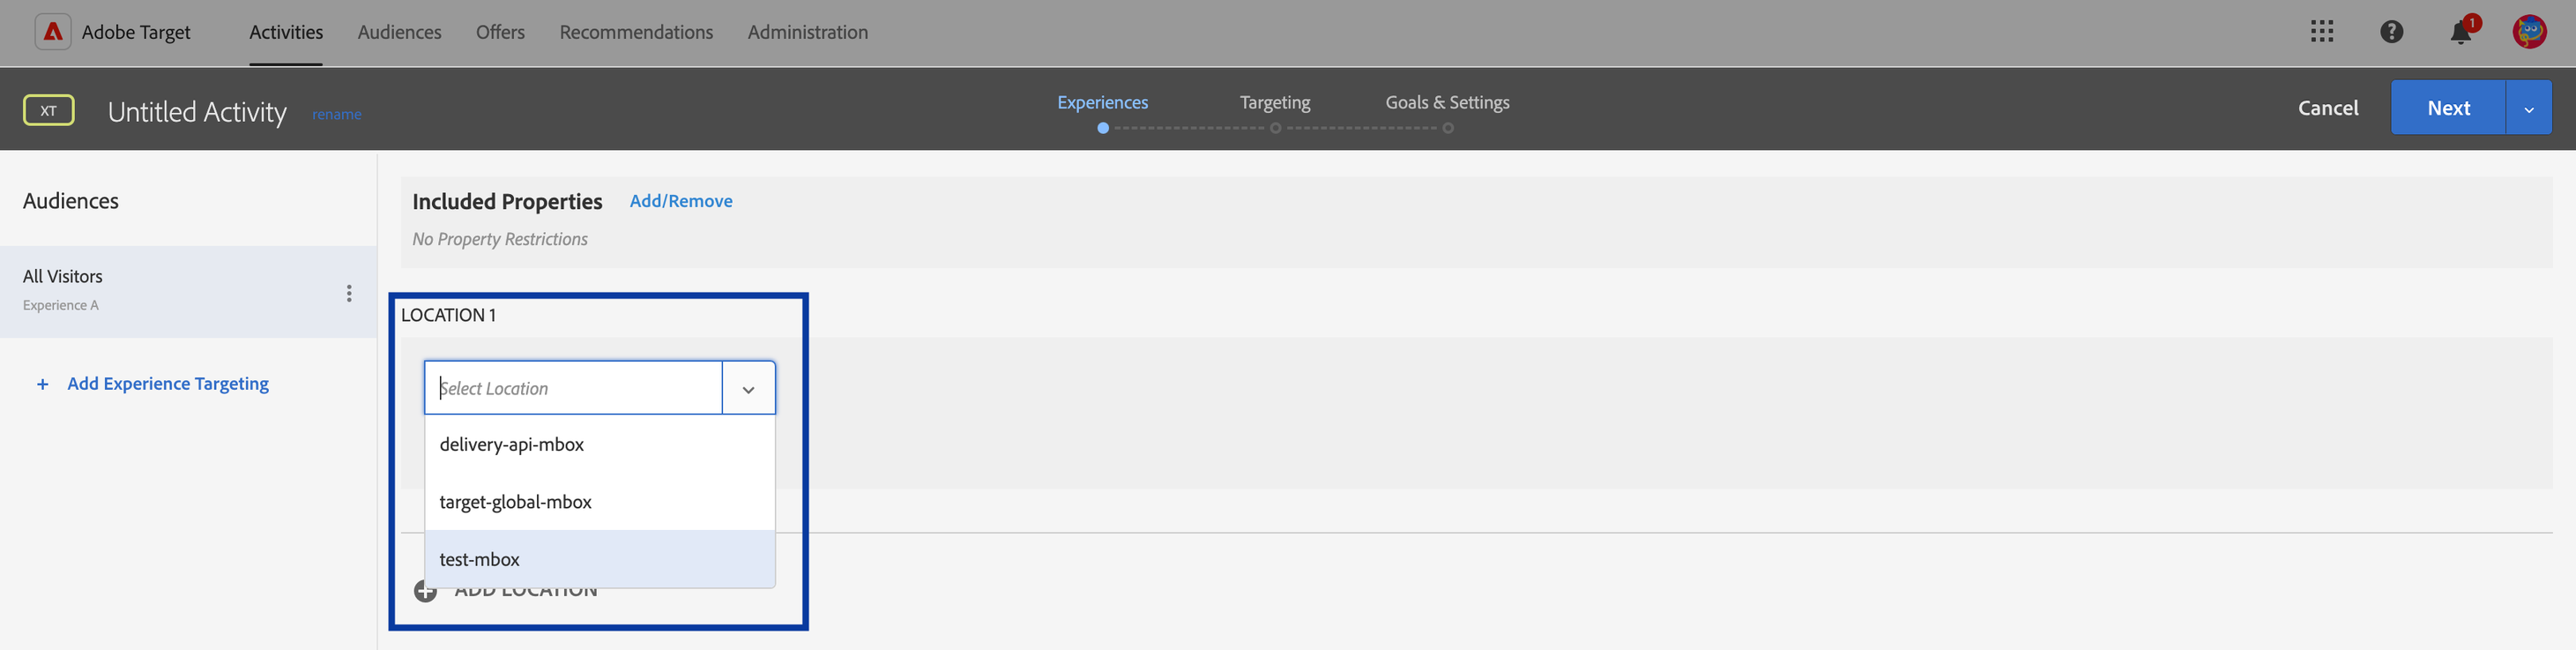
 ### Mbox Name
Mbox Name refers to the name account to which you can share the profile parameters to. You can obtain the Mbox Name from the Adobe Experience Platform by navigating to **Activities** > **Location.** Using the drop-down menu, you can find all the Mbox accounts available.
### Mbox Name
Mbox Name refers to the name account to which you can share the profile parameters to. You can obtain the Mbox Name from the Adobe Experience Platform by navigating to **Activities** > **Location.** Using the drop-down menu, you can find all the Mbox accounts available.
 ## Destination Setup
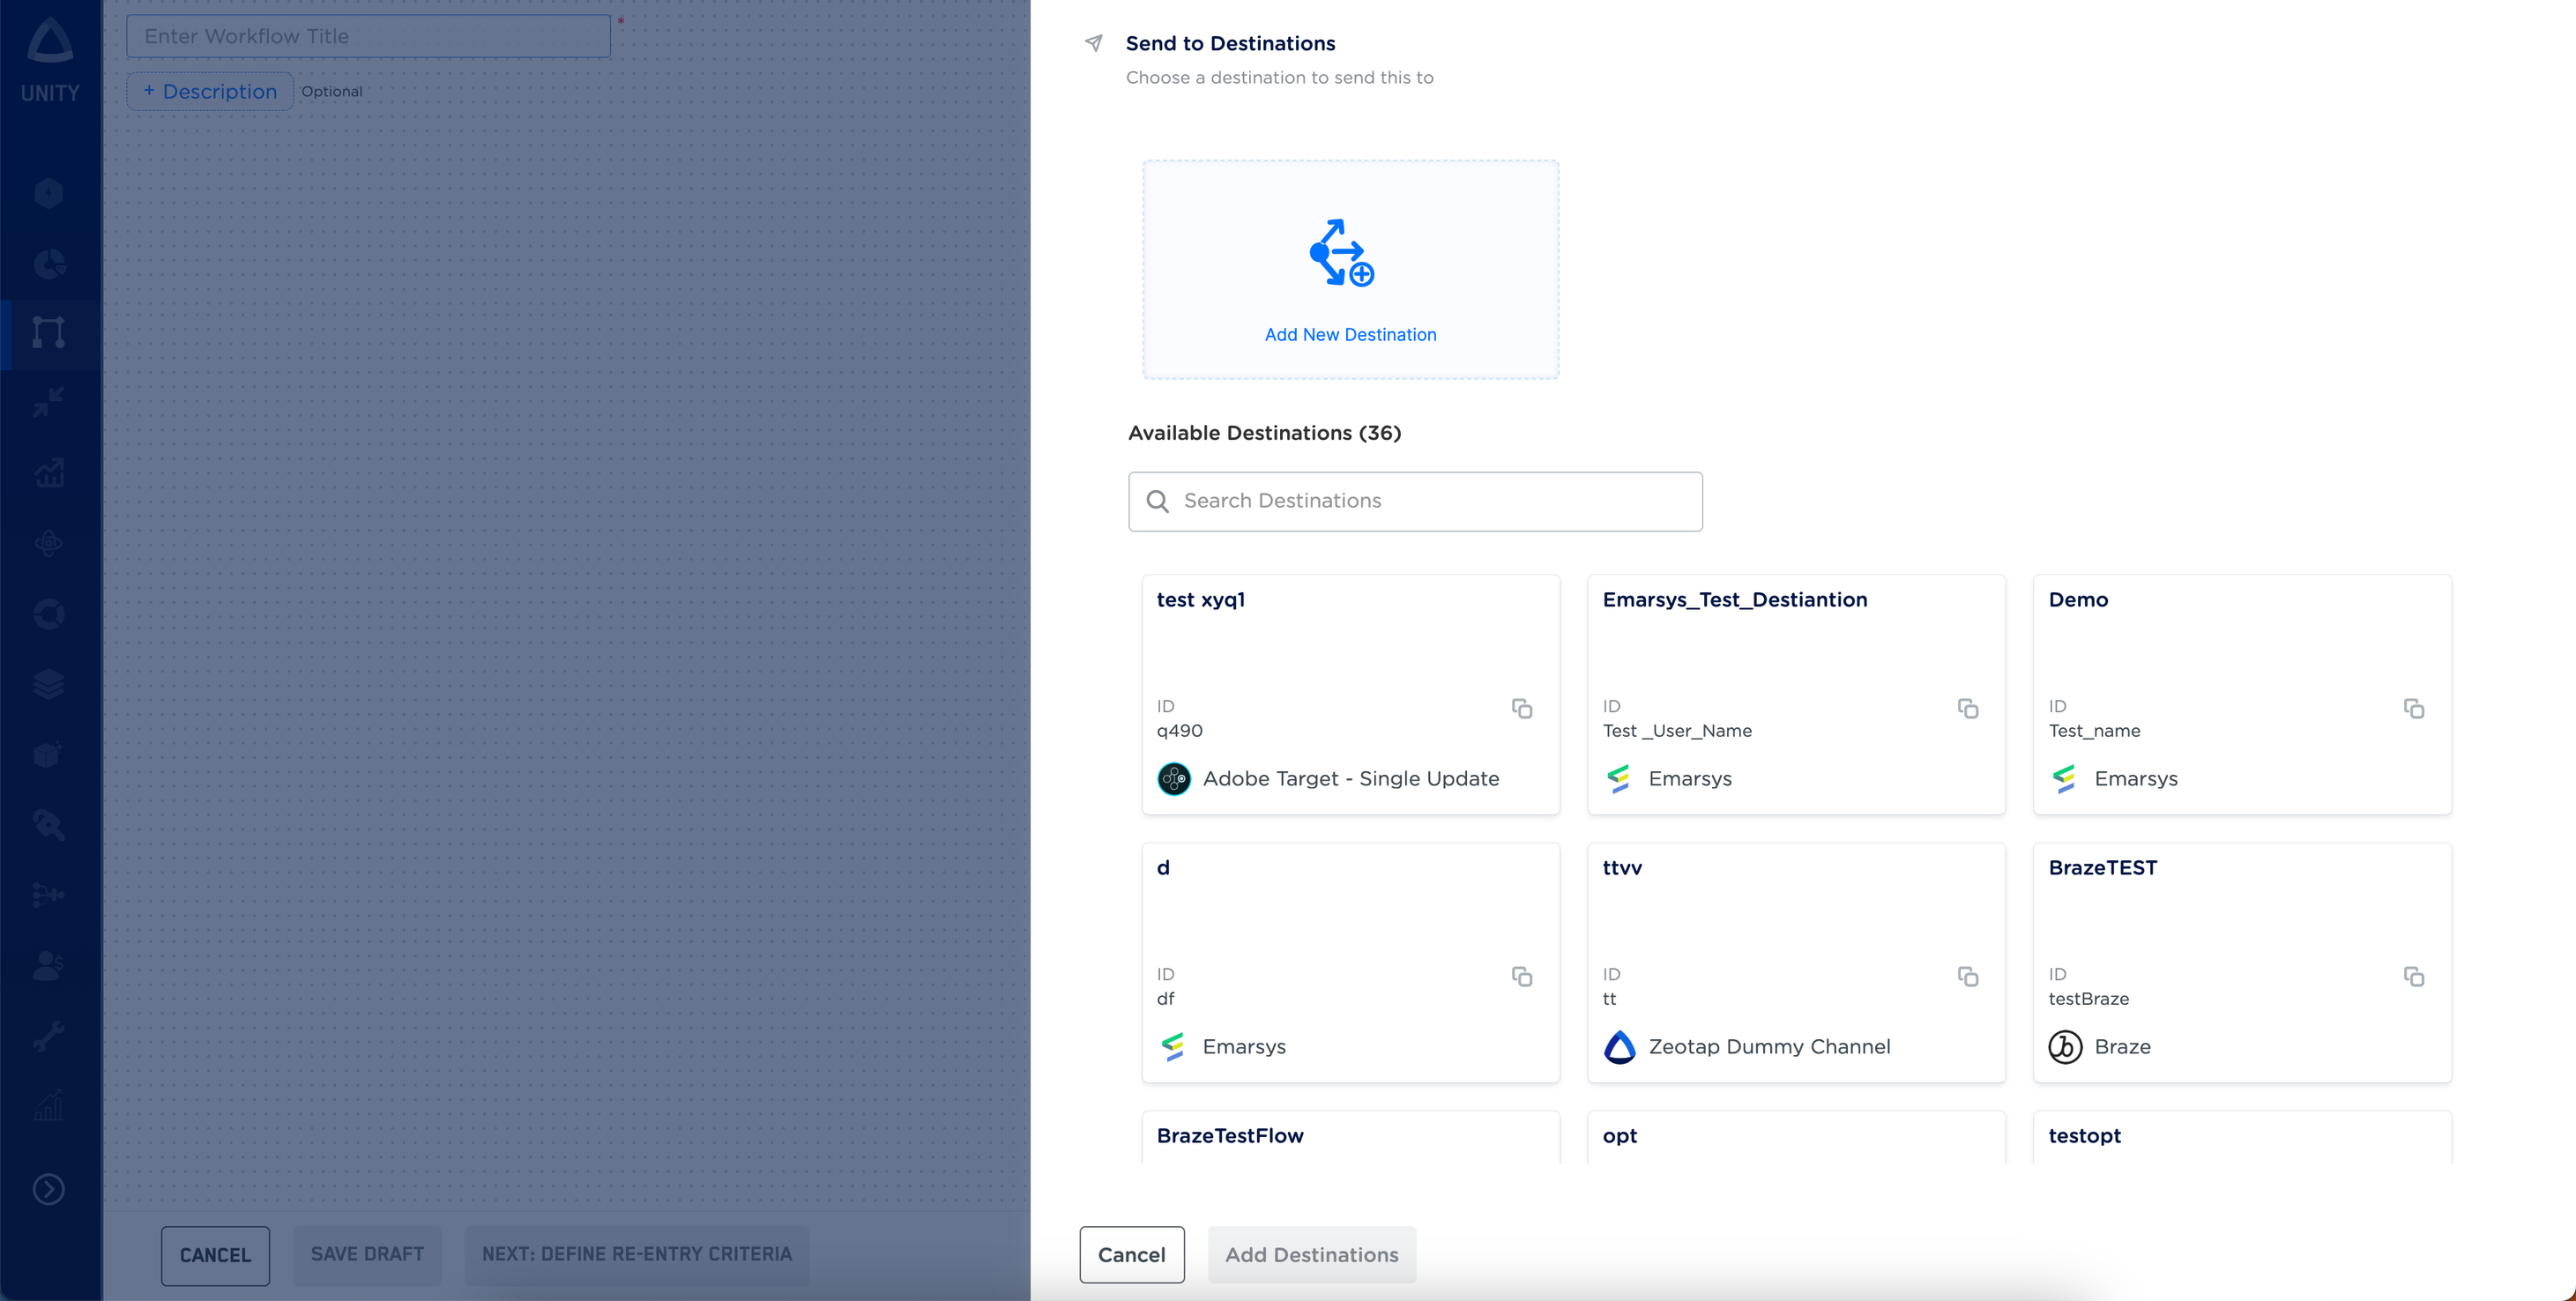
After you have applied filters or added conditions for your users in Journeys, you can activate them in Adobe Target under **Send to Destinations.** A new window opens, where you can set up your destination. You can use an already existing destination from the list of **Available Destinations** or create a new one.
## Destination Setup
After you have applied filters or added conditions for your users in Journeys, you can activate them in Adobe Target under **Send to Destinations.** A new window opens, where you can set up your destination. You can use an already existing destination from the list of **Available Destinations** or create a new one.
 ### Add New Destination
Perform the following steps to add a new destination:
Log into the Zeotap CDP App and go to the DESTINATIONS application.
Click **+ Create Destination.**
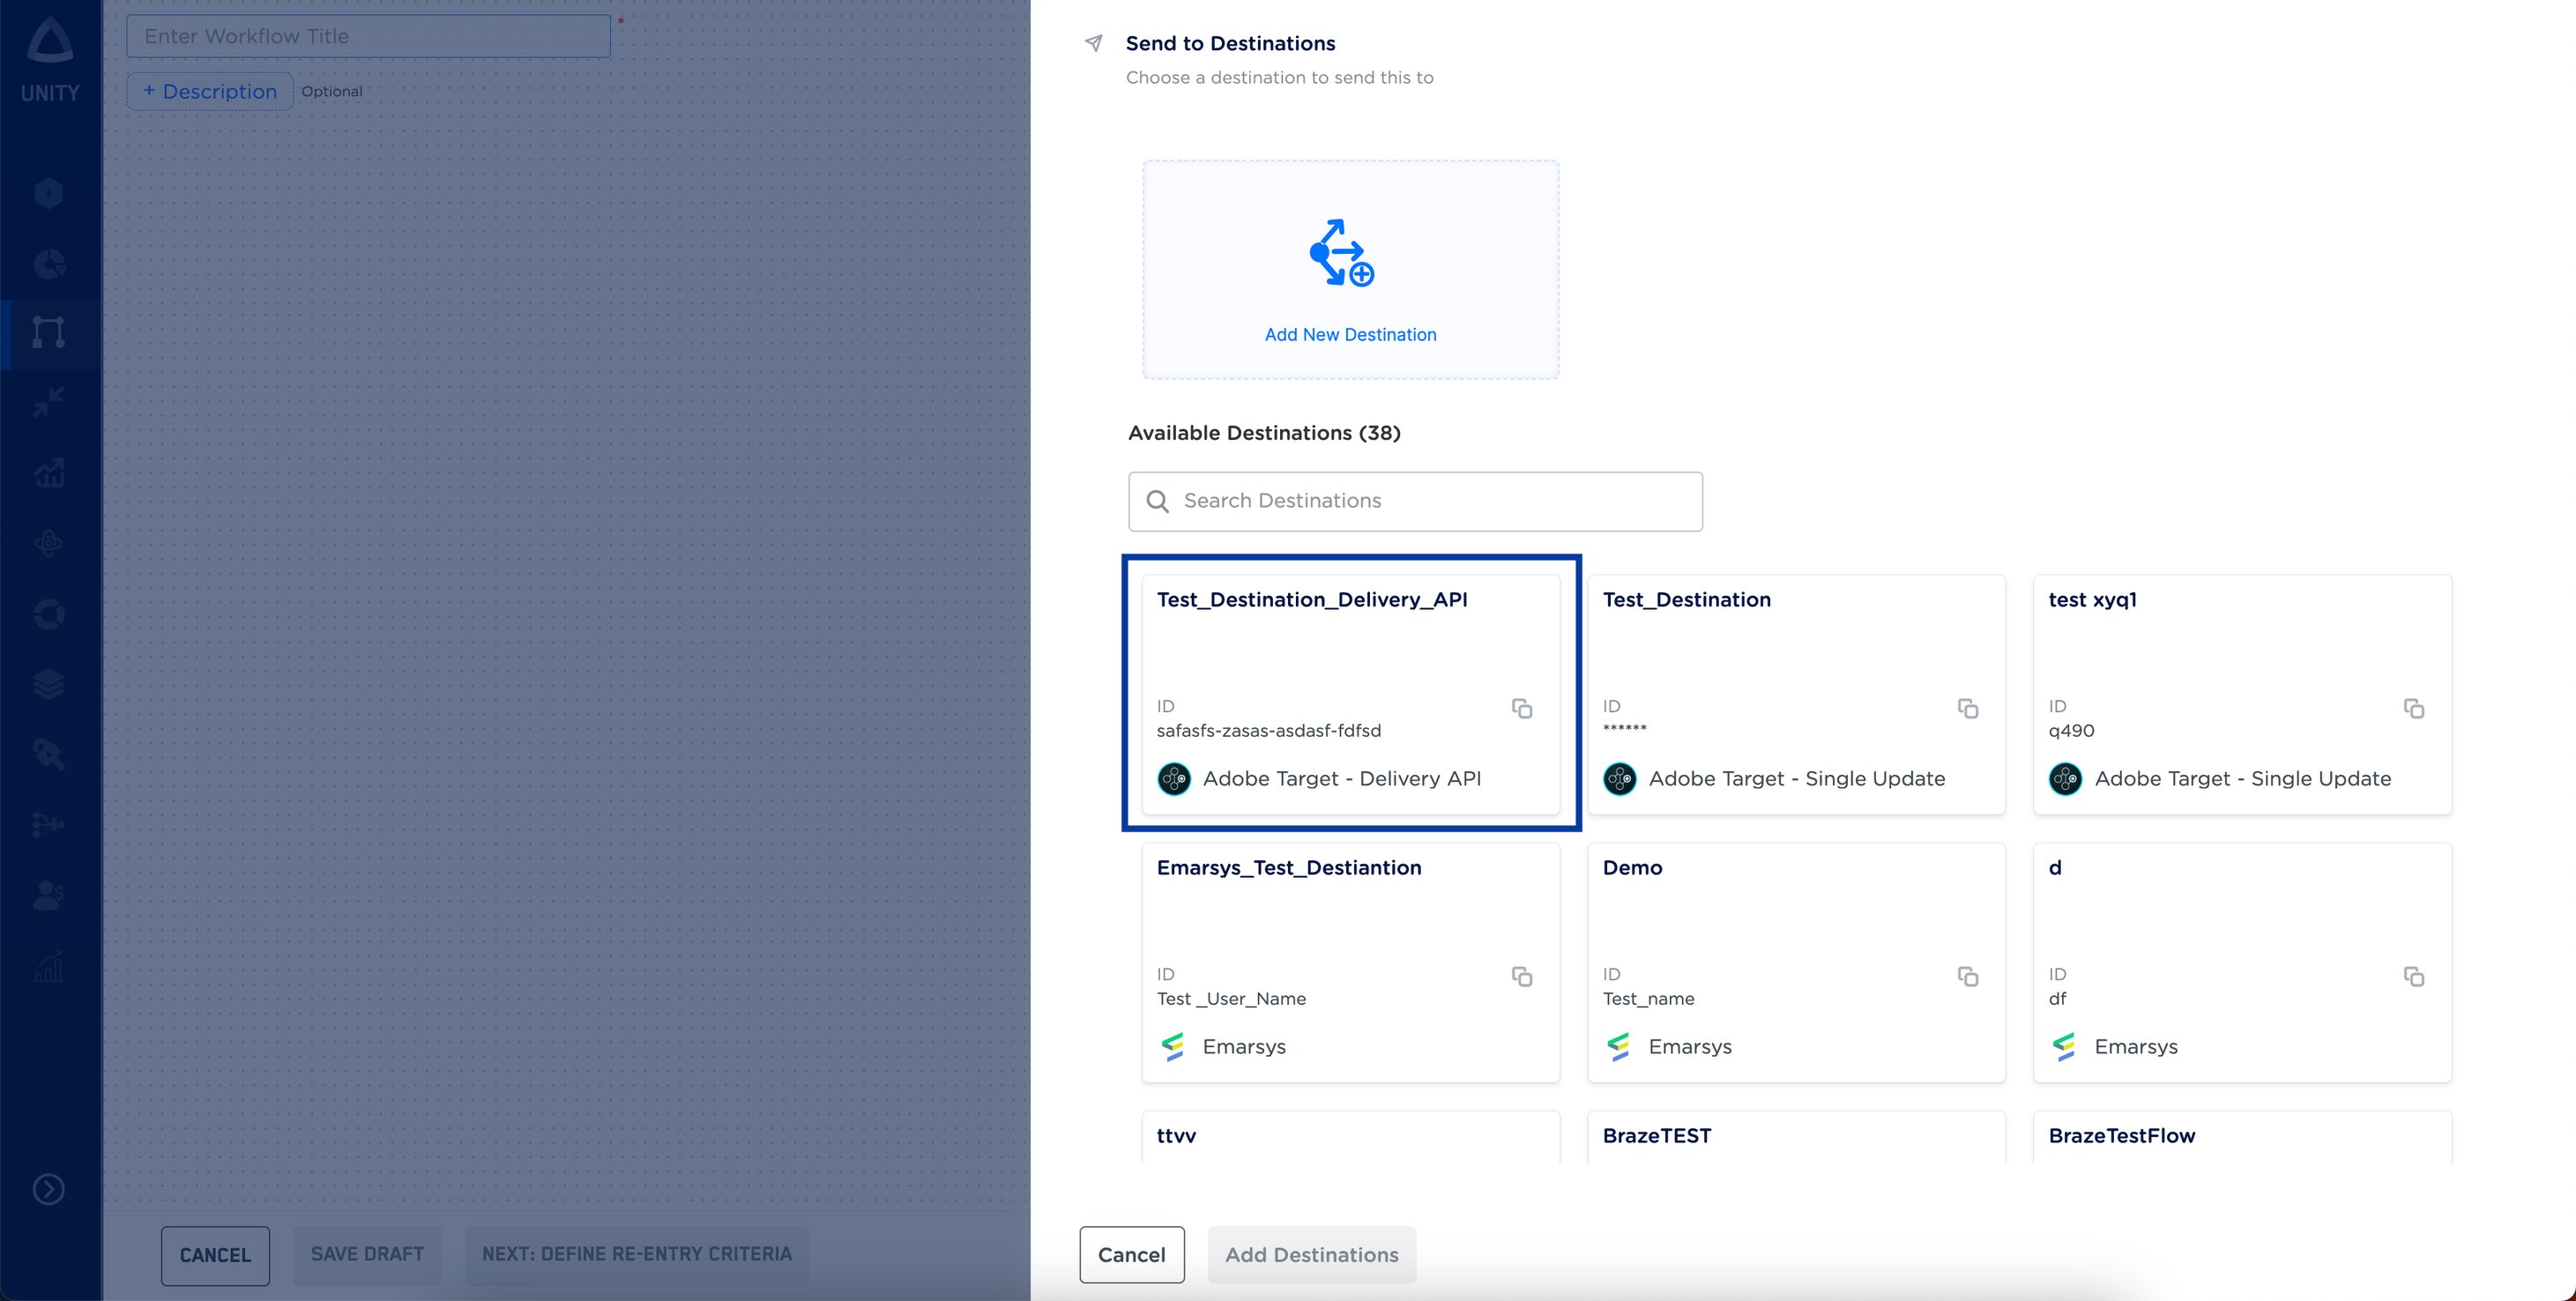
Under All Destinations, search for **Adobe Target - Delivery API.**
Click **Adobe Target - Delivery API.**
a. Enter a name for the Destination.
b. Enter the **Property Token, Client Code** and **Mbox Name** that you have obtained in the above steps.
Review the fields entered above and click **Next**.
In the mapping screen that appears, under **Choose your Action**, select **Stream attributes to Adobe Target - Delivery API**as the action for sending data from the workflow created in Journeys. Under **Map the Fields**, note that you must mandatorily map the **ECID**, **Adobe Target Session ID** and **Mbox Edge Number**. Use **+ Add Mapping Field** to add custom identifiers and attributes you wish to send to Adobe Target (Delivery API).
Once the mapping is complete, click **Create Destination**.
### Link the Destination
After creating a Destination, next, you have to link the Destination that you created to the Journeys workflow and map the relevant source fields to the Destination fields in the **Data To Send** tab.
### Add New Destination
Perform the following steps to add a new destination:
Log into the Zeotap CDP App and go to the DESTINATIONS application.
Click **+ Create Destination.**
Under All Destinations, search for **Adobe Target - Delivery API.**
Click **Adobe Target - Delivery API.**
a. Enter a name for the Destination.
b. Enter the **Property Token, Client Code** and **Mbox Name** that you have obtained in the above steps.
Review the fields entered above and click **Next**.
In the mapping screen that appears, under **Choose your Action**, select **Stream attributes to Adobe Target - Delivery API**as the action for sending data from the workflow created in Journeys. Under **Map the Fields**, note that you must mandatorily map the **ECID**, **Adobe Target Session ID** and **Mbox Edge Number**. Use **+ Add Mapping Field** to add custom identifiers and attributes you wish to send to Adobe Target (Delivery API).
Once the mapping is complete, click **Create Destination**.
### Link the Destination
After creating a Destination, next, you have to link the Destination that you created to the Journeys workflow and map the relevant source fields to the Destination fields in the **Data To Send** tab.
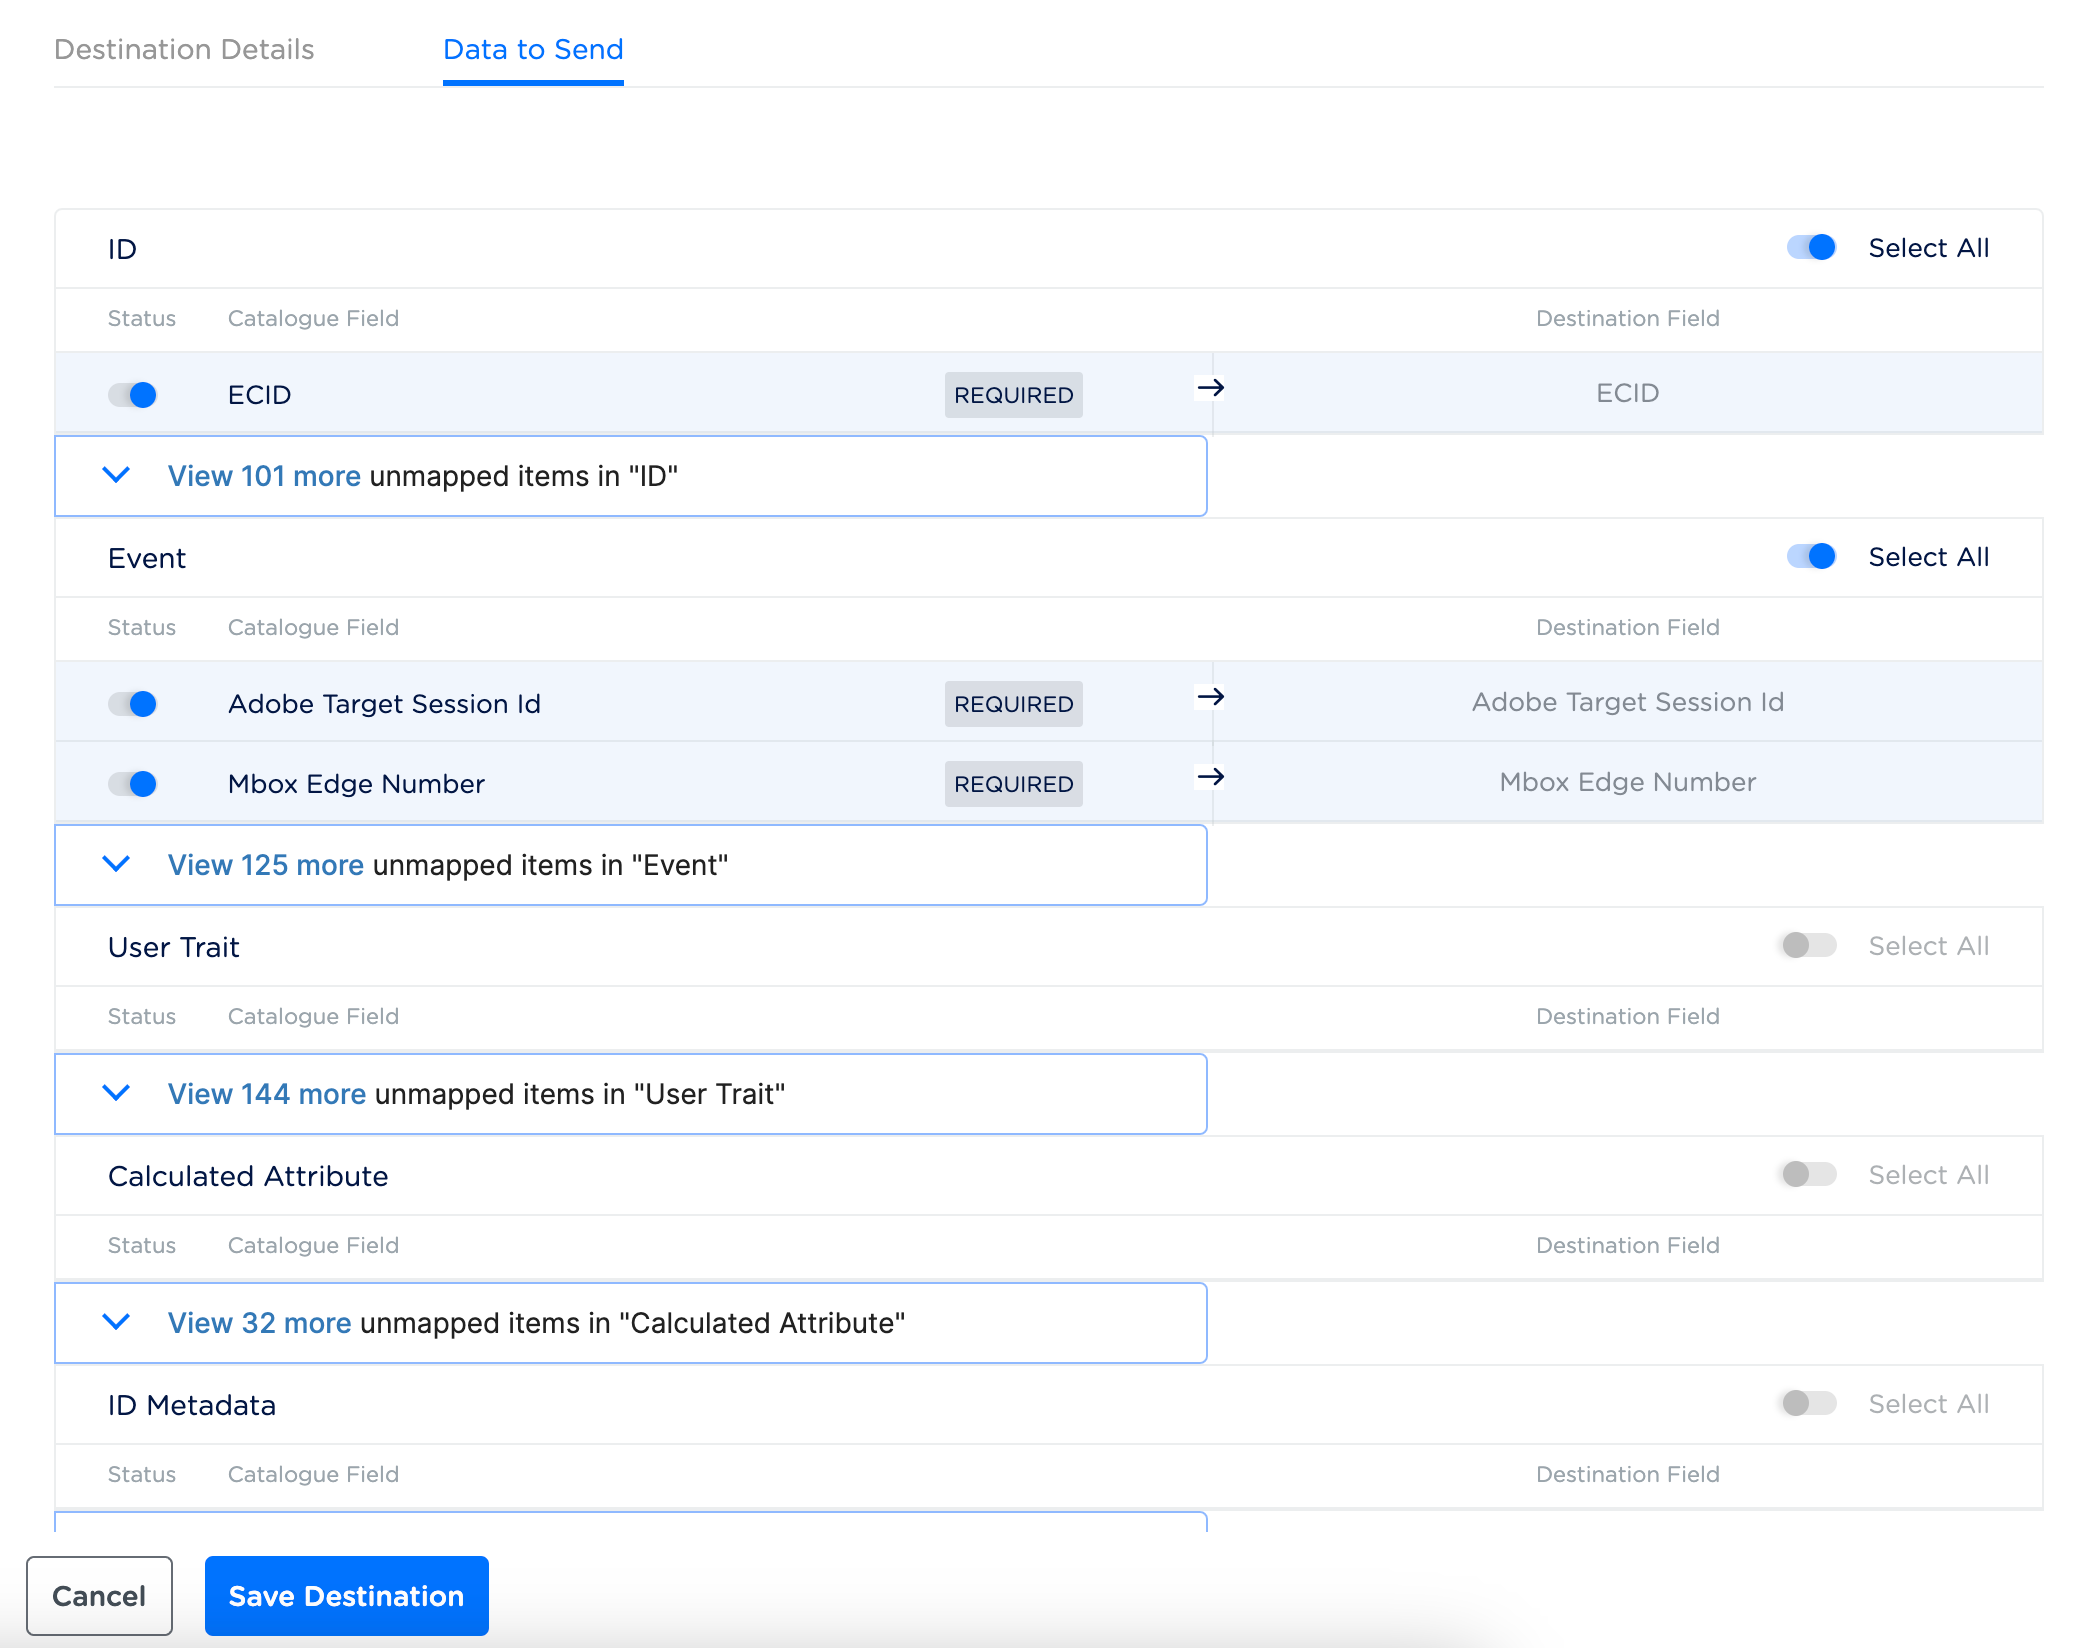
 Note that, by default, the ECID, Adobe Target Session Id and Mbox Edge Number are mapped in the **Data to Send** tab as they are the mandatory fields. Along with that, you can map more profile attributes that you wish to share using this integration. Once you have completed the mapping, click **Save Destination**.
 ## View the Profile Updates Shared on Adobe Target (Delivery API)
You can view the profile parameters sent to Adobe Target (Delivery API). To do so, log into the Adobe Experience Platform and perform the following steps:
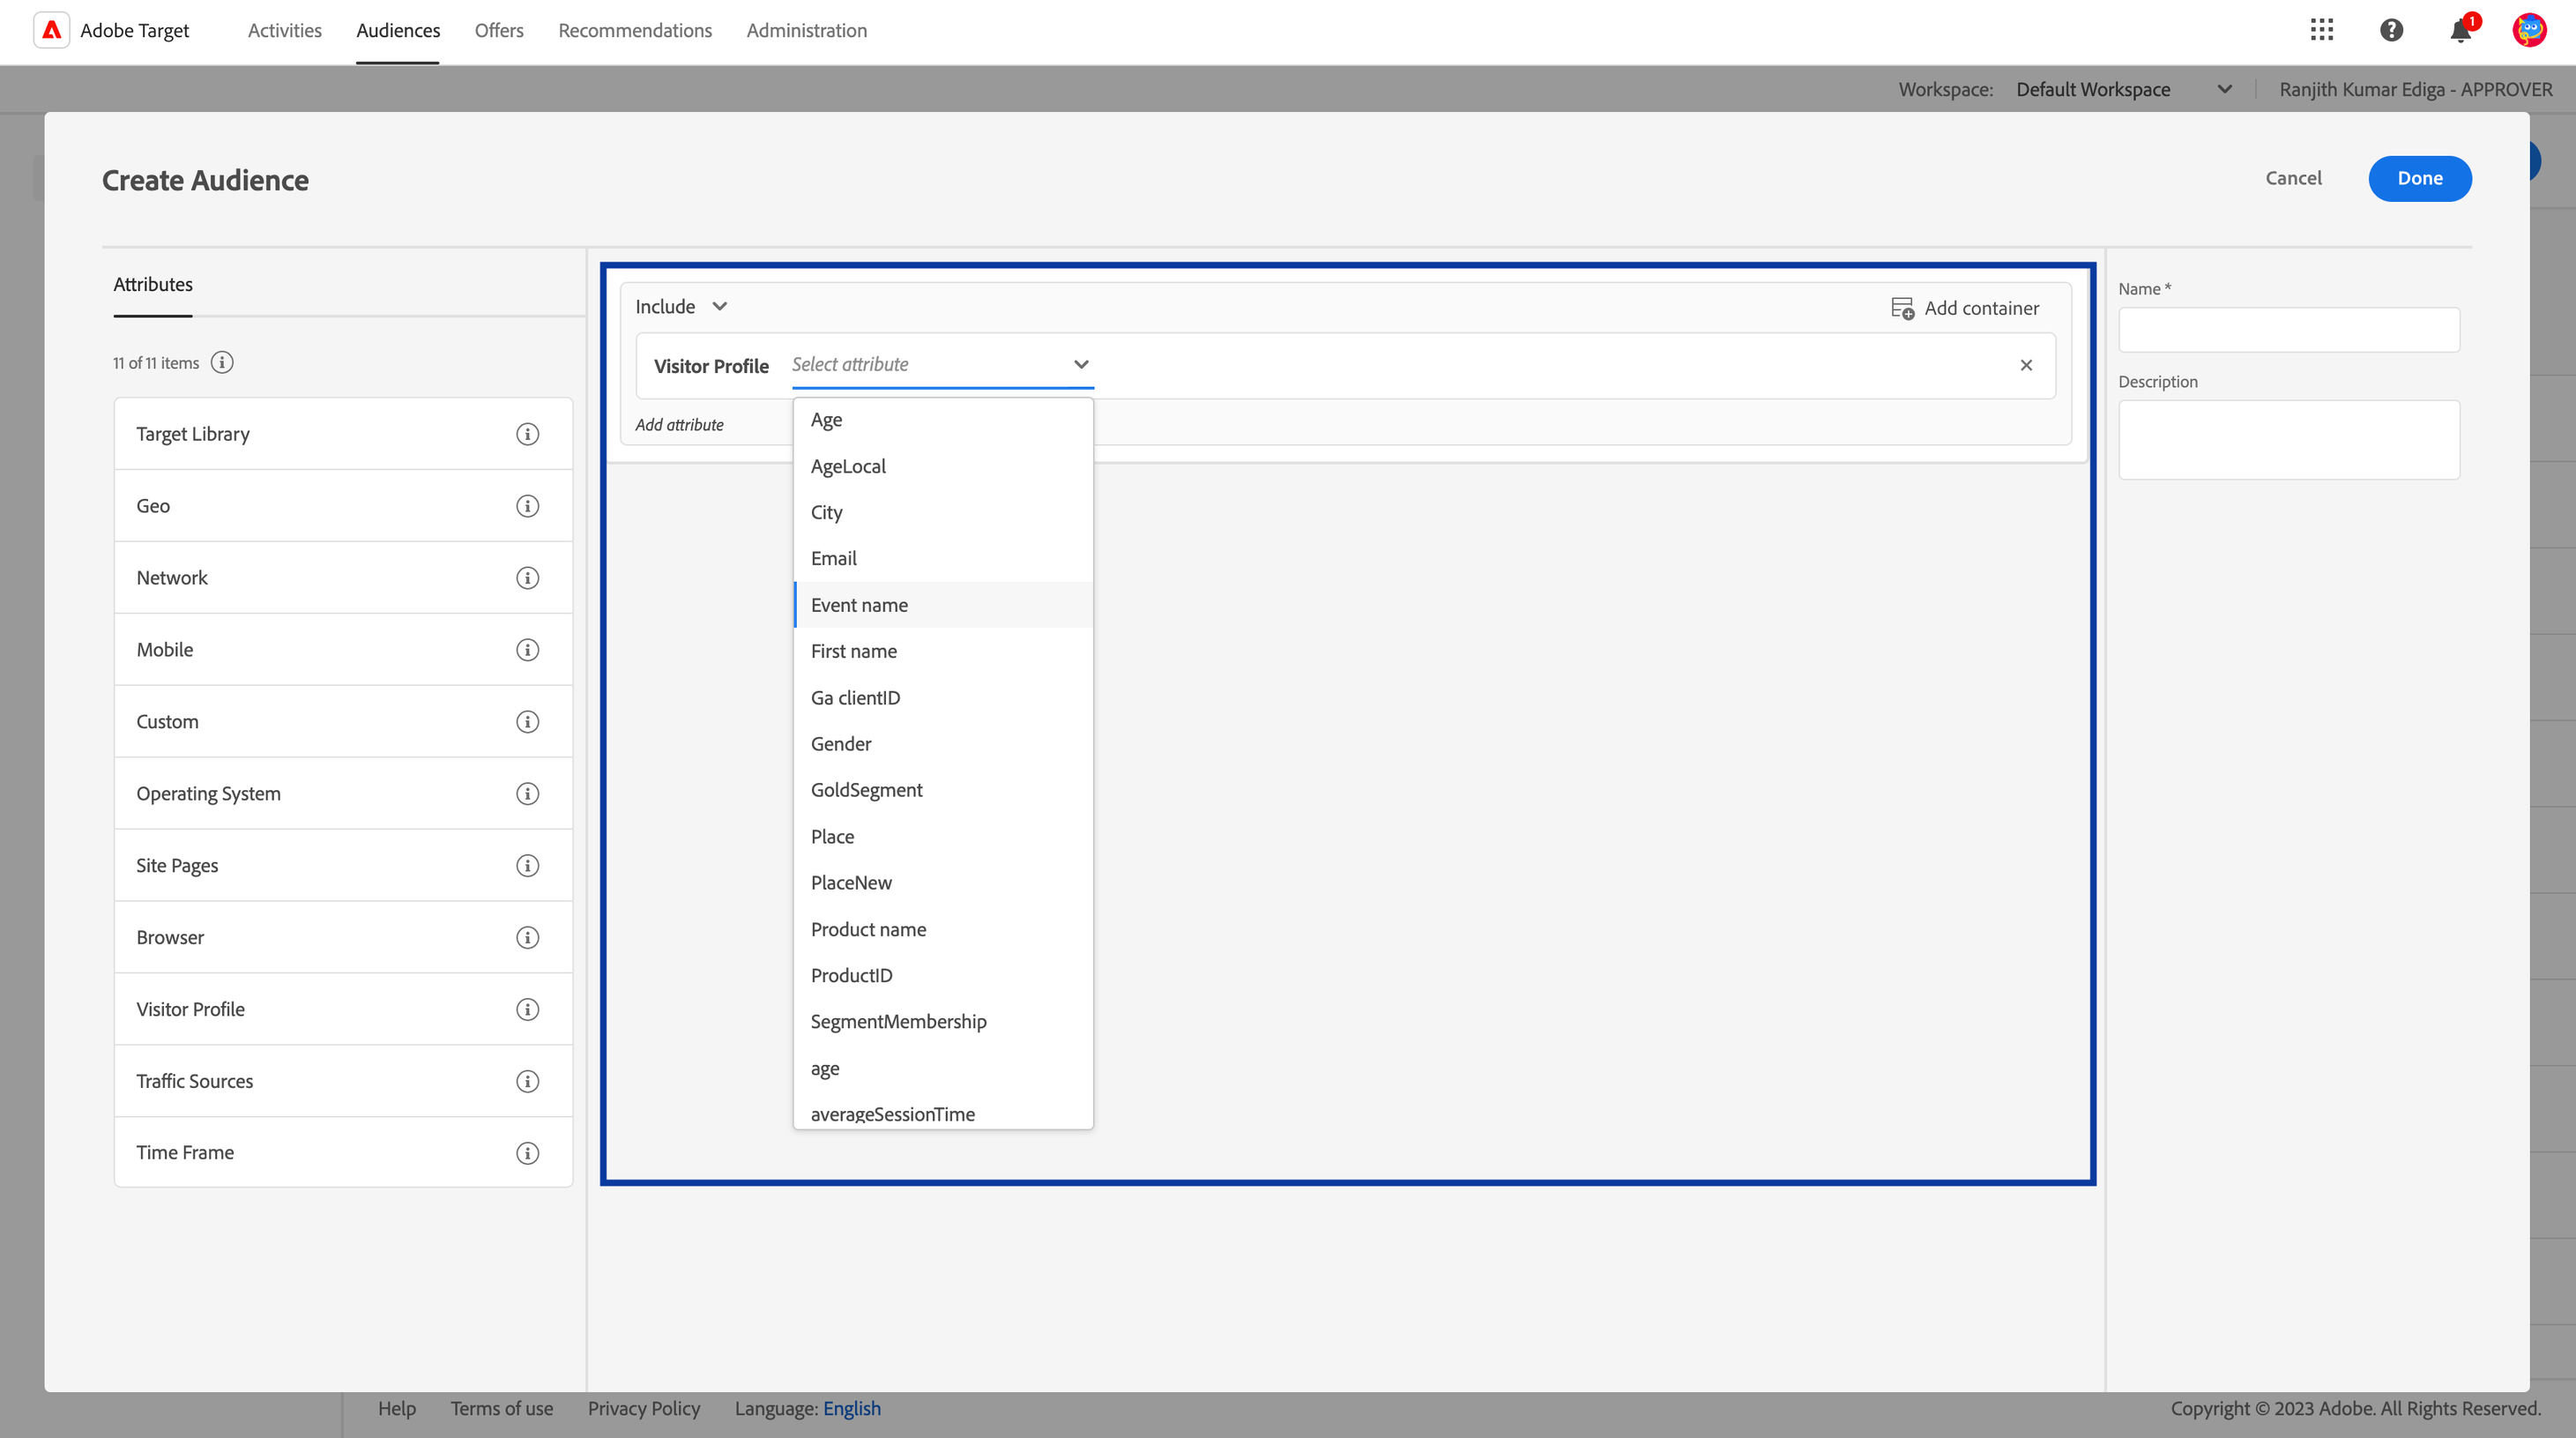
Go to the **Audiences** tab and click **Create Audience**.
Under **Attributes**, drag and drop the **Visitor Profile** to the middle of the screen.
Use the drop-down option on the Visitor Profile to verify the presence of the profile parameters that you have shared through Zeotap.
## View the Profile Updates Shared on Adobe Target (Delivery API)
You can view the profile parameters sent to Adobe Target (Delivery API). To do so, log into the Adobe Experience Platform and perform the following steps:
Go to the **Audiences** tab and click **Create Audience**.
Under **Attributes**, drag and drop the **Visitor Profile** to the middle of the screen.
Use the drop-down option on the Visitor Profile to verify the presence of the profile parameters that you have shared through Zeotap.