> ## Documentation Index
> Fetch the complete documentation index at: https://docs.zeotap.com/llms.txt
> Use this file to discover all available pages before exploring further.
# Active Agent - Virtual Minds
## Overview
The *Active Agent demand-side platform (DSP)* is the only fully-fledged omnichannel DSP on the German market to offer innovative marketing technology.
The integration with Zeotap allows you to send segment data created in Zeotap to your Active Agent instance.
## Supported Identifiers
The integration supports the following identifier types:
| ID Type | Description |
| :------ | :------------------------------------ |
| 0 | UNKNOWN |
| 3 | ADITION |
| 4 | AAID — Android Advertising ID |
| 5 | IDFA — iOS Identifier for Advertisers |
| 12 | CTV |
| 13 | NETID |
| 15 | ID5 |
| 17 | IDFV |
| 40 | UTIQ |
If you are unsure which ID type you will send, you can leave the ID Type blank.
## Prerequisites
Before pushing segments to Active Agent, ensure you have your **Adition Network ID** from your Active Agent POC.
Once you have the Adition Network ID, contact **Zeotap Customer Support** and request that they create the required attribute on their side for your network ID. After the attribute is created, it becomes visible in your Zeotap instance, and Support will share the following credentials with you:
* **Attribute ID**
* **Attribute Key**
These credentials are used when linking an audience to the Active Agent destination so that segments are automatically pushed to your Active Agent instance.
### Retrieve Attribute ID and Key from your Zeotap Instance
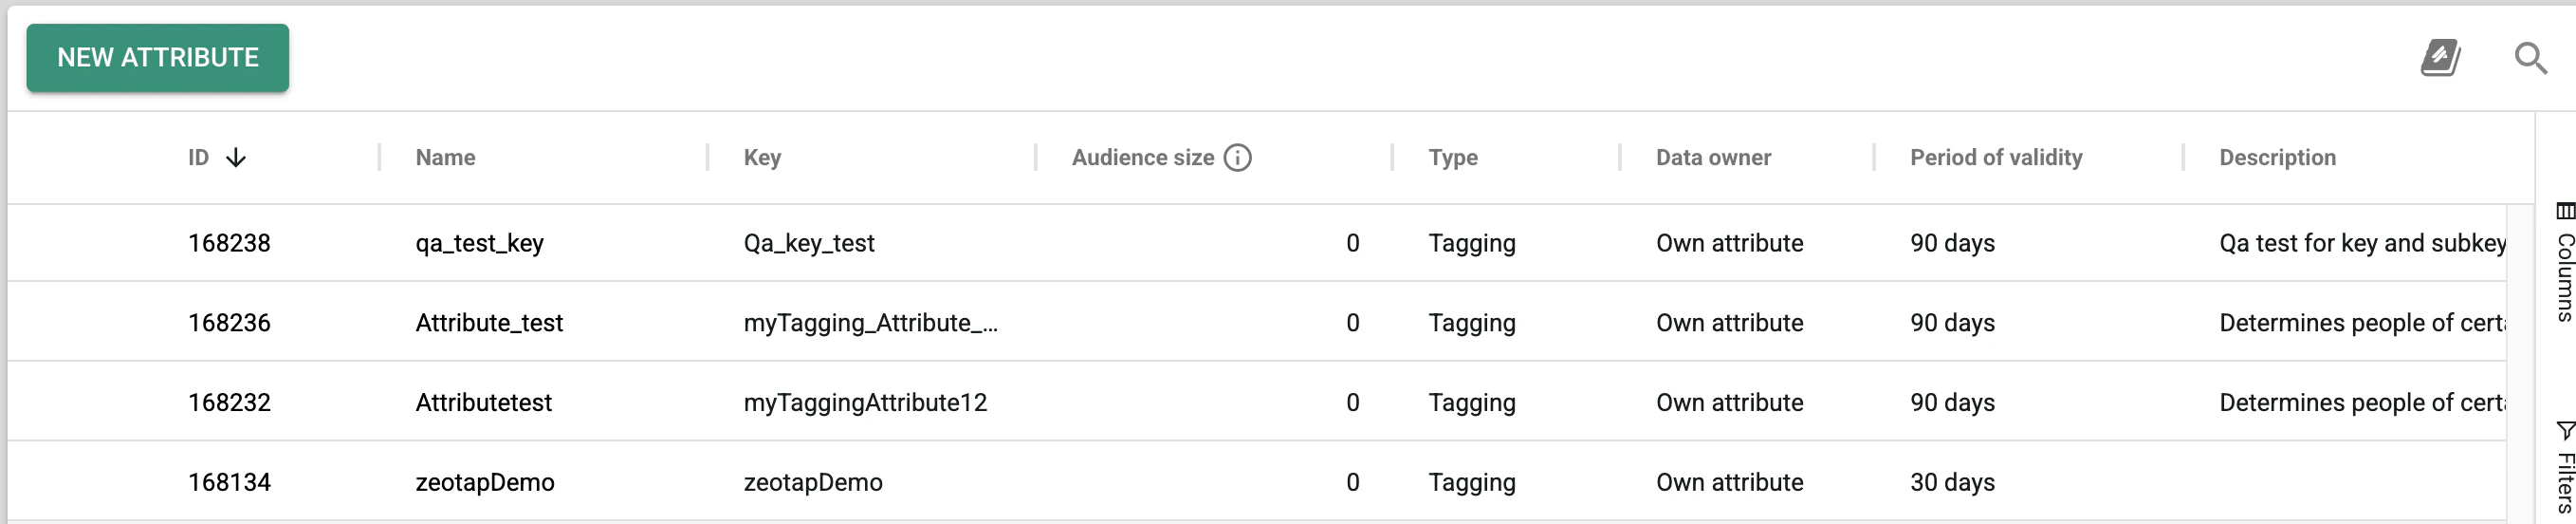
Once you contact Zeotap Customer Support and they create the shared attribute, the attribute appears in your instance on the audience attribute screen. Note down its **Attribute ID** and **Key**.
 ## Create a Destination for Active Agent
Once you have obtained the prerequisites mentioned in the above section, perform the following steps to create a Destination for Active Agent:
Log into the Zeotap CDP App and go to the **DESTINATIONS** application.
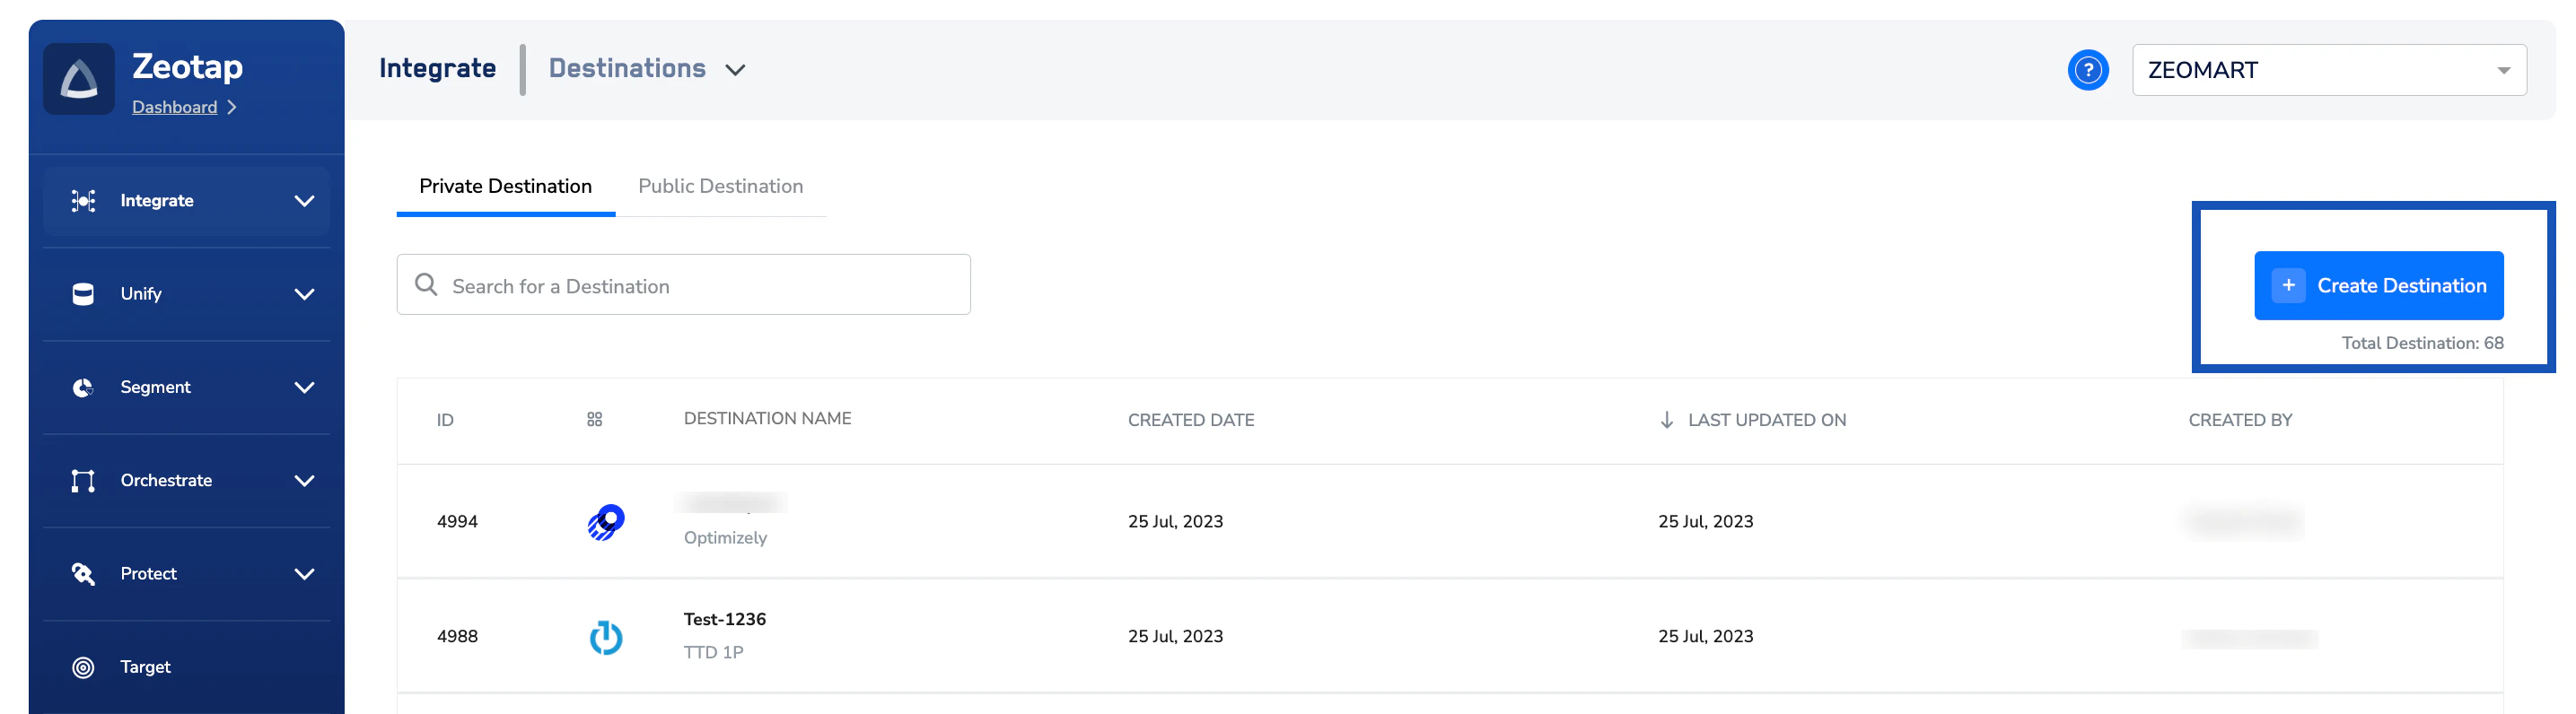
Click **+ Create Destination**.
## Create a Destination for Active Agent
Once you have obtained the prerequisites mentioned in the above section, perform the following steps to create a Destination for Active Agent:
Log into the Zeotap CDP App and go to the **DESTINATIONS** application.
Click **+ Create Destination**.
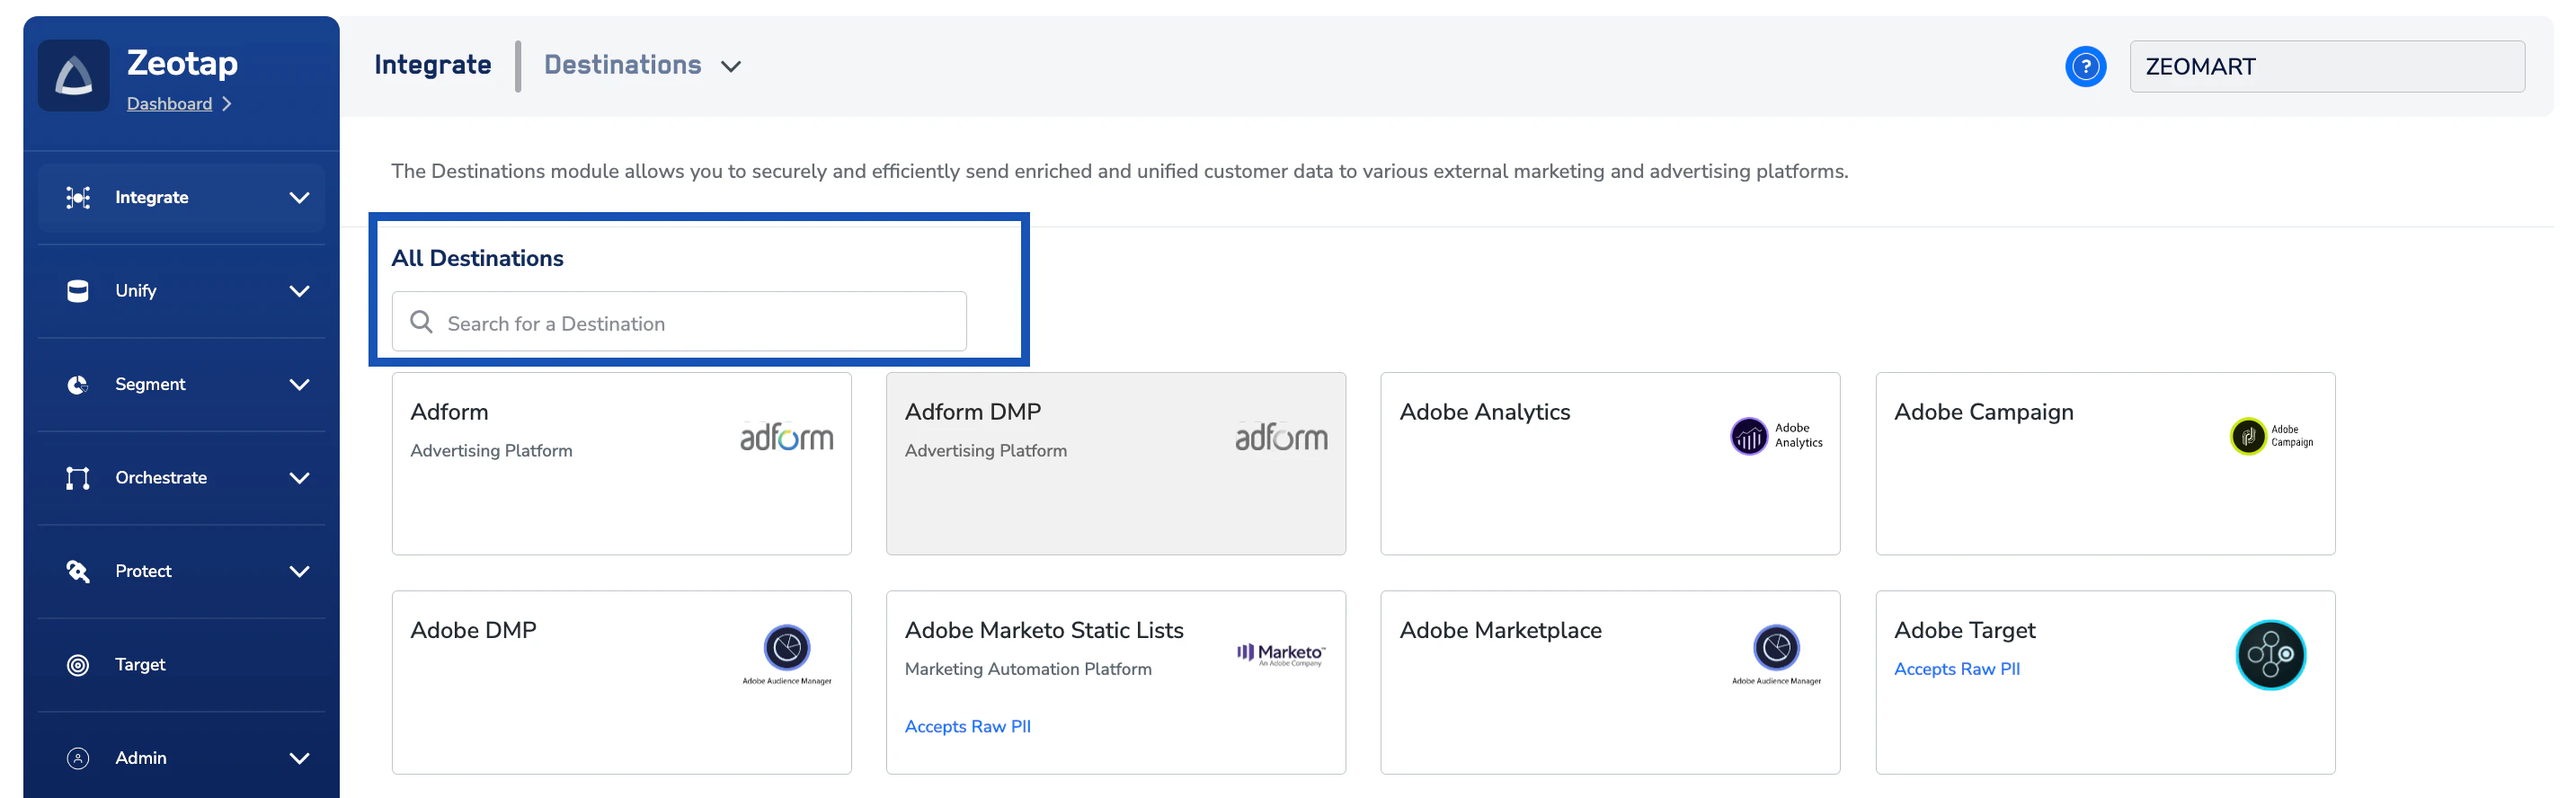
 Under **All Destinations**, search for **Active Agent**.
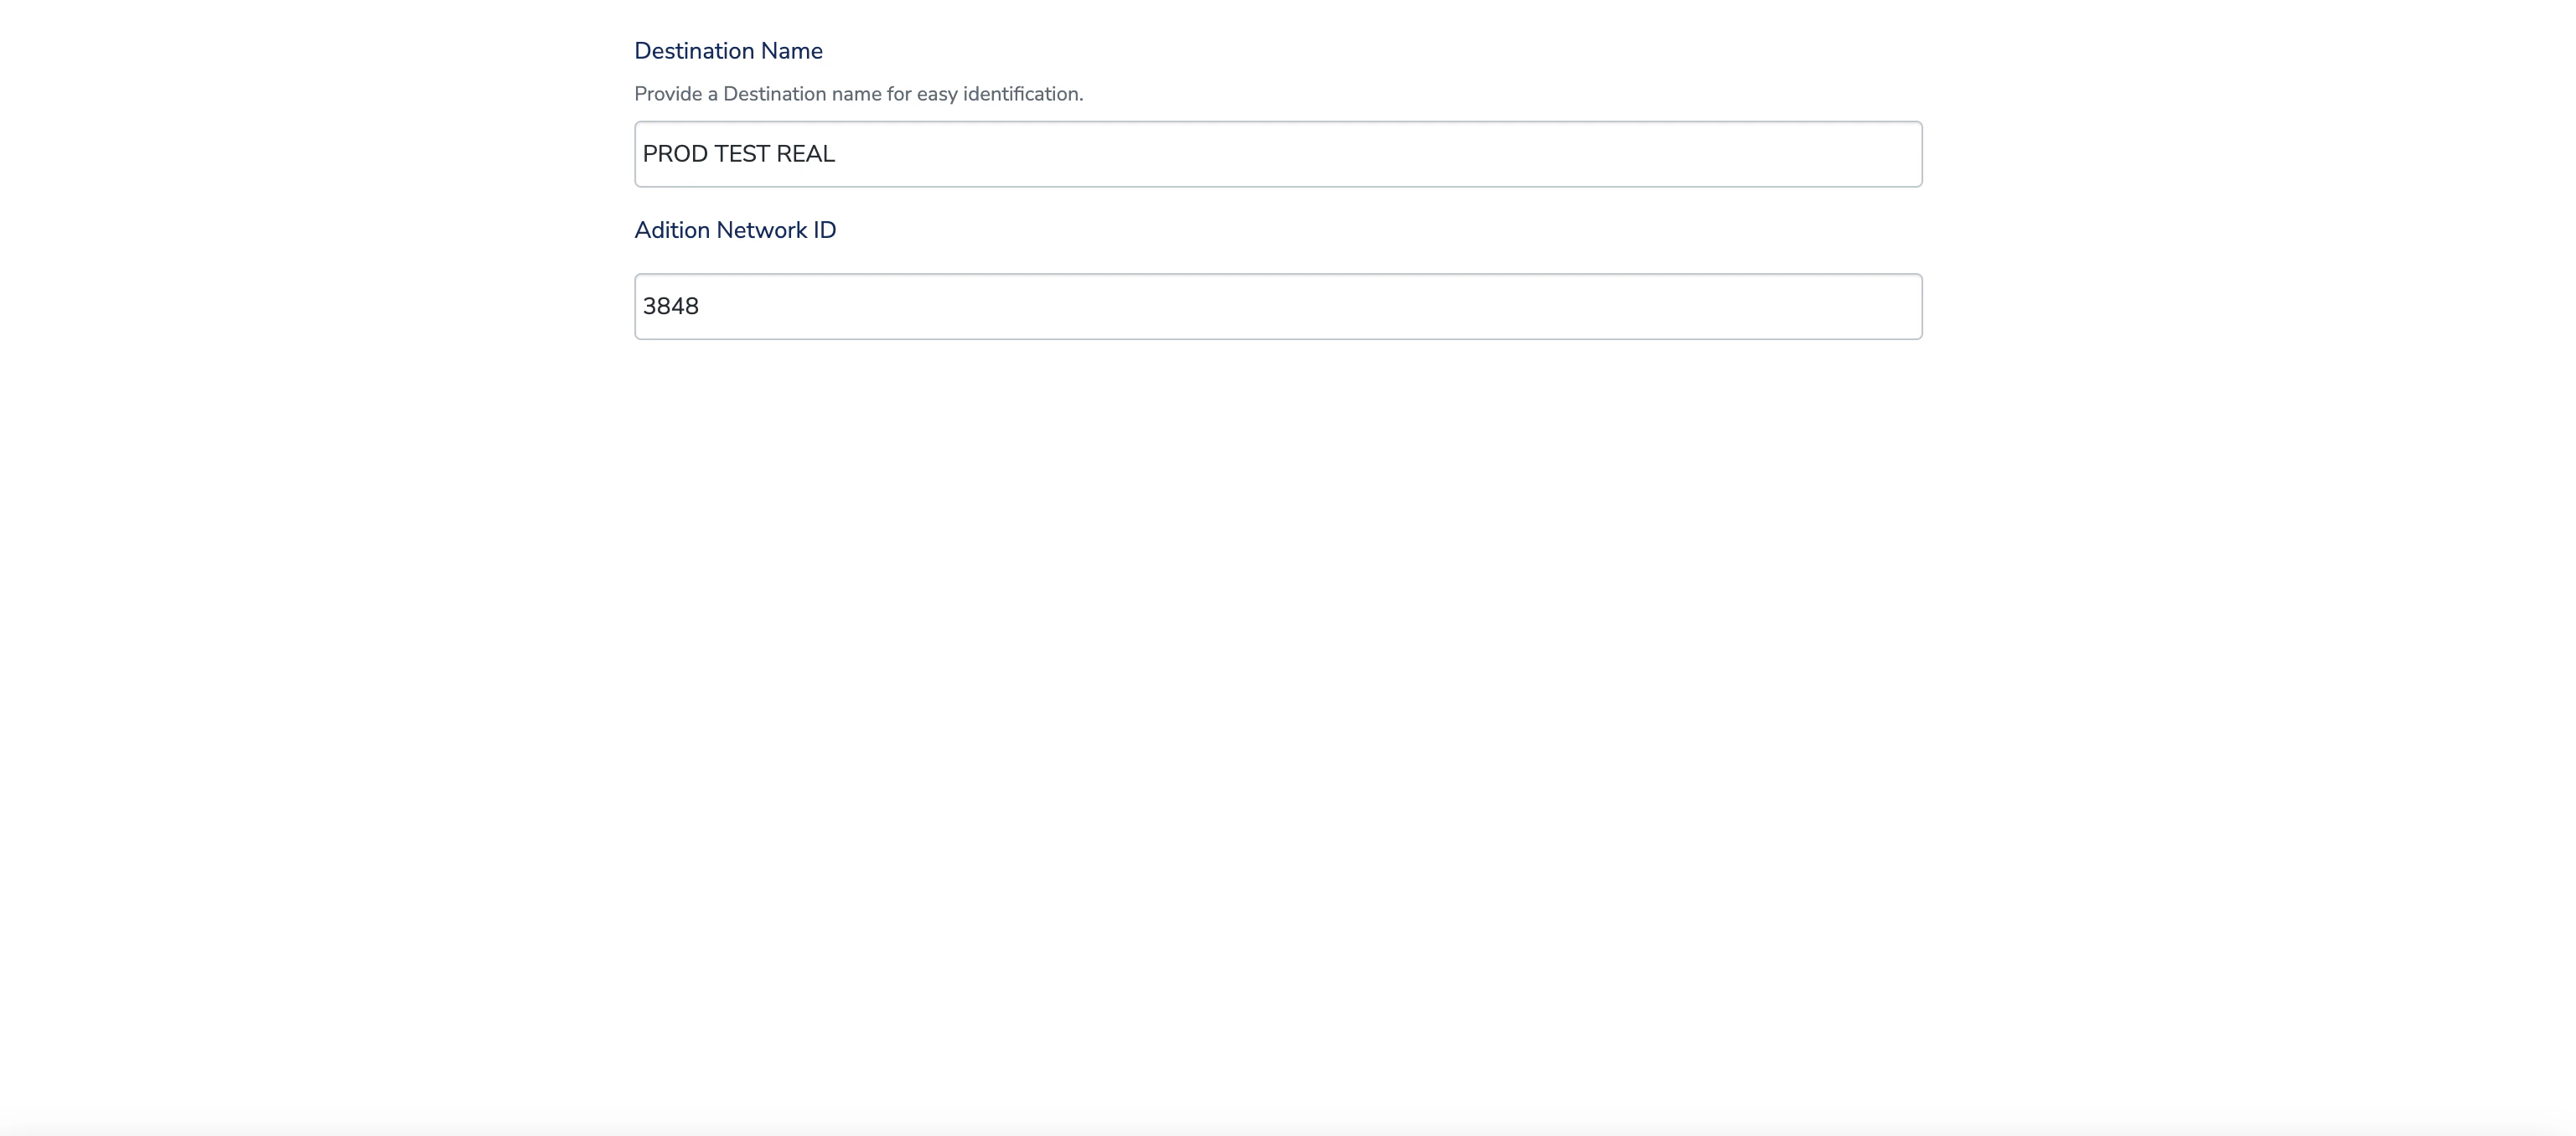
 Click **Active Agent**. A screen appears with destination details on the left and the configuration fields on the right. Enter the required details:
a. Enter a name for the Destination.
b. Enter the **Adition Network ID**.
Click **Active Agent**. A screen appears with destination details on the left and the configuration fields on the right. Enter the required details:
a. Enter a name for the Destination.
b. Enter the **Adition Network ID**.
 c. Review the values and click **Next** to proceed to mapping.
On the **Action and Mapping** screen, select either **Send Identifiers via Key and Sub-Key to Active Agent** or **Send Identifier via Sub-key in Active Agent** as the action, then map the **Catalogue** and **Destination** fields.
The following fields need to be mapped:
a. **Active Agent ID** — Map the identifier(s) you want to send. You can now map **multiple identifiers** to this single field — select them as a **List** (for example, `Adid`, `Email Raw`, and an Active Agent / partner cookie) so that all of them are sent to Active Agent in one action.
b. **ID Type** — Choose the appropriate ID type from the [Supported Identifiers](#supported-identifiers) list. Add it as custom data. When sending a list of identifiers, provide the **ID Type** as a single **String** value. If unsure, leave it blank.
c. Review the values and click **Next** to proceed to mapping.
On the **Action and Mapping** screen, select either **Send Identifiers via Key and Sub-Key to Active Agent** or **Send Identifier via Sub-key in Active Agent** as the action, then map the **Catalogue** and **Destination** fields.
The following fields need to be mapped:
a. **Active Agent ID** — Map the identifier(s) you want to send. You can now map **multiple identifiers** to this single field — select them as a **List** (for example, `Adid`, `Email Raw`, and an Active Agent / partner cookie) so that all of them are sent to Active Agent in one action.
b. **ID Type** — Choose the appropriate ID type from the [Supported Identifiers](#supported-identifiers) list. Add it as custom data. When sending a list of identifiers, provide the **ID Type** as a single **String** value. If unsure, leave it blank.
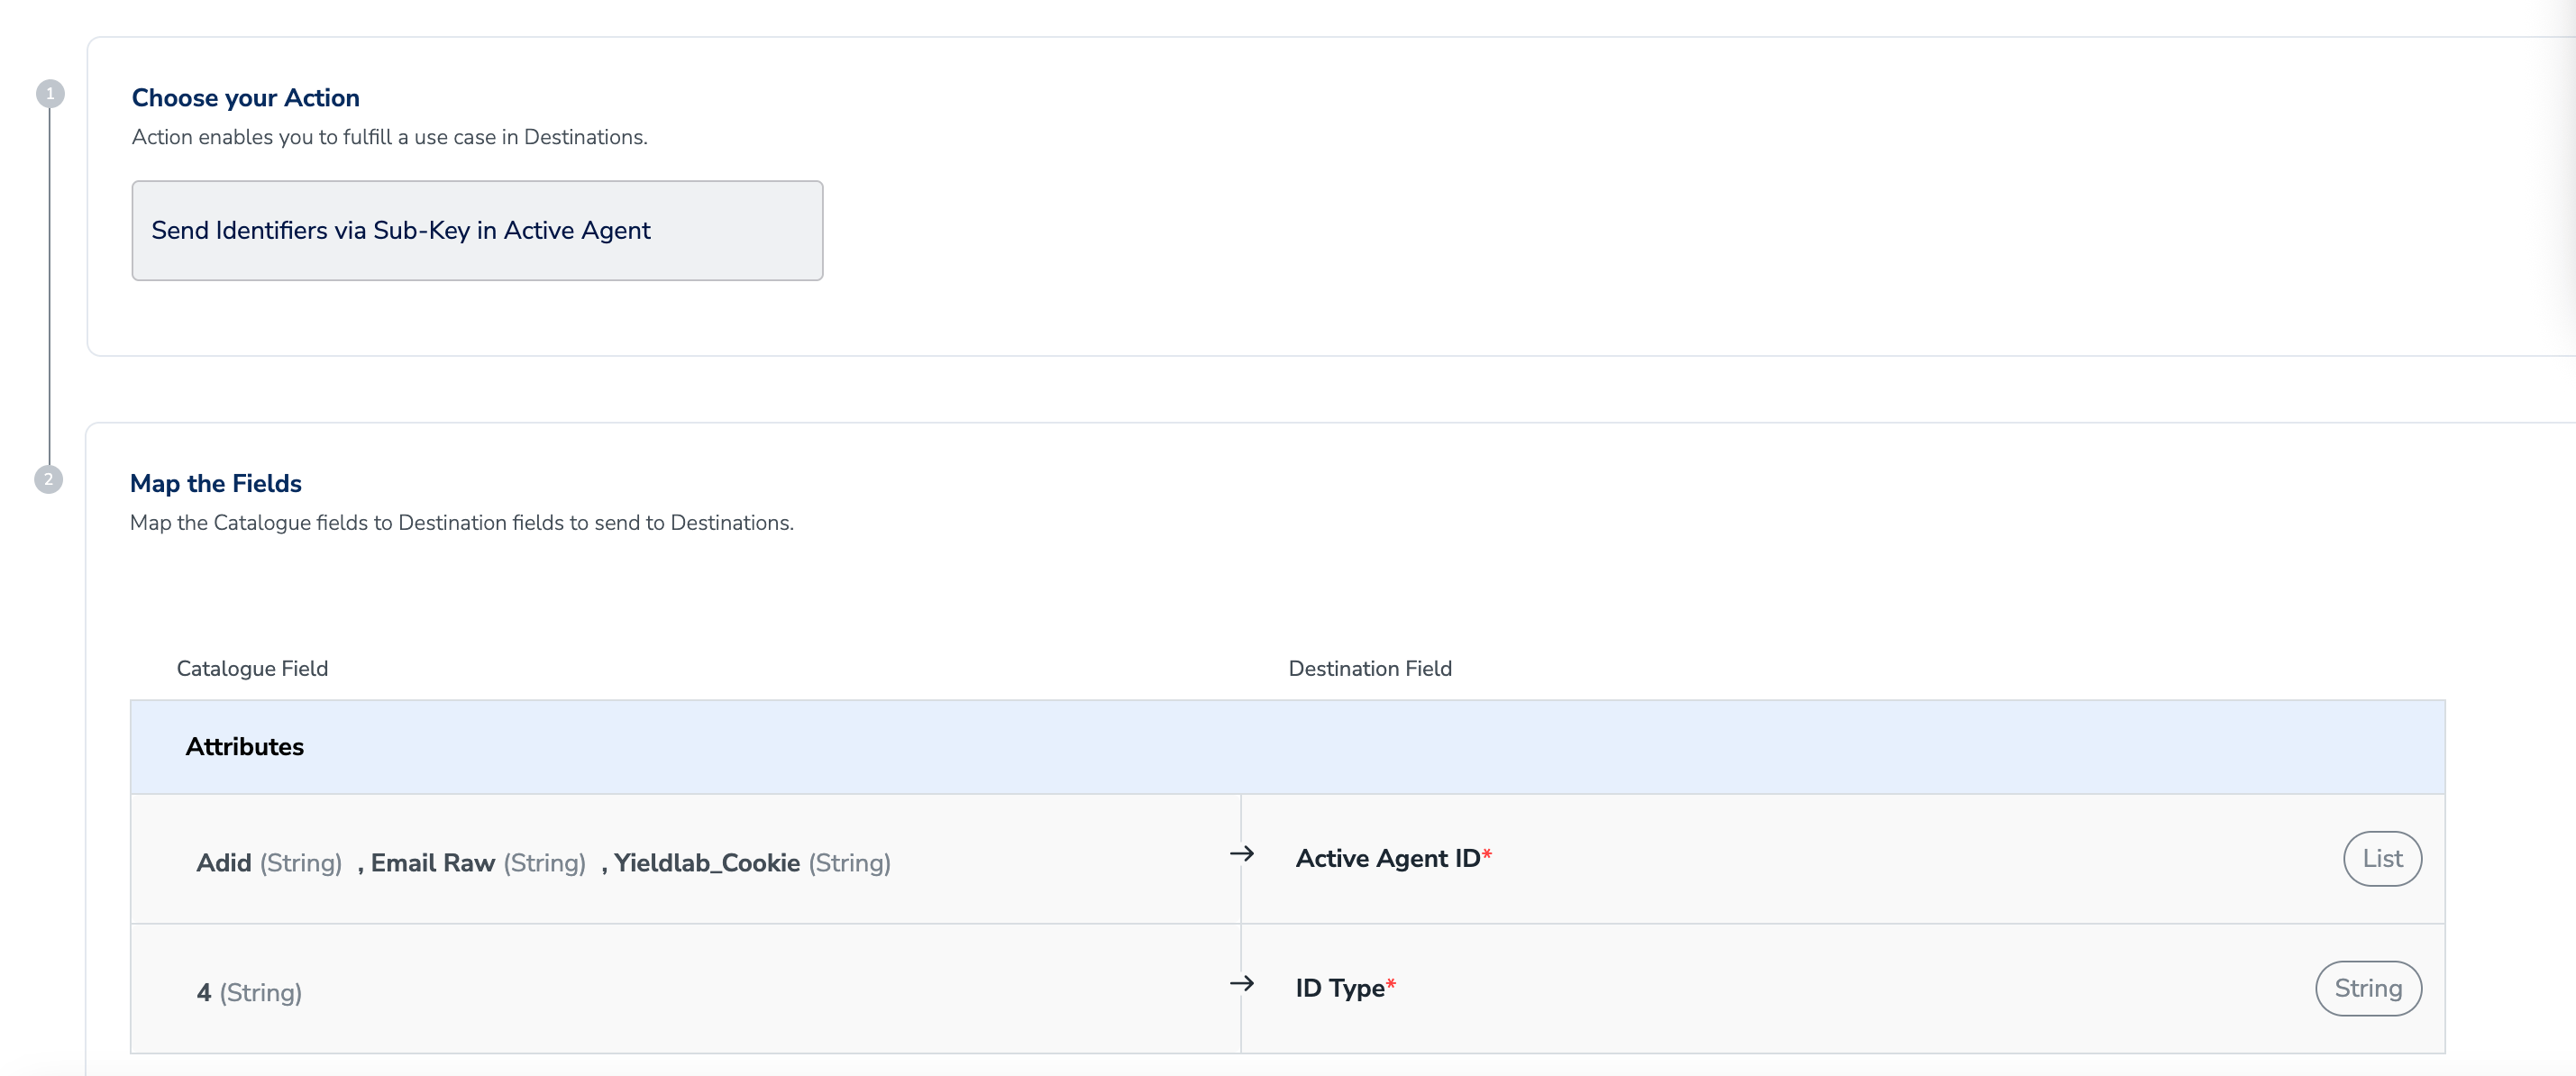 For **Send Identifiers via Key and Sub-Key**, key and sub-key names match. To add a sub-key into an existing key, use **Send Identifier via Sub-key in Active Agent**.
Once the mapping is complete, click **Create Destination**. The created Destination gets listed in the **Audiences** application, which can be linked to an audience (segment).
## Audience Boost
Active Agent supports **Audience Boost**, which enriches your first-party (1P) audience data using Zeotap's identity graph to increase match rates and addressable reach — without collecting more data yourself.
To enable it, open the Destination's **Destination Settings**, go to the **Enable Audience Boost** section, and select the **Audience boost** checkbox.
Audience Boost is enabled per Destination, and its availability depends on the data acceptance policy of the Destination. For any inquiries, contact your Zeotap POC.
For details on how Audience Boost works, the audiences it creates in the Destination, and how to measure incremental reach, refer to [Audience Boost](/articles/segment-customer/audience-boost).
## Link an Audience to the Active Agent Destination
The details you captured above are now used when linking the audience. The audience-link pop-up differs depending on the action you chose for the destination.
### When the action is "Send Identifiers via Key and Sub-Key to Active Agent"
For **Send Identifiers via Key and Sub-Key**, key and sub-key names match. To add a sub-key into an existing key, use **Send Identifier via Sub-key in Active Agent**.
Once the mapping is complete, click **Create Destination**. The created Destination gets listed in the **Audiences** application, which can be linked to an audience (segment).
## Audience Boost
Active Agent supports **Audience Boost**, which enriches your first-party (1P) audience data using Zeotap's identity graph to increase match rates and addressable reach — without collecting more data yourself.
To enable it, open the Destination's **Destination Settings**, go to the **Enable Audience Boost** section, and select the **Audience boost** checkbox.
Audience Boost is enabled per Destination, and its availability depends on the data acceptance policy of the Destination. For any inquiries, contact your Zeotap POC.
For details on how Audience Boost works, the audiences it creates in the Destination, and how to measure incremental reach, refer to [Audience Boost](/articles/segment-customer/audience-boost).
## Link an Audience to the Active Agent Destination
The details you captured above are now used when linking the audience. The audience-link pop-up differs depending on the action you chose for the destination.
### When the action is "Send Identifiers via Key and Sub-Key to Active Agent"
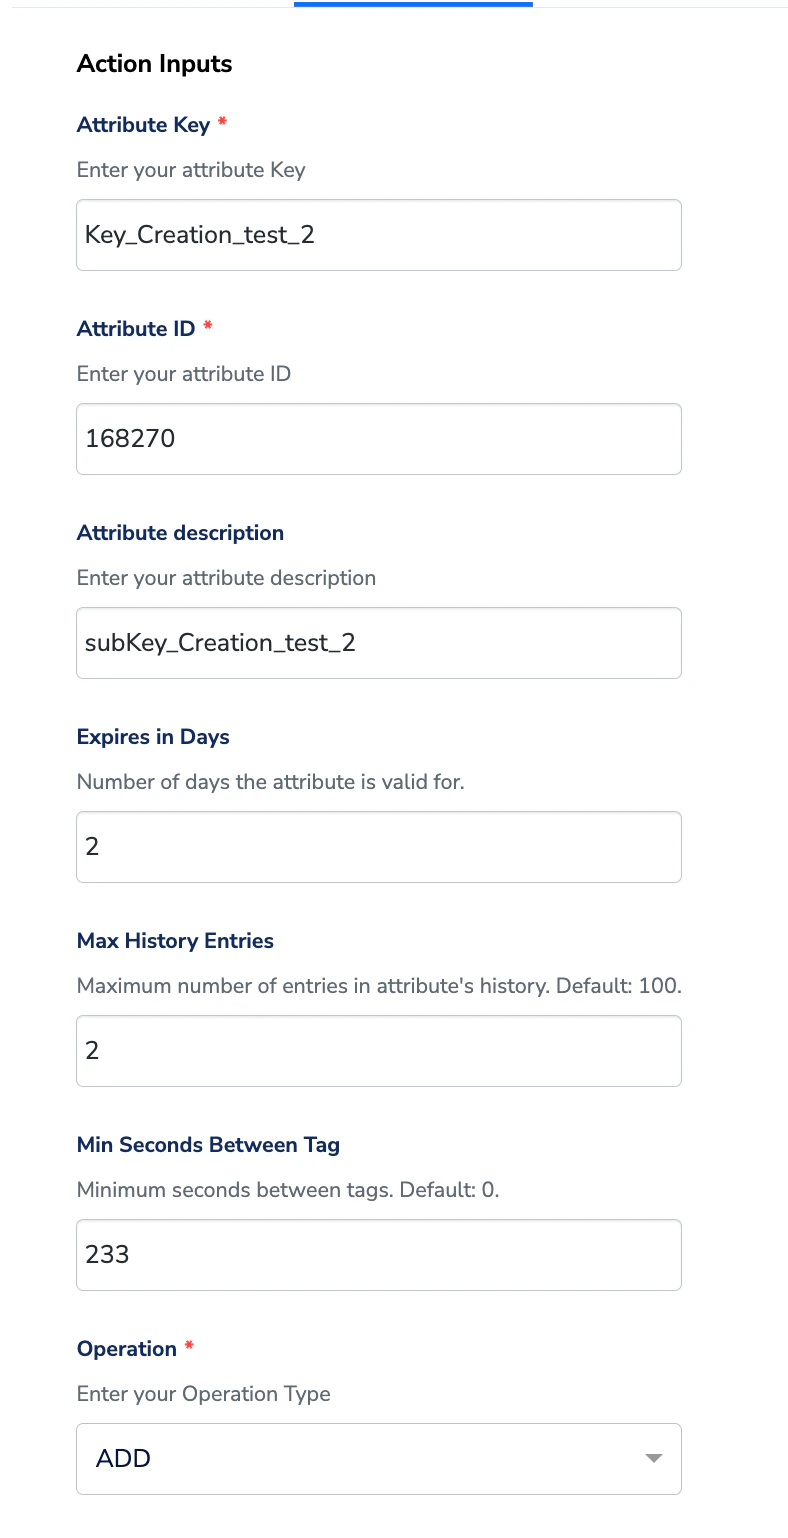 | Field | Description |
| :-------------------------- | :------------------------------------------------------------------ |
| **Attribute Key** | Enter your attribute Key. |
| **Attribute ID** | Enter your attribute ID. |
| **Attribute Description** | Enter a description for the attribute. |
| **Expires in Days** | Number of days the attribute is valid for. |
| **Max History Entries** | Maximum number of entries in the attribute's history. Default: 100. |
| **Min Seconds Between Tag** | Minimum seconds between tags. Default: 0. |
| **Operation** | Enter your Operation Type (for example, ADD). |
**Important**
Keep the **Max History Entries** below 10 for the destination to work as required. You can add other parameters depending on how you would like the audience to be set up.
### When the action is "Send Identifier via Sub-key in Active Agent"
| Field | Description |
| :-------------------------- | :------------------------------------------------------------------ |
| **Attribute Key** | Enter your attribute Key. |
| **Attribute ID** | Enter your attribute ID. |
| **Attribute Description** | Enter a description for the attribute. |
| **Expires in Days** | Number of days the attribute is valid for. |
| **Max History Entries** | Maximum number of entries in the attribute's history. Default: 100. |
| **Min Seconds Between Tag** | Minimum seconds between tags. Default: 0. |
| **Operation** | Enter your Operation Type (for example, ADD). |
**Important**
Keep the **Max History Entries** below 10 for the destination to work as required. You can add other parameters depending on how you would like the audience to be set up.
### When the action is "Send Identifier via Sub-key in Active Agent"
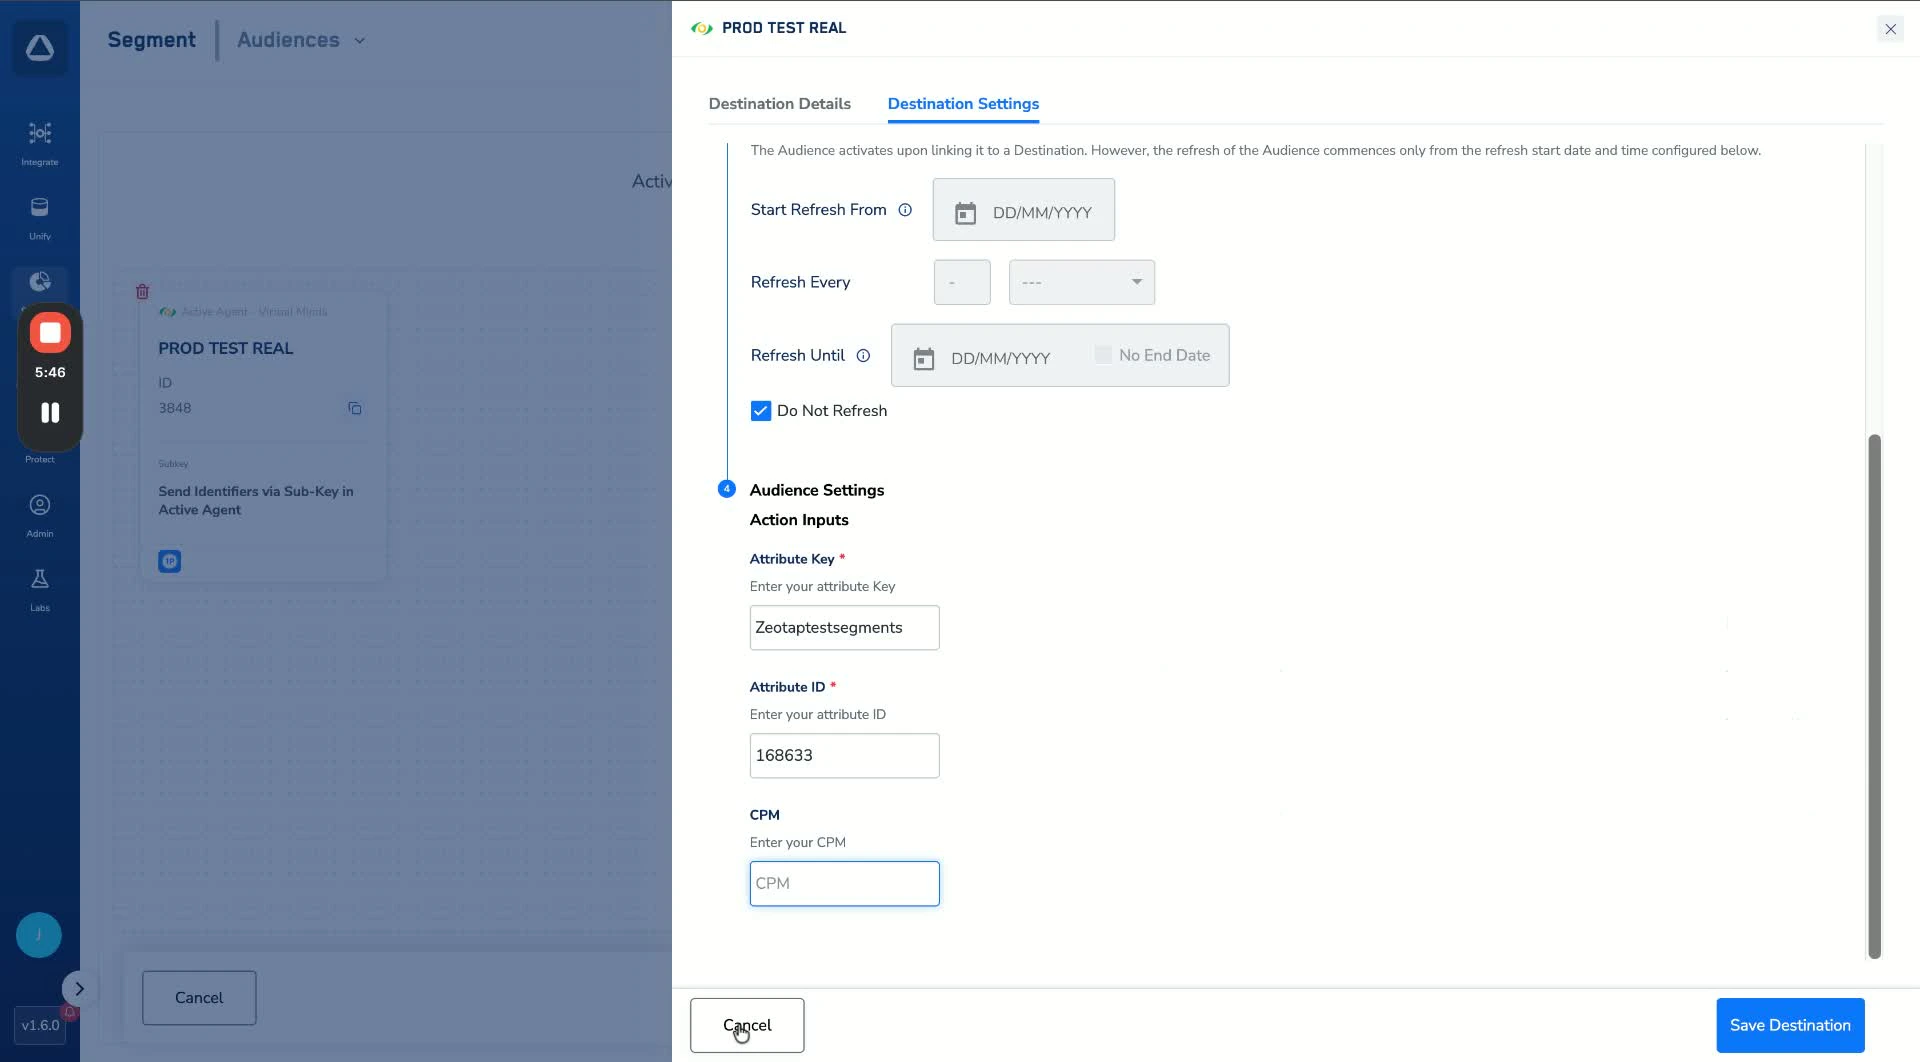 Use the credentials shared by Zeotap Customer Support (or the ones you retrieved from your Zeotap instance) to fill in the following fields:
| Field | Description |
| :---------------- | :---------------------------------------------------------------------------- |
| **Attribute Key** | Paste the **Attribute Key** shared by Support (or copied from your instance). |
| **Attribute ID** | Paste the **Attribute ID** shared by Support (or copied from your instance). |
| **CPM** | Optional. Leave blank if not needed. |
### When the action is "Send Identifiers via Sub-key in Active Agent" (with full attribute settings)
Use the credentials shared by Zeotap Customer Support (or the ones you retrieved from your Zeotap instance) to fill in the following fields:
| Field | Description |
| :---------------- | :---------------------------------------------------------------------------- |
| **Attribute Key** | Paste the **Attribute Key** shared by Support (or copied from your instance). |
| **Attribute ID** | Paste the **Attribute ID** shared by Support (or copied from your instance). |
| **CPM** | Optional. Leave blank if not needed. |
### When the action is "Send Identifiers via Sub-key in Active Agent" (with full attribute settings)
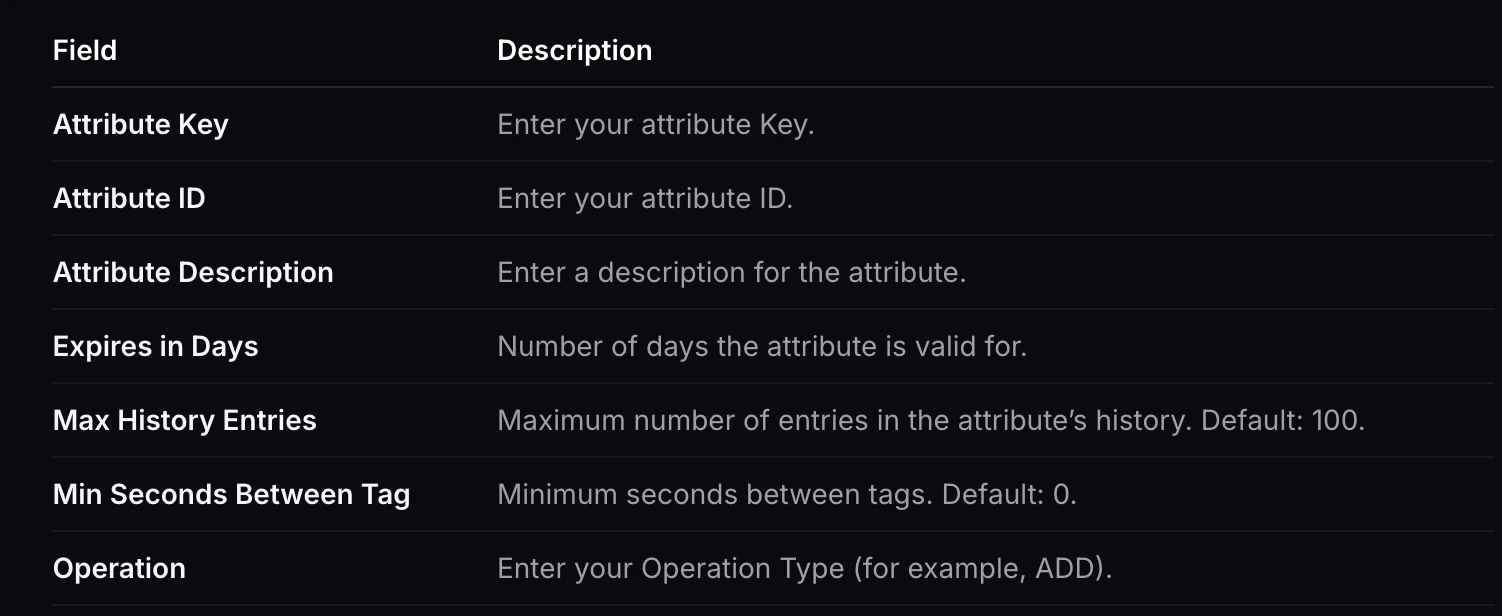 Click **Save Destination**. The audience will start pushing into your Active Agent instance and should appear as a segment in Active Agent.
For information about how to link an audience to the created Destination in the **Audiences** application, refer [here](/articles/integrate-customer/link-an-audience-to-the-destination).
**Note:**
*The terms Audiences and Segments are used interchangeably to refer to customer cohorts belonging to a specific category — for example, customers over 18 years of age who have performed an `addToCart` event within the last 30 days.*
Click **Save Destination**. The audience will start pushing into your Active Agent instance and should appear as a segment in Active Agent.
For information about how to link an audience to the created Destination in the **Audiences** application, refer [here](/articles/integrate-customer/link-an-audience-to-the-destination).
**Note:**
*The terms Audiences and Segments are used interchangeably to refer to customer cohorts belonging to a specific category — for example, customers over 18 years of age who have performed an `addToCart` event within the last 30 days.*